
Build a node.
From parts to a working node: what to buy, how to put it together, how to burn the image, and how to get it set up.
Not tech-savvy? Contact us and we can connect you with a node builder.
[ GFN v170 software package ]Parts needed
-
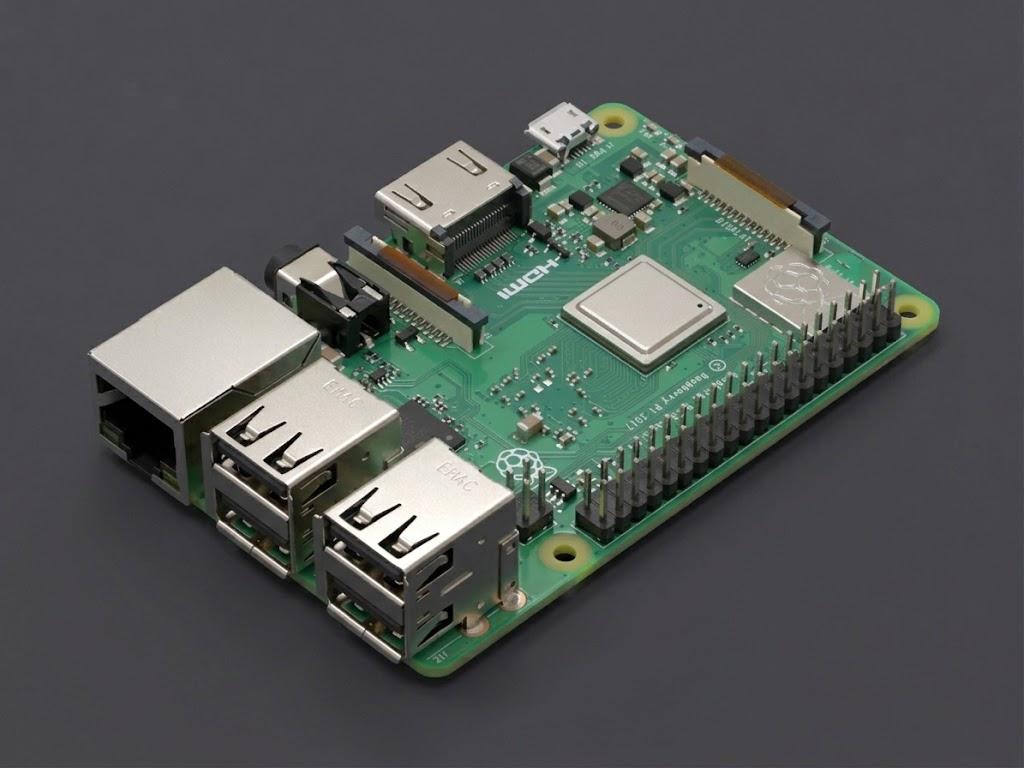 Raspberry Pi 3B+ * ~$35.00The main board that runs the node software.
 -
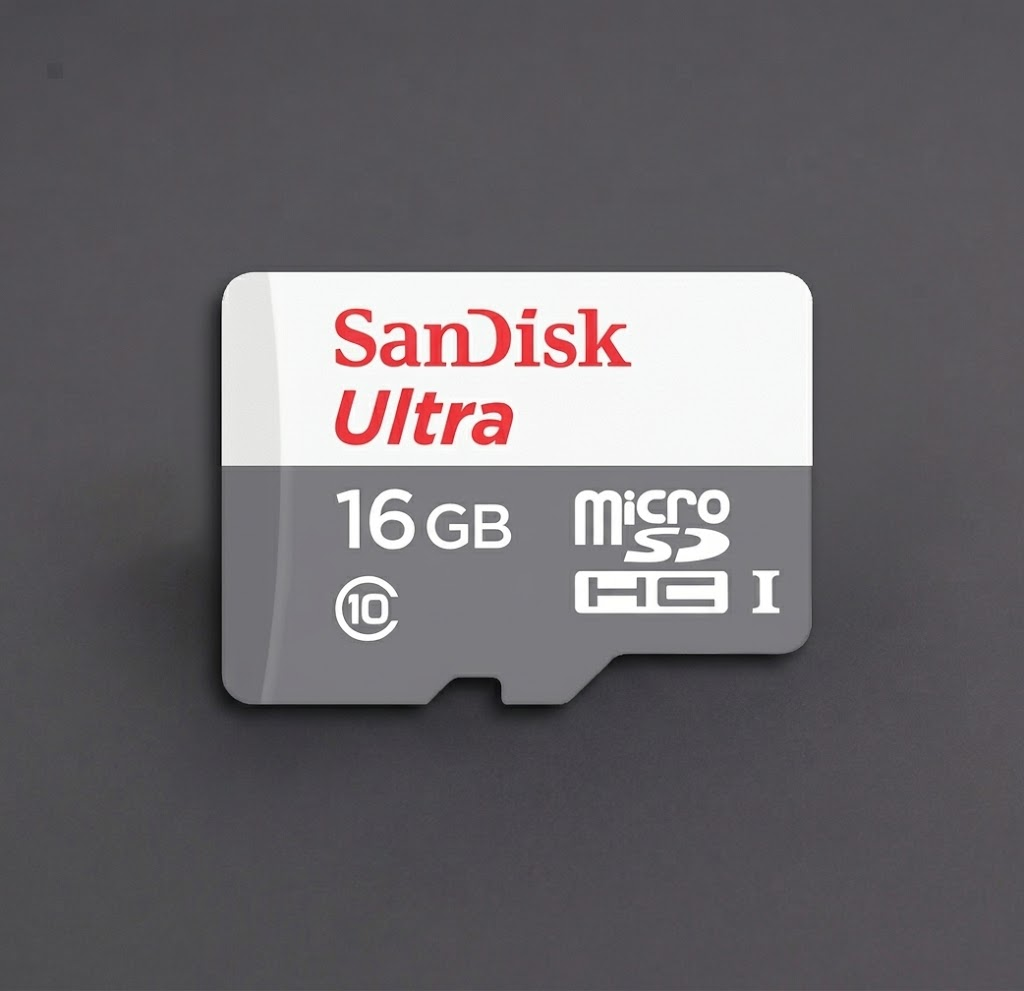 MicroSD Card (16GB+ / Class 10) * ~$25.0016GB minimum. Holds the operating system and node software.
 -
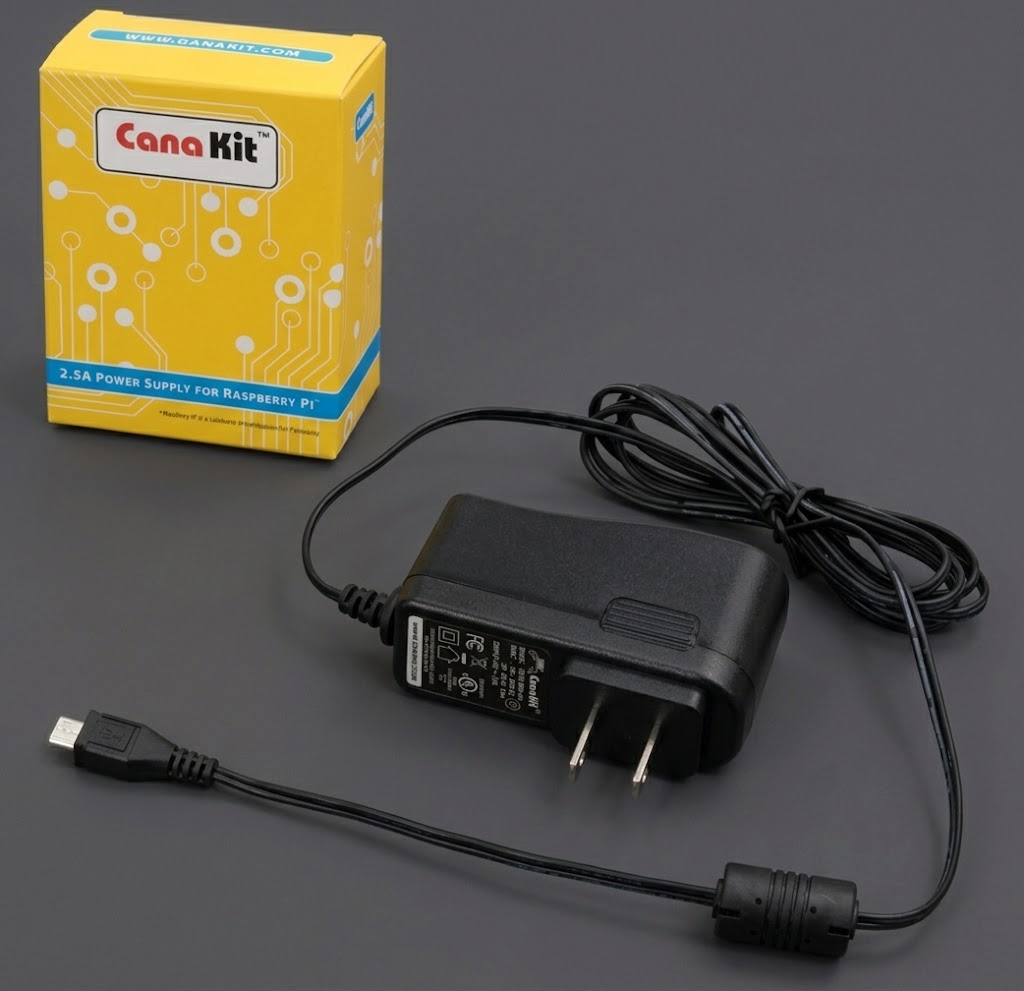 Power Supply * ~$10.00Ensure proper amperage for your Pi model.
 -
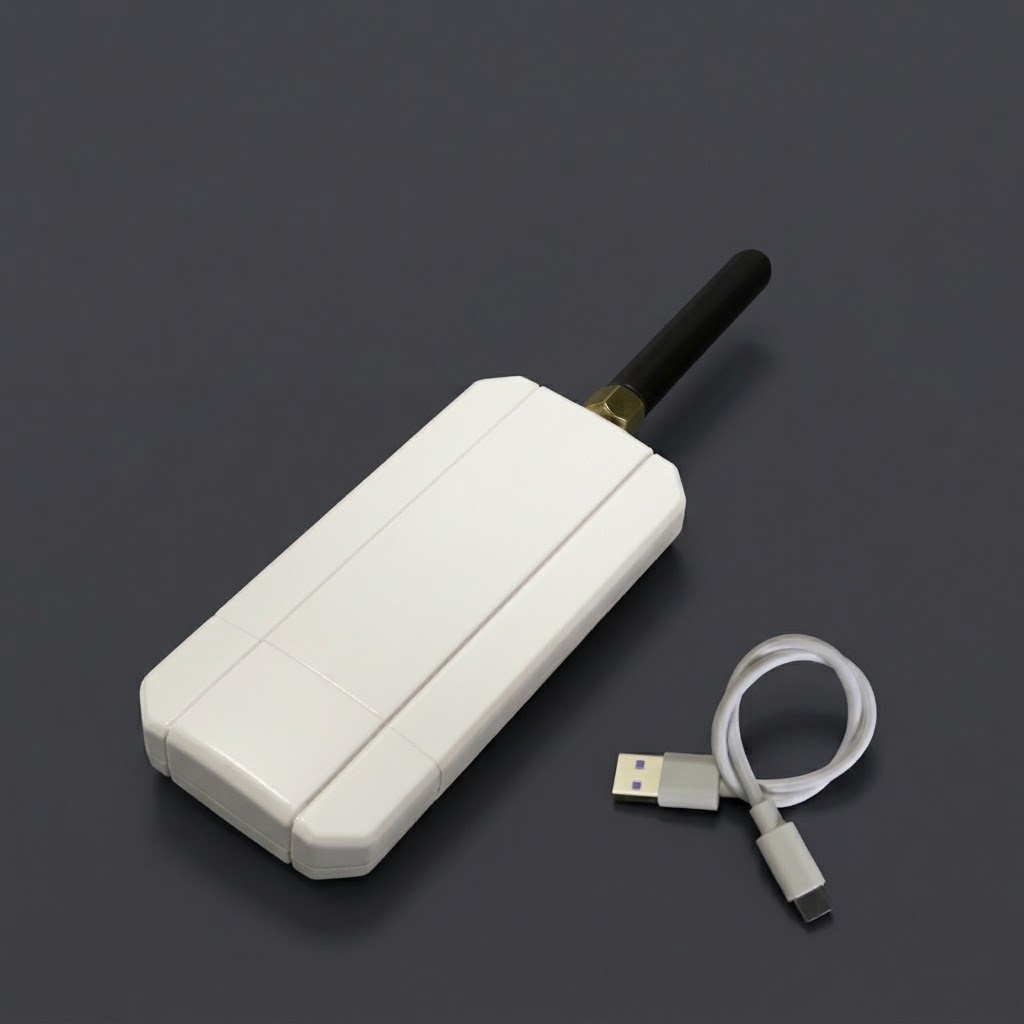 Aursinc Radio Dongle * ~$65.00Radio interface choice A.
 -
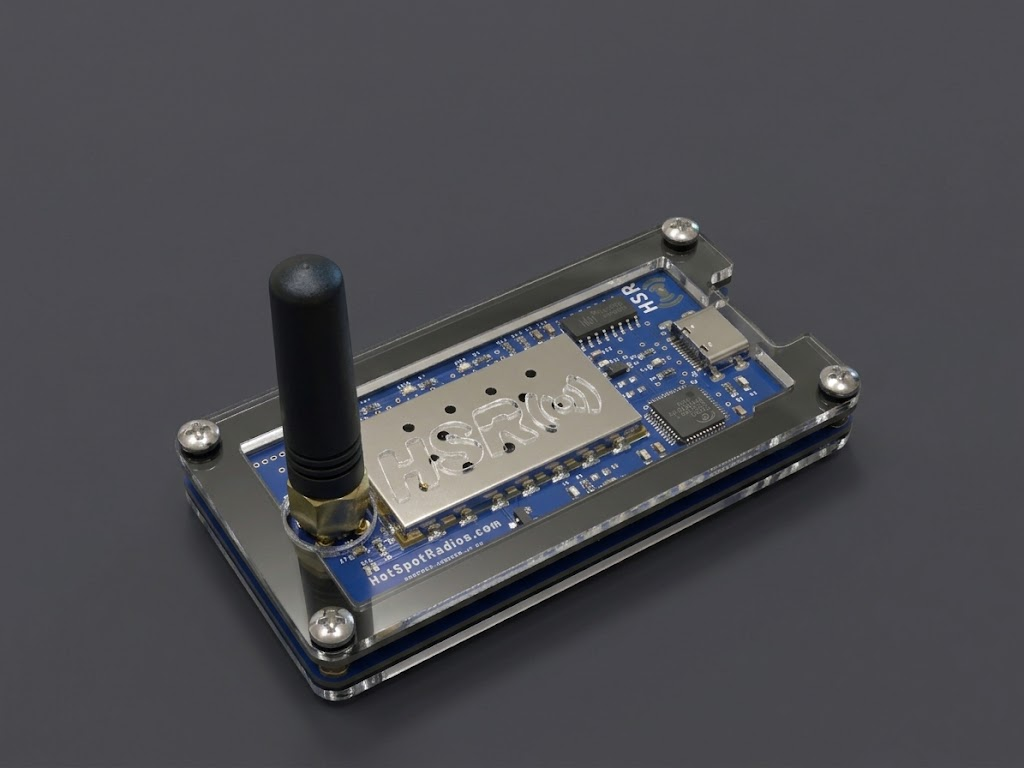 HSR Radio Dongle * ~$110.00Radio interface choice B.
 -
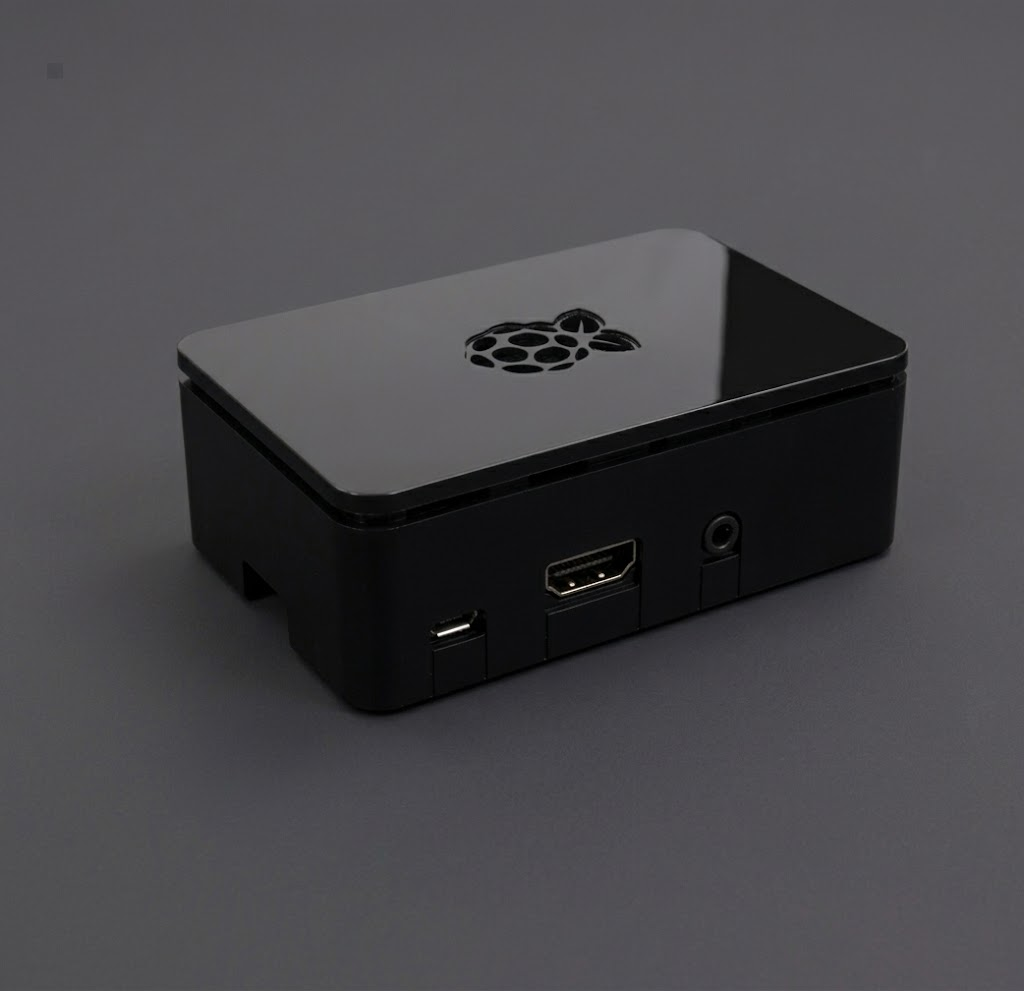 Case * Price VariesChoose any compatible case you like.
 -
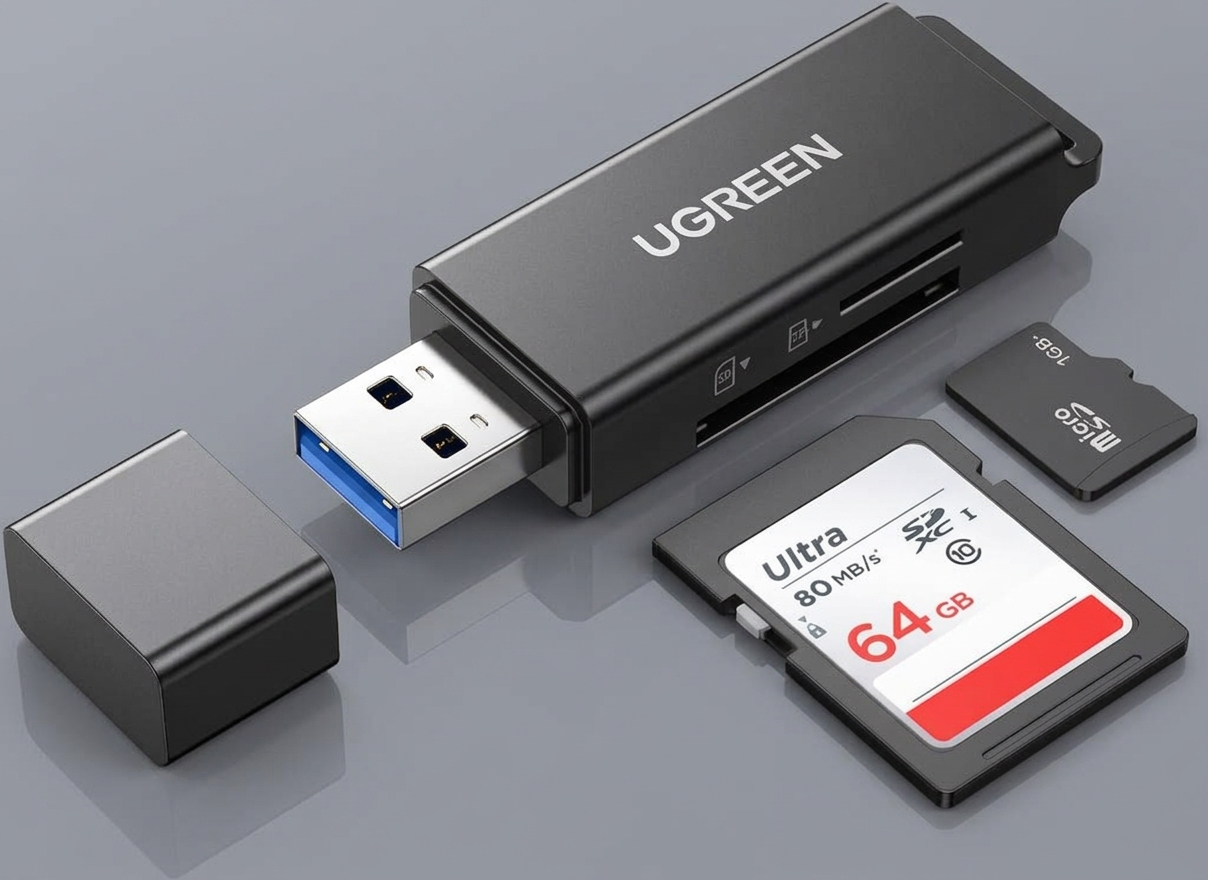 SD Card Adapter * ~$8.00Optional
Assemble the node
Step 1 - Install Pi into the case
Follow your case's assembly instructions.
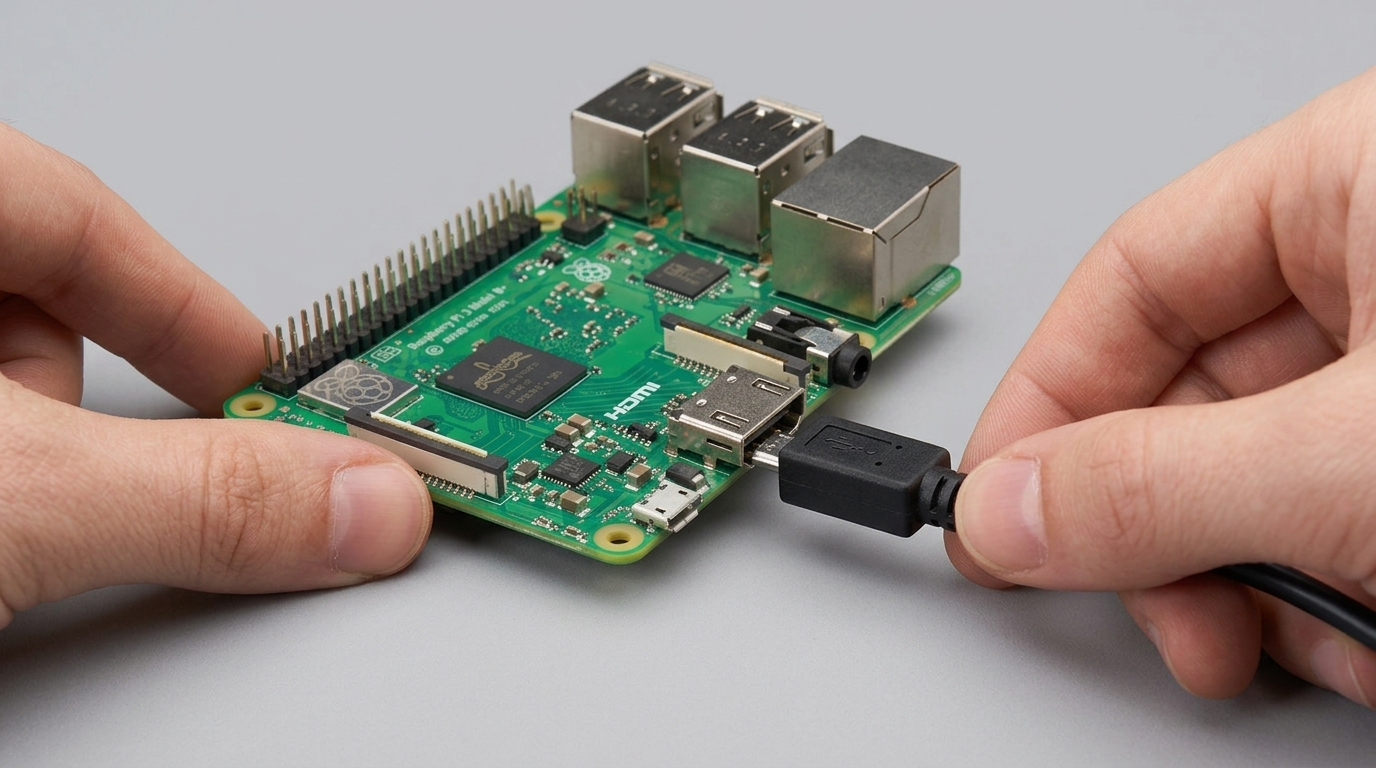
Step 2 - Install radio dongle
Attach the USB cable to the radio dongle and plug it into a USB port on the Pi.
Burning the image
Step 1 - Download the GFN software pack
Download the ZIP archive from the website.
Step 2 - Extract the files
Extract and save the contents to your PC.
Step 3 - Install Win32 Disk Imager
Run the win32diskimager installer executable and complete the installation.
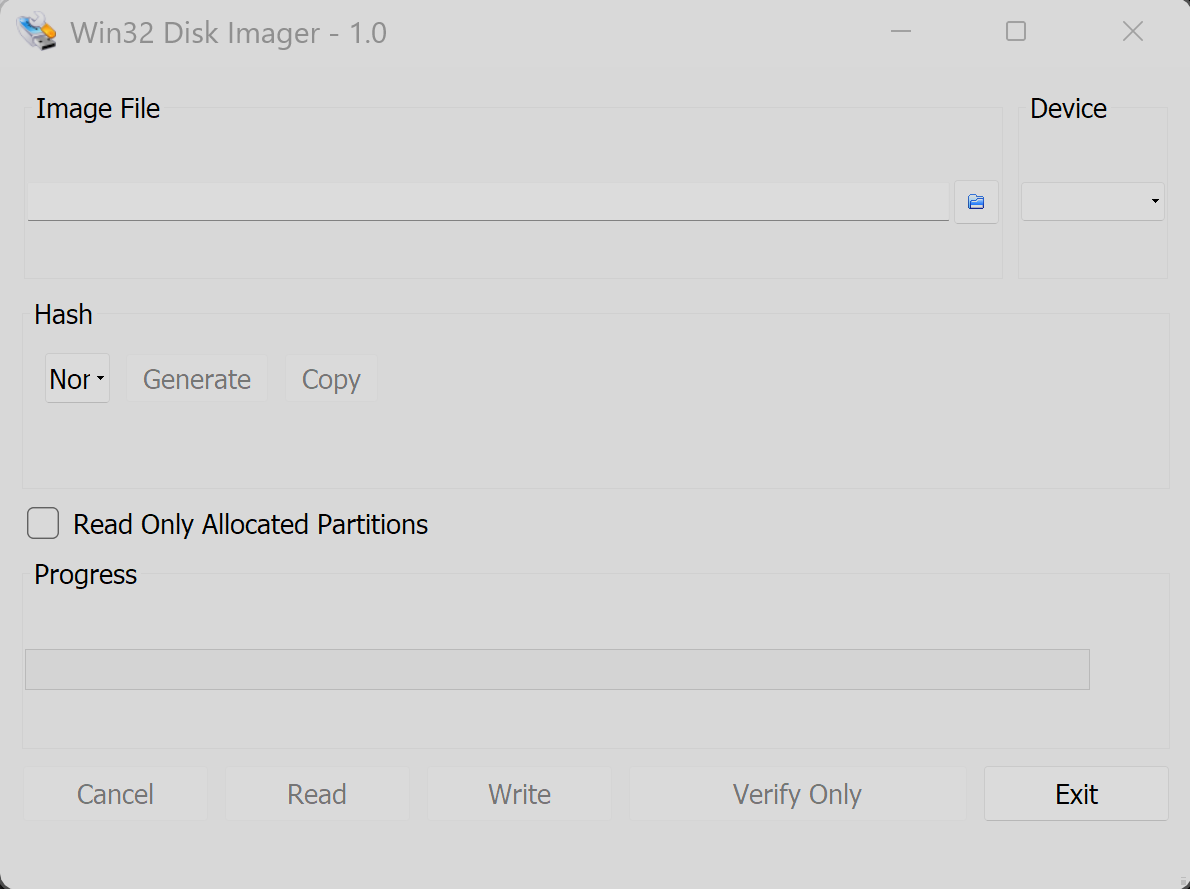
Step 4 - Open Win32 Disk Imager
Launch the Win32 Disk Imager application on your PC.
Step 5 - Insert the microSD card
Plug your microSD card into your PC using a card reader.
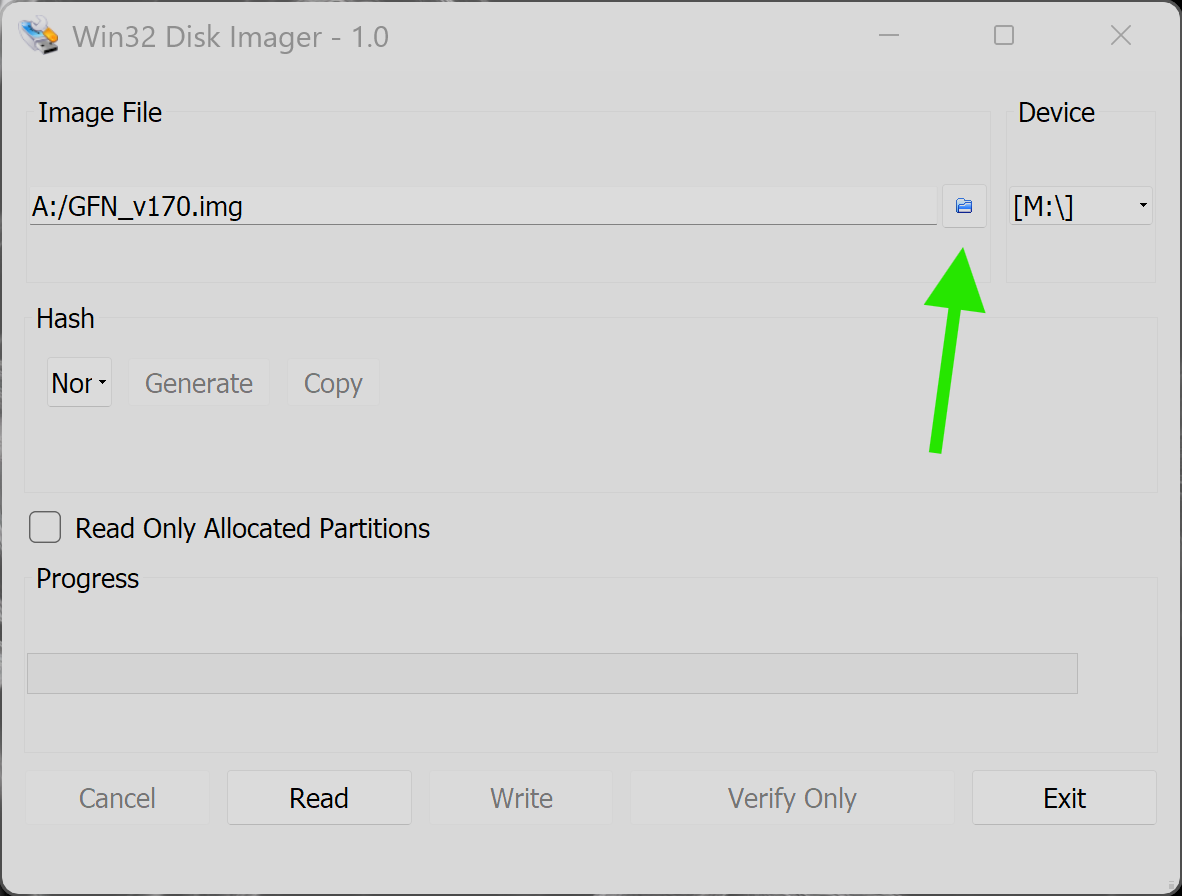
Step 6 - Load the GFN image
Click the folder icon, navigate to the extracted files, and select the GFN_vXXX.img file.
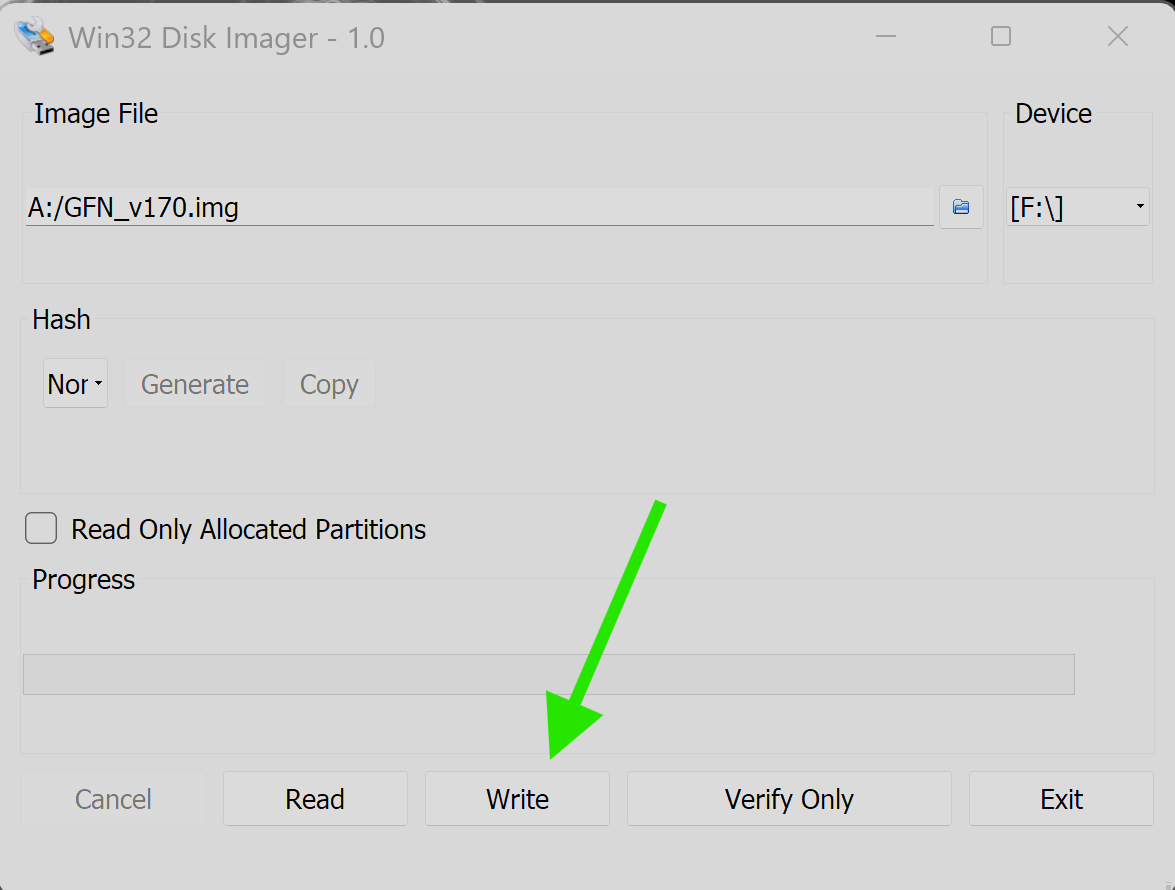
Step 7 - Write the image
Select your SD card drive letter and click "Write" to begin flashing the image.
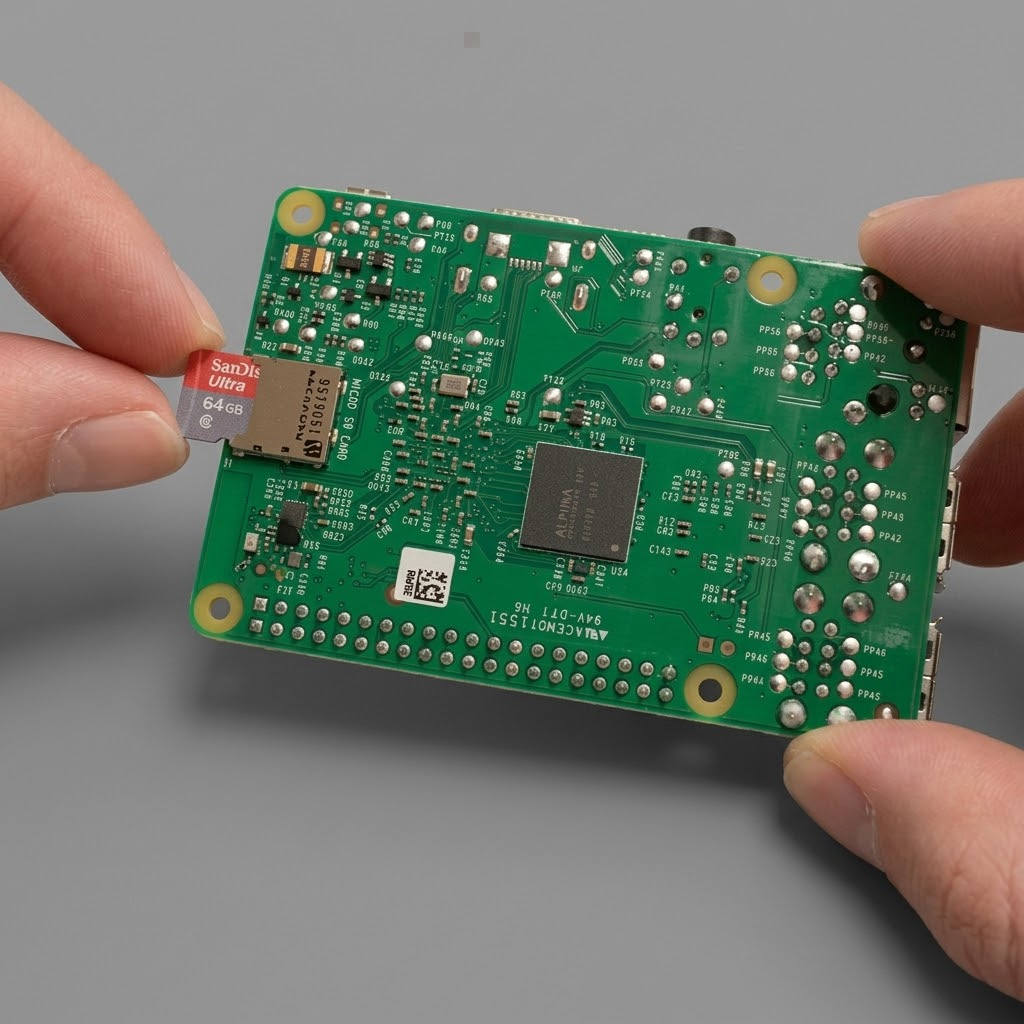
Step 8 - Insert microSD card into Pi
Once flashing completes, safely remove the microSD card from your PC and insert it into the Pi.
Setting up the image
Step 1 - Install MobaXterm
Install MobaXterm using the setup files included in your download.
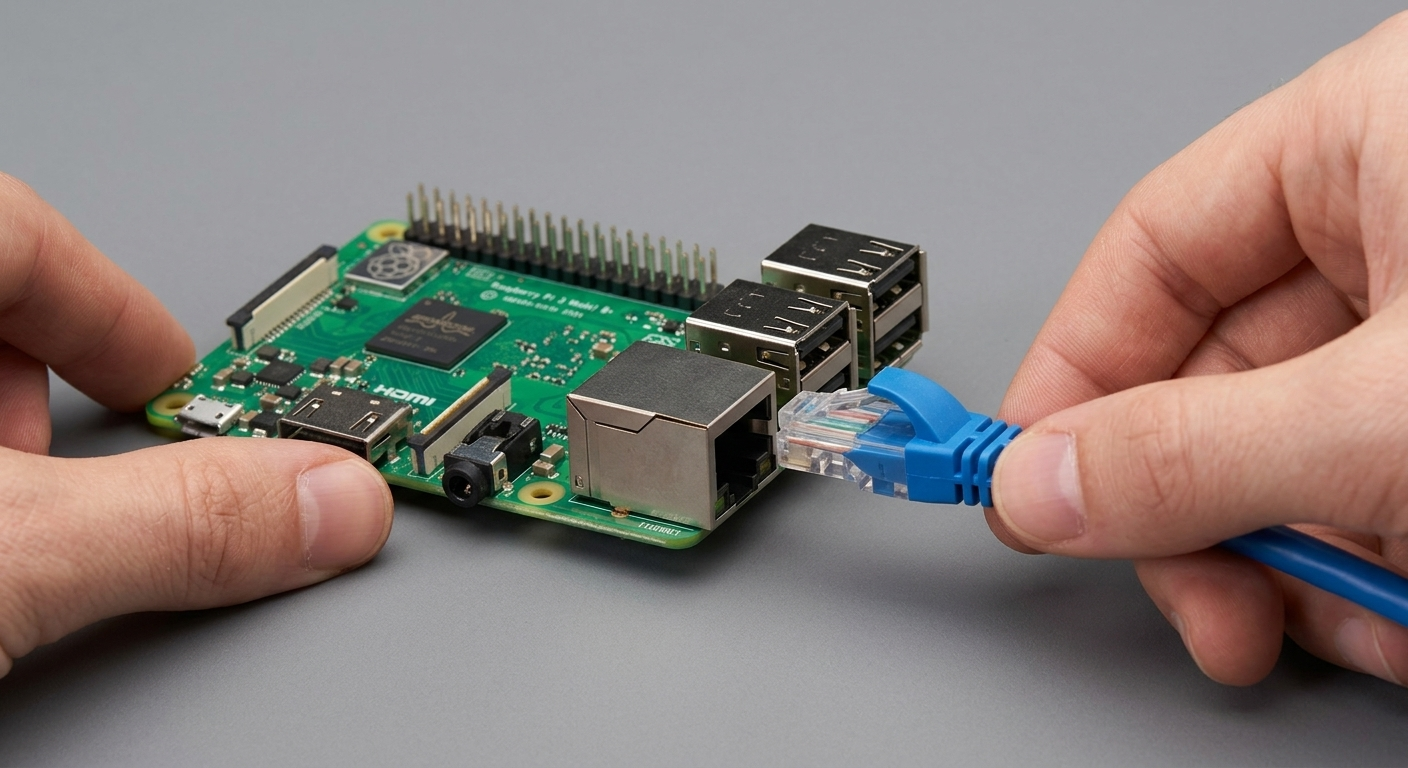
Step 2 - Connect Ethernet
Plug one end of the Ethernet cable into the Pi and the other into your router.
Step 3 - Power on the Pi
Connect power to the Pi. Do NOT unplug it during setup, or the configuration will cancel.
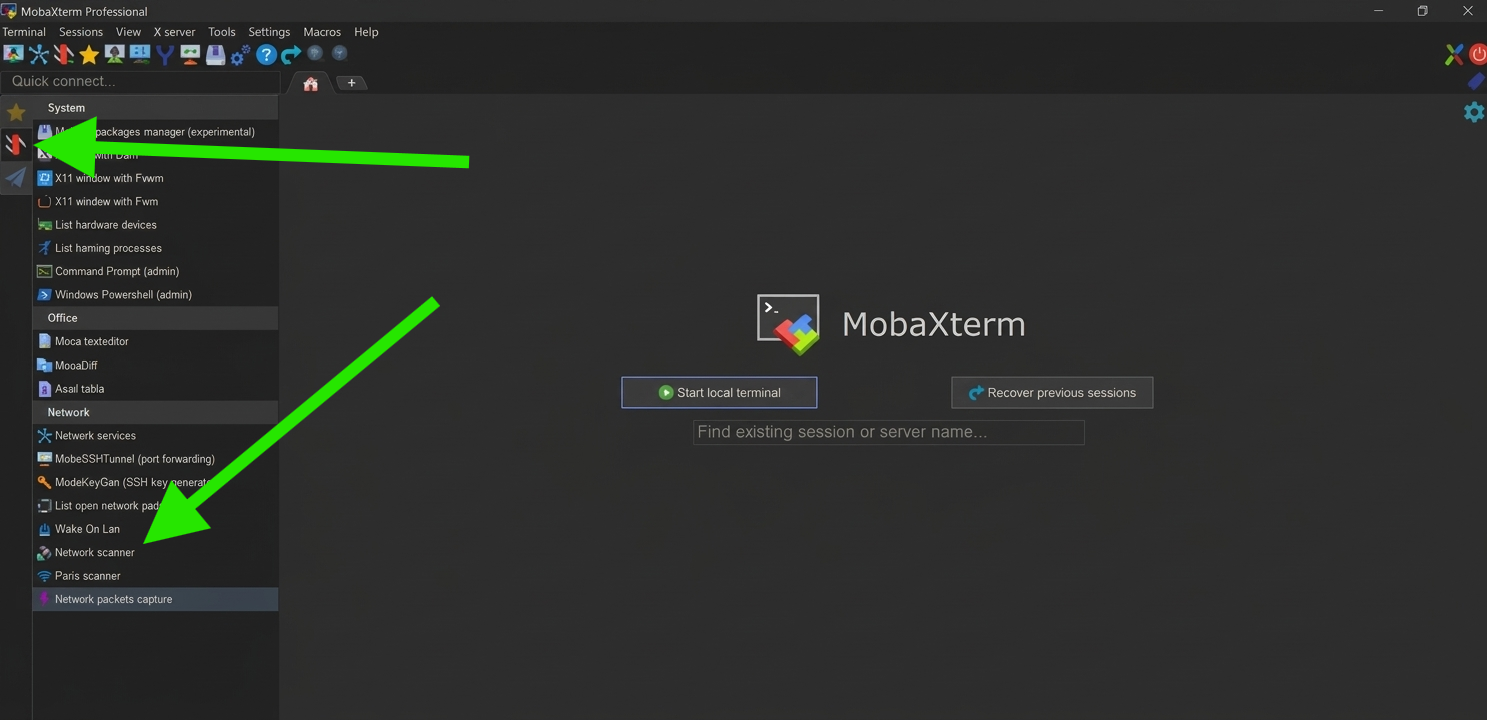
Step 4 - Open MobaXterm
Click the Swiss Army Knife icon, then select "Network scanner".
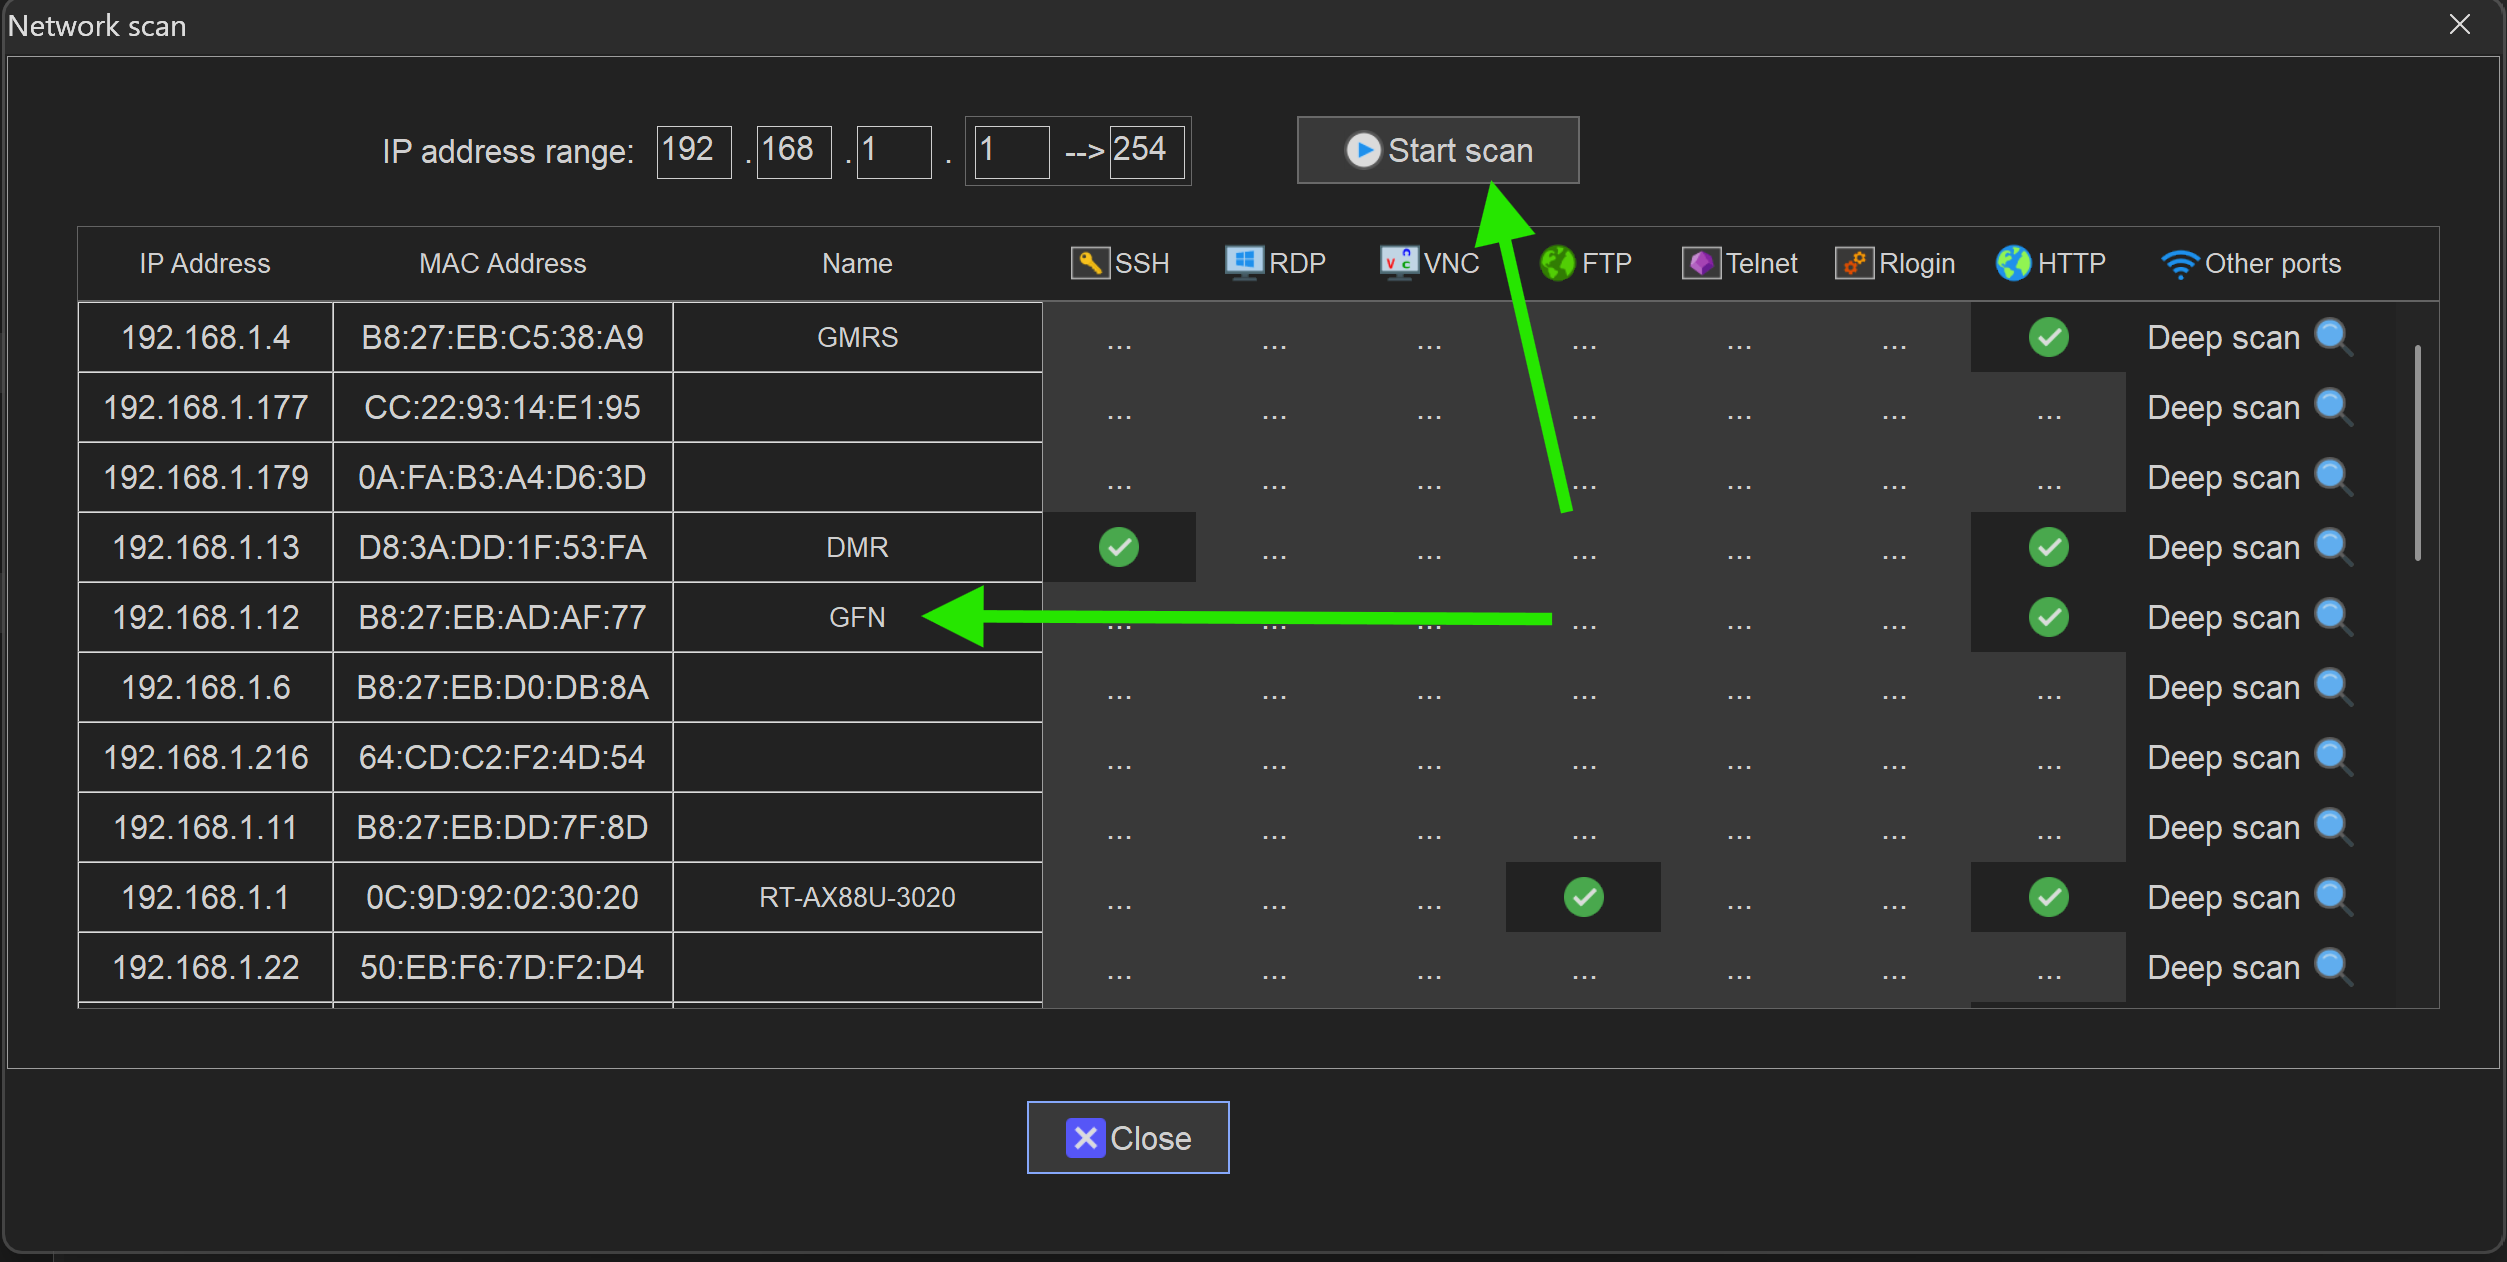
Step 5 - Scan for your Node
Click "Start Scan" and look for "GFN". You may need to scan multiple times, or check your router's admin panel if it does not appear.
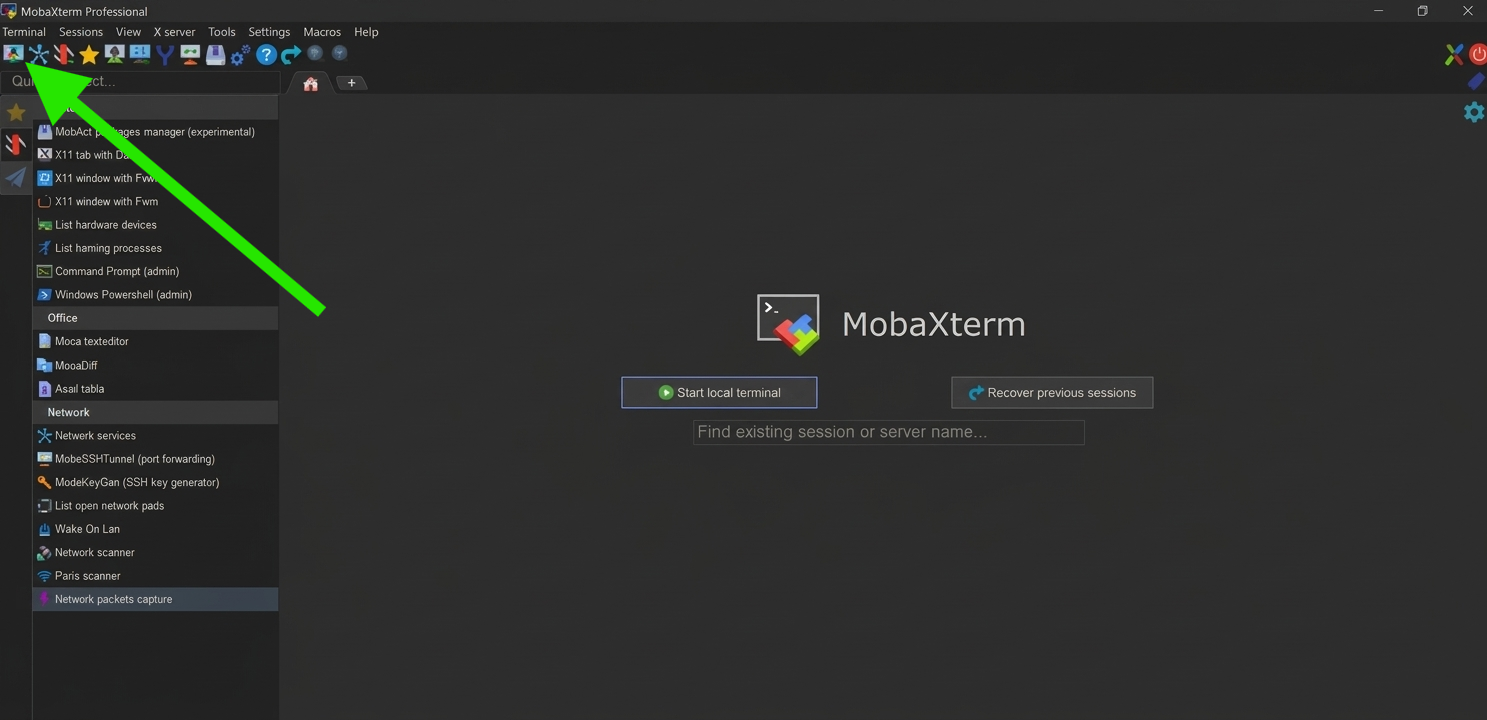
Step 6 - Start a Remote Session
Click "Session" in the top-left corner to start a new remote connection.
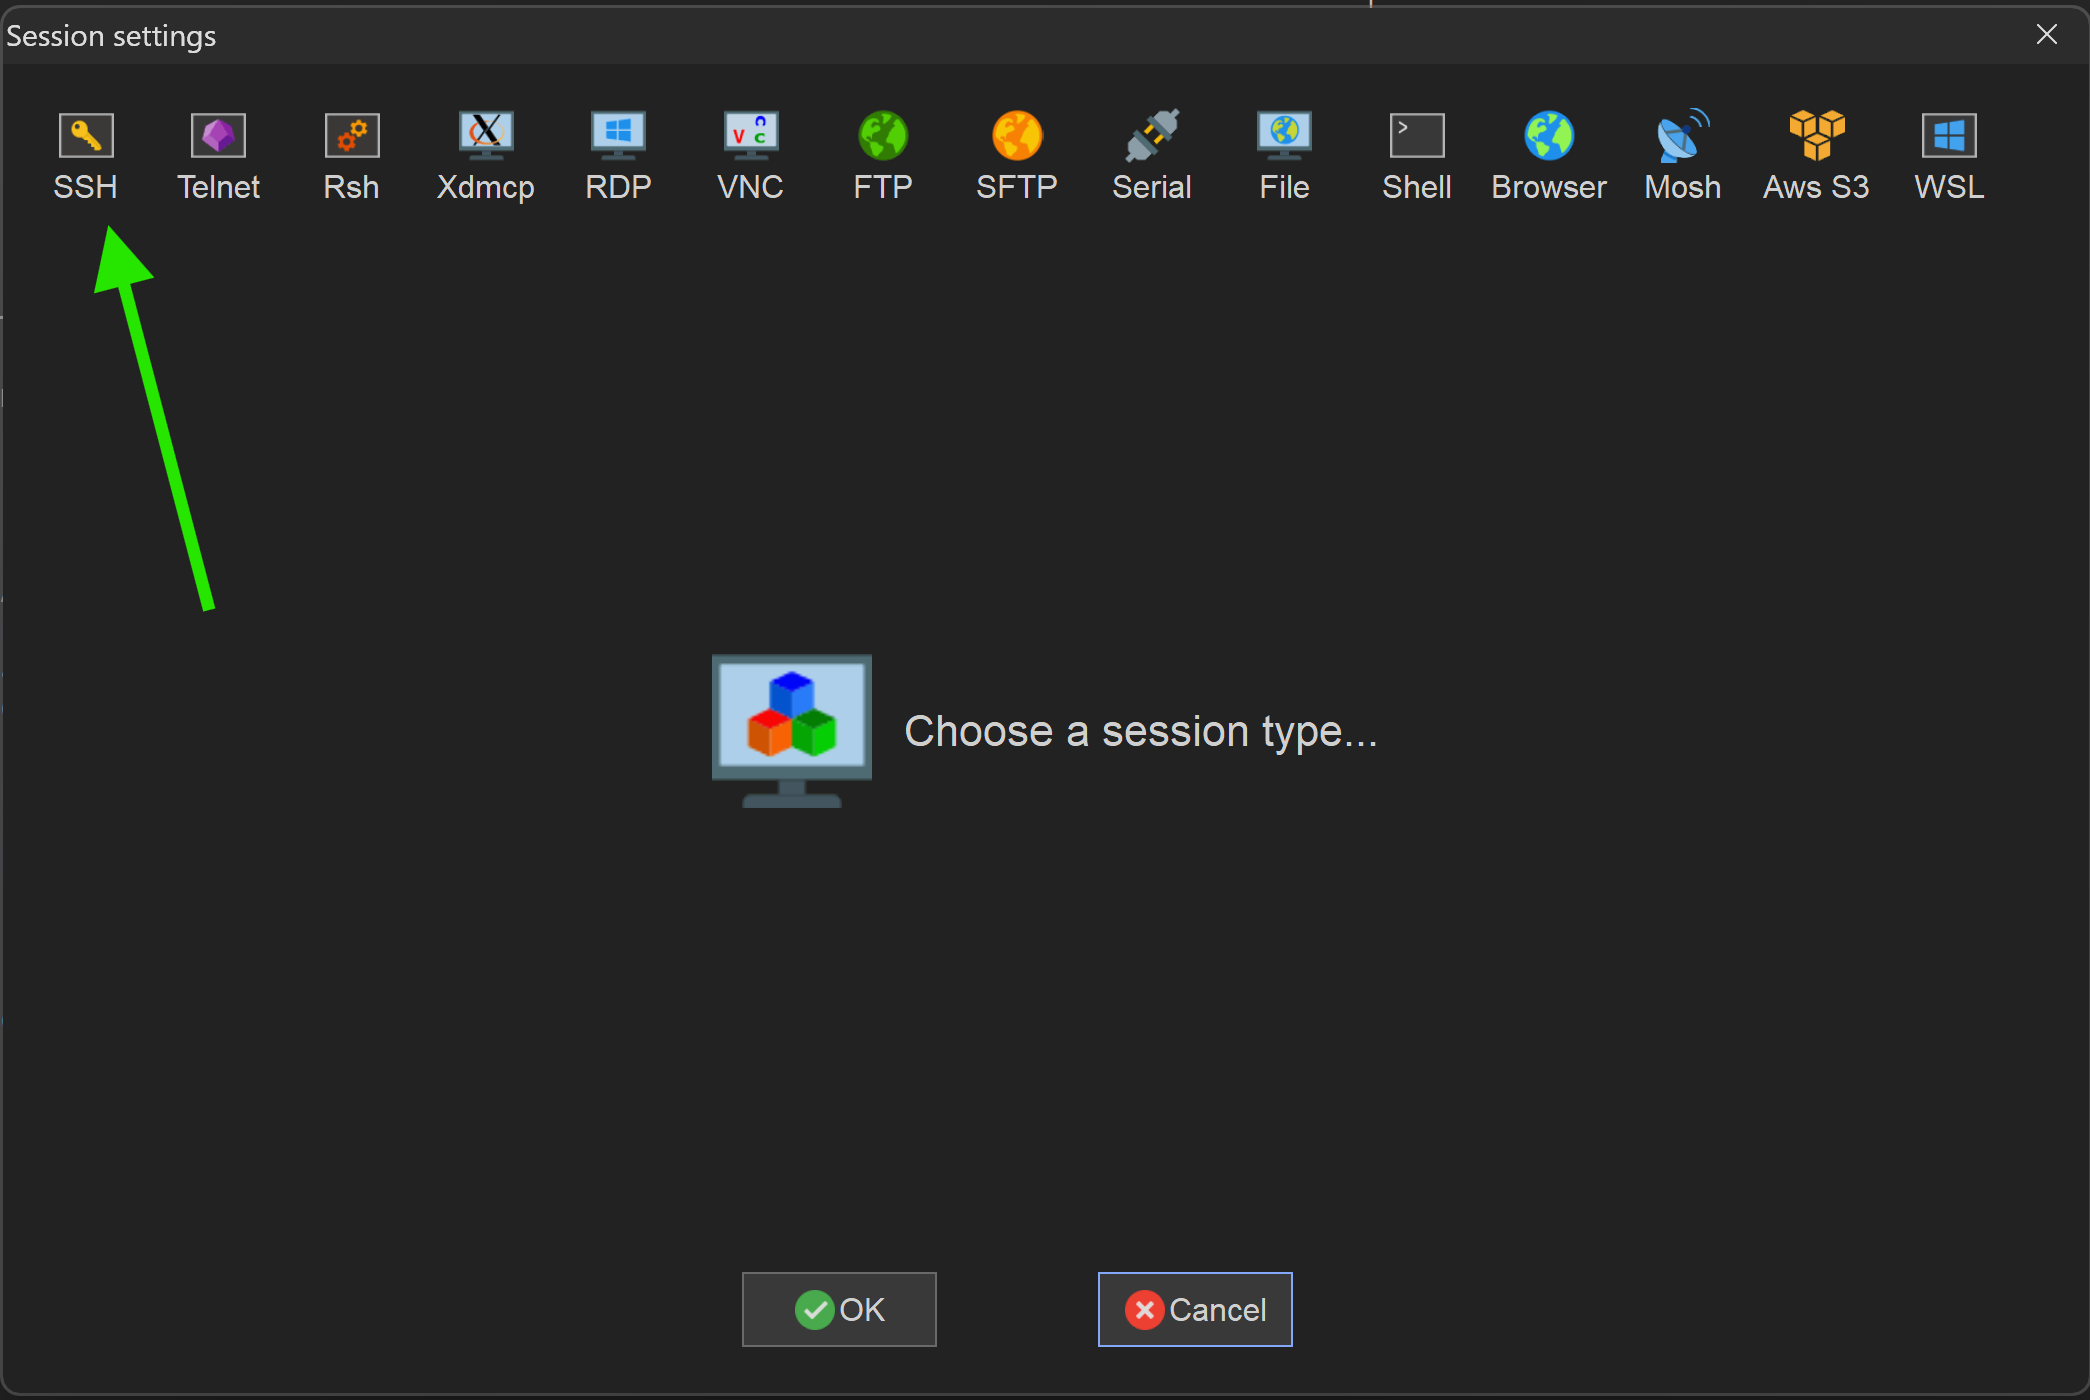
Step 7 - Select SSH
Choose SSH as the session type.
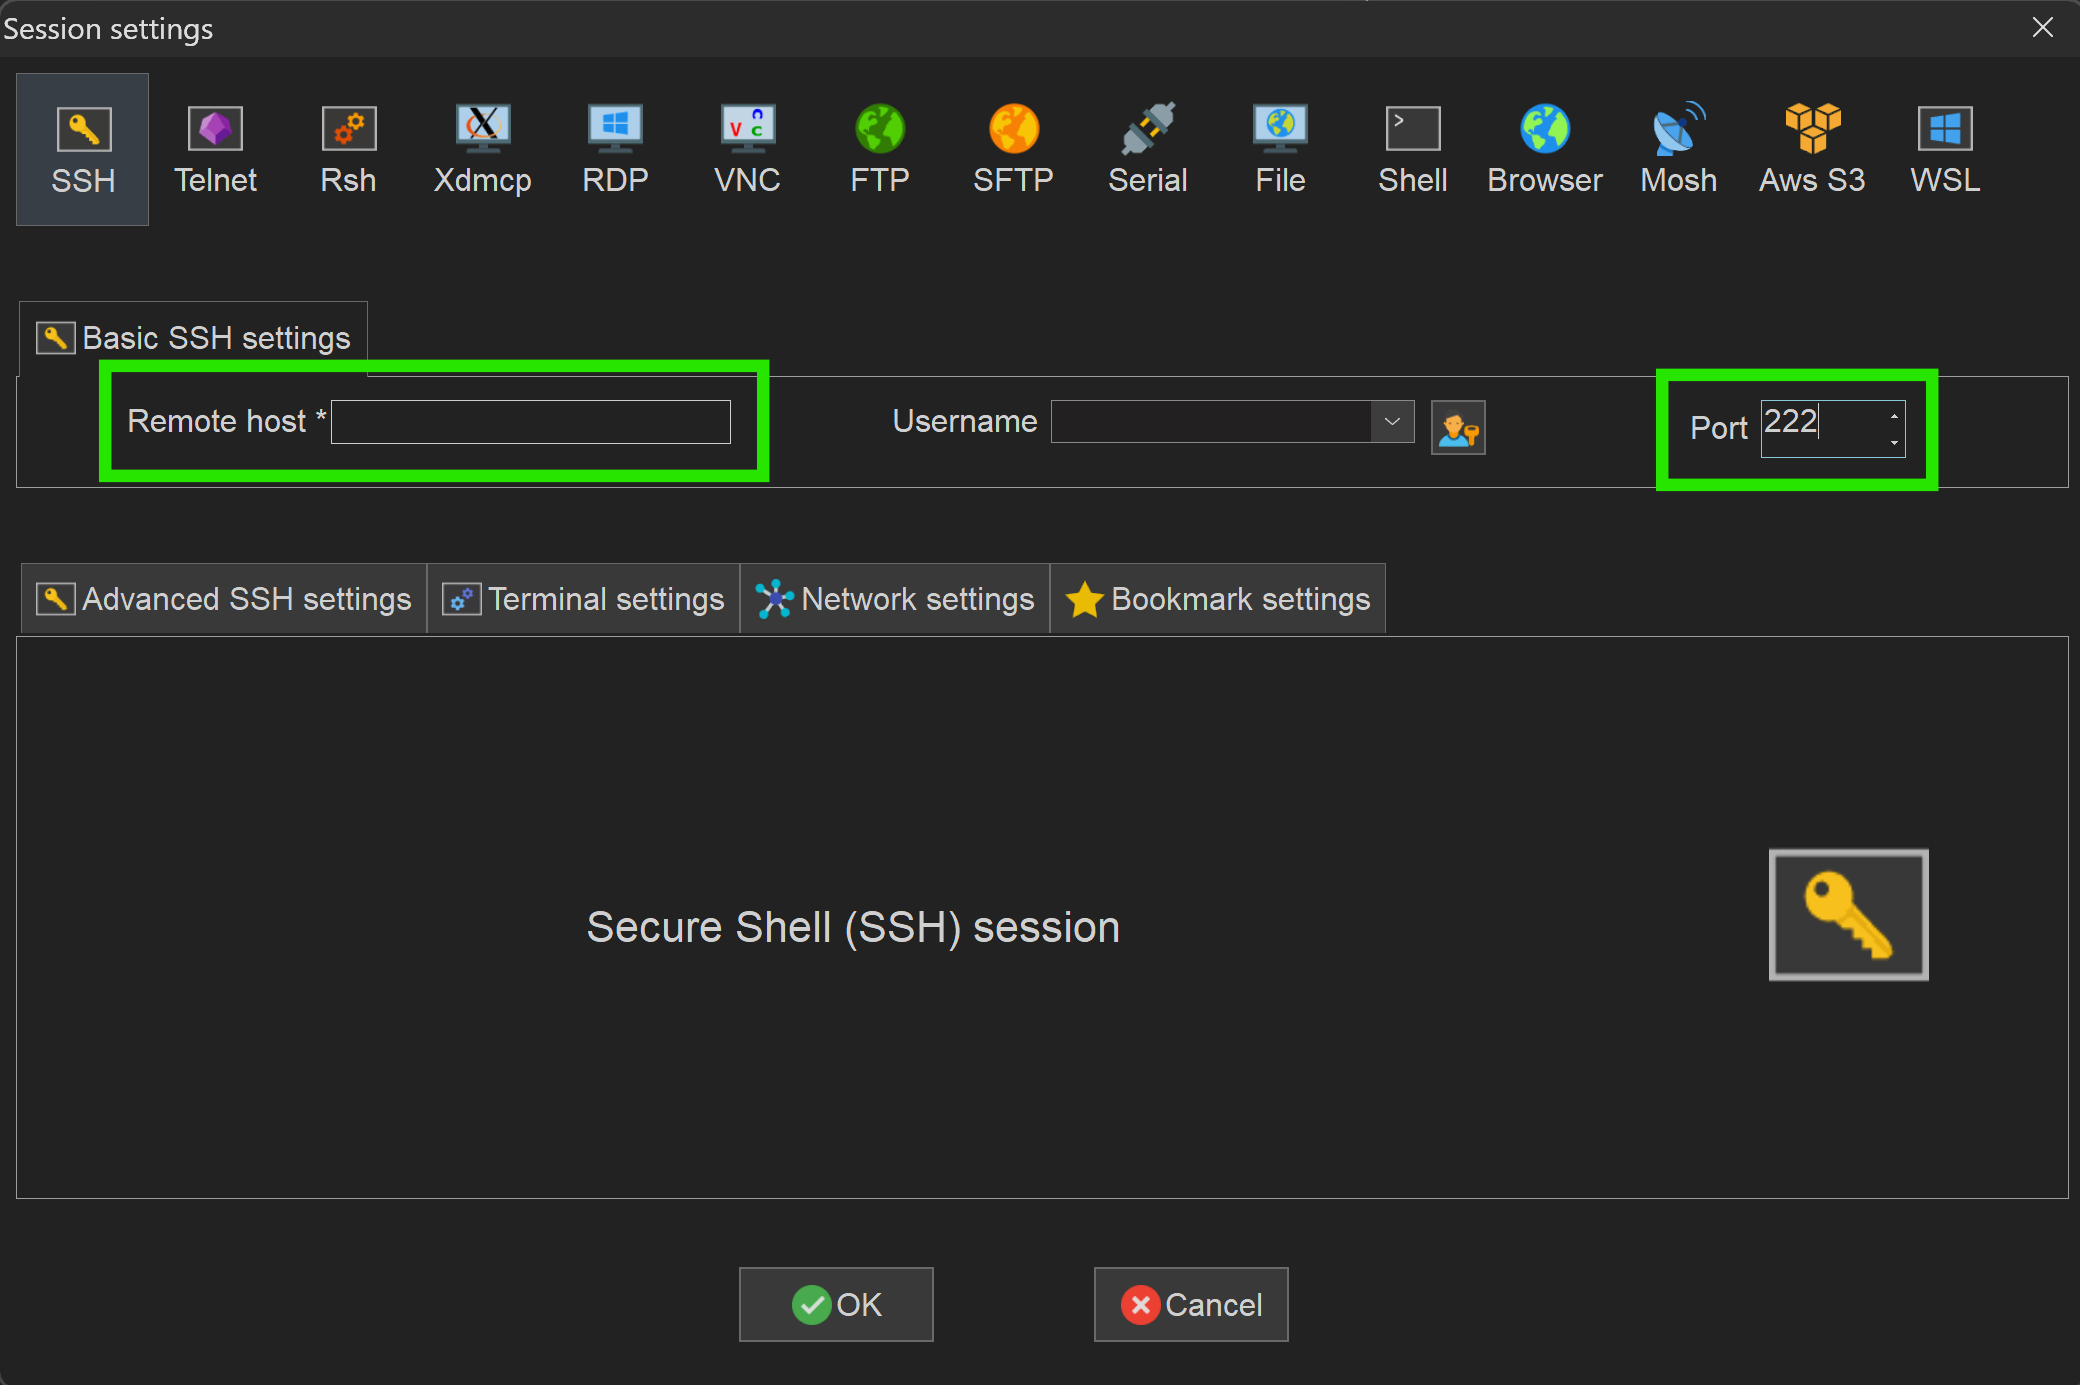
Step 8 - Enter IP Address & Port
Enter the IP address of your Pi and set the port number to 222.
Step 9 - Connect
Click on the newly created session to initiate the connection.
Step 10 - Login
Enter the default login credentials provided in your download package.

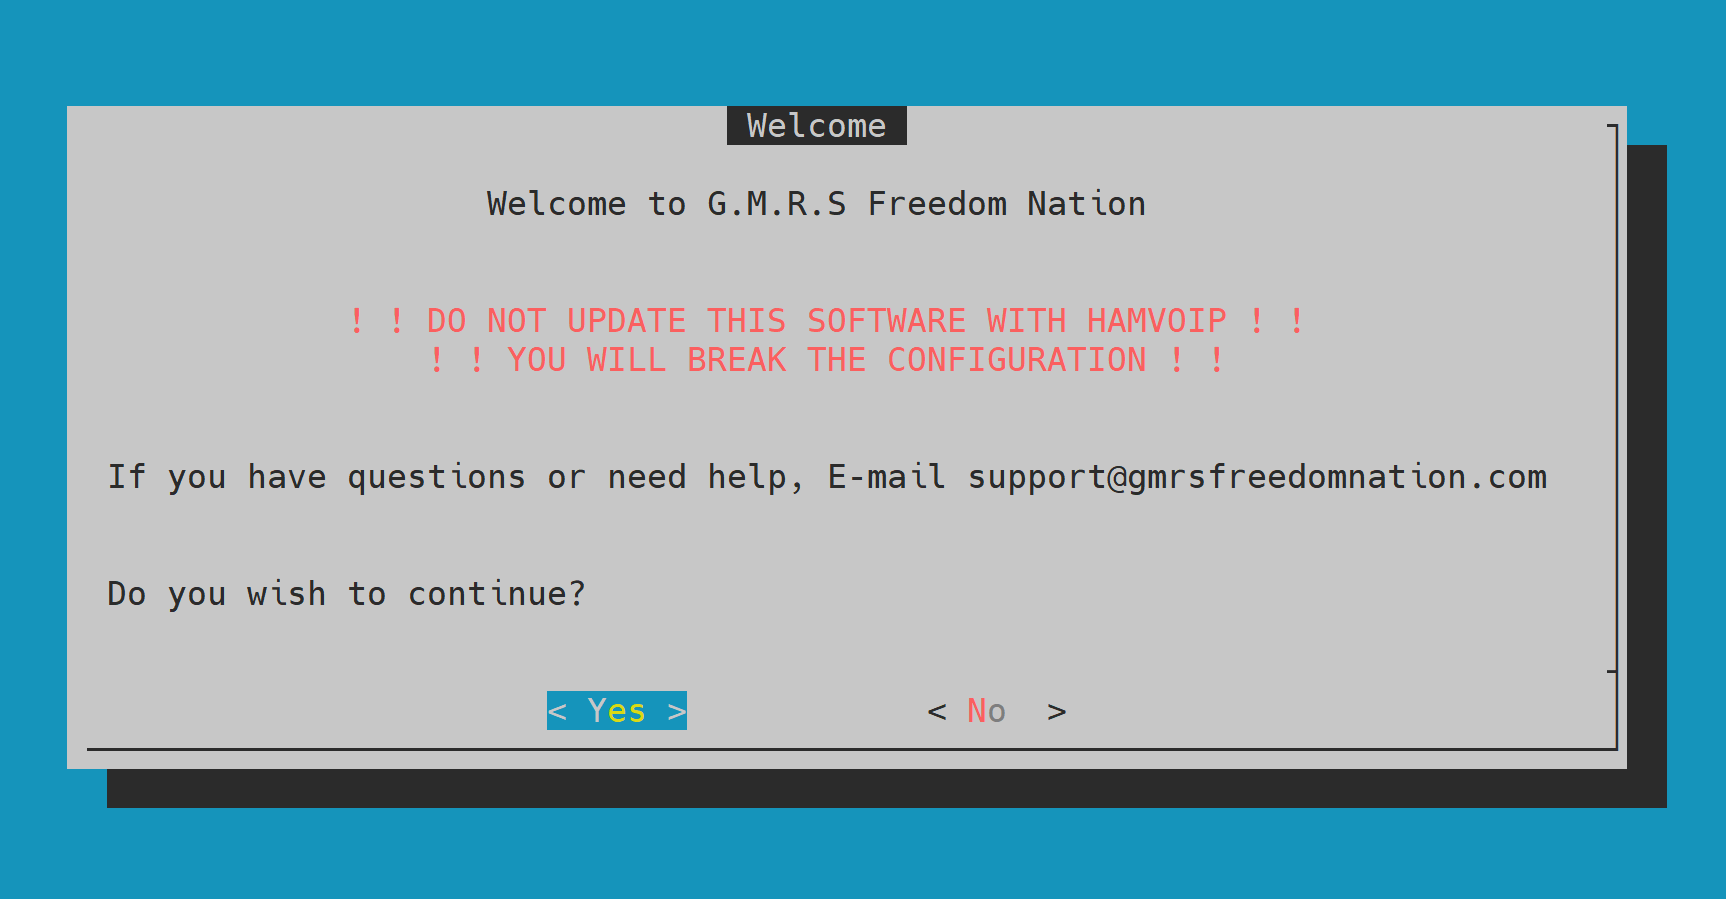
Step 11 - Configure Node
When prompted to configure the node, select "Yes".
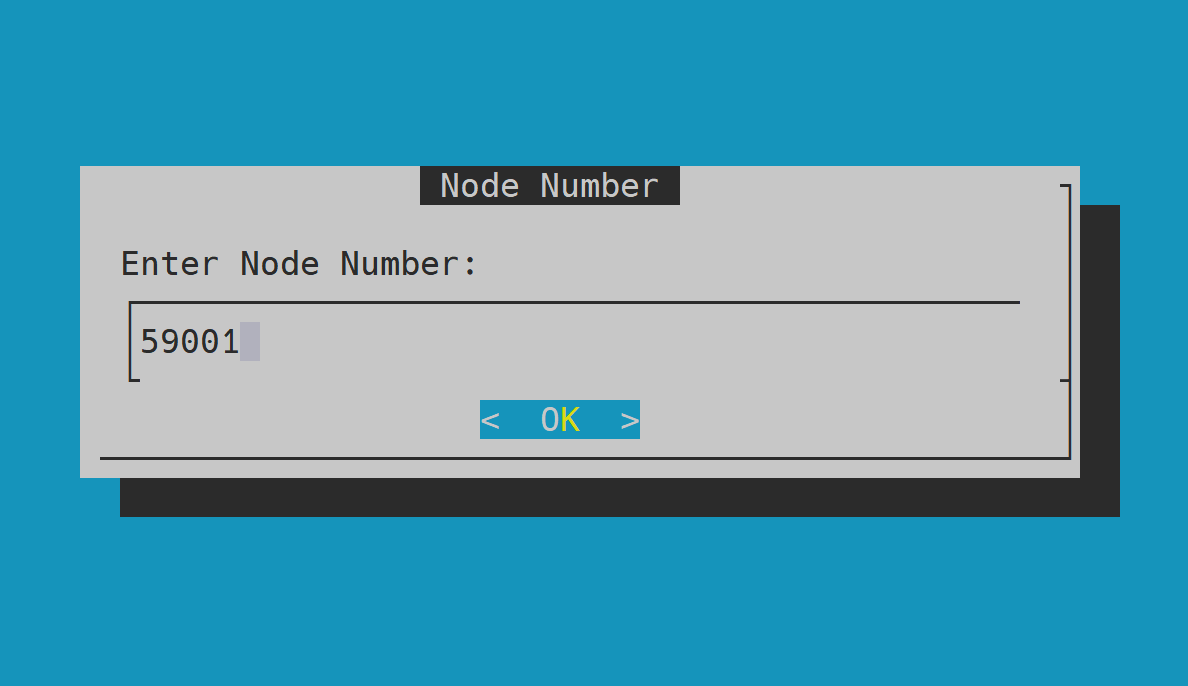
Step 12 - Enter Node Number
Type the node number assigned in your welcome email, then select "OK".
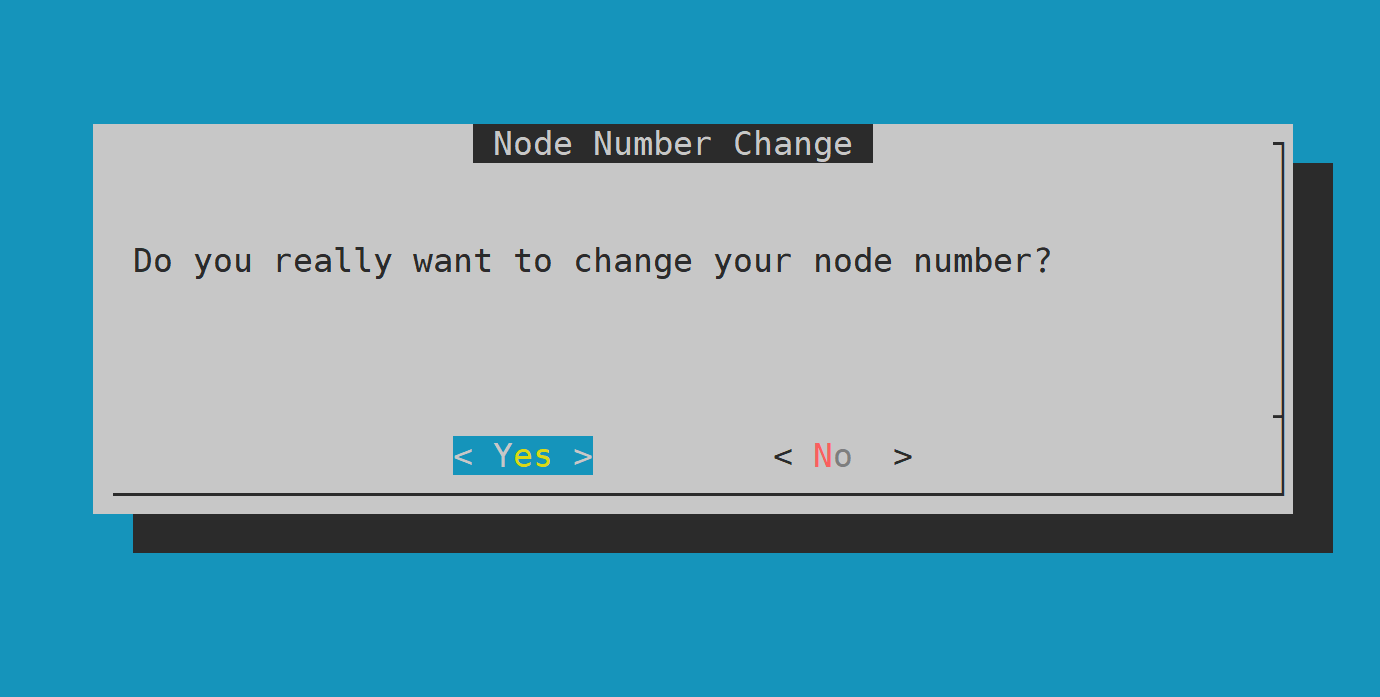
Step 13 - Confirm Node Change
Select "Yes"
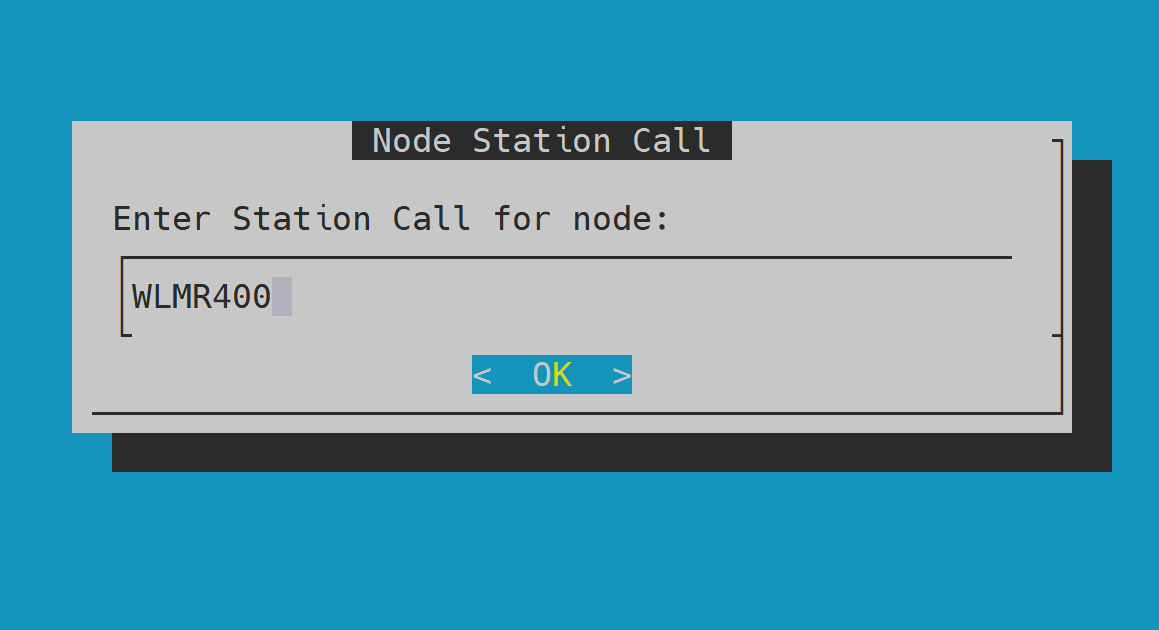
Step 14 - Enter Call Sign, then select "OK".
Enter your call sign.
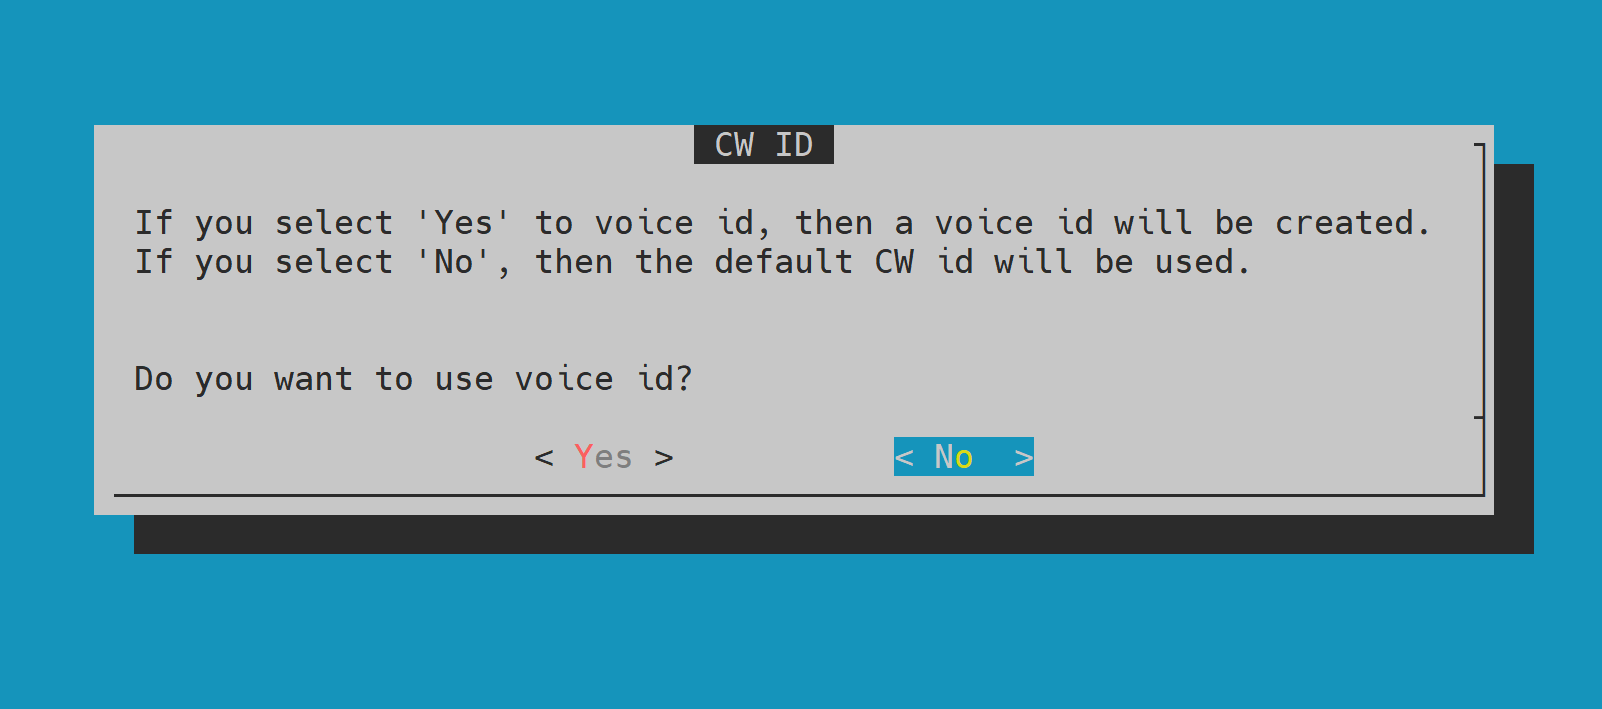
Step 15 - Select ID Method
Choose your preferred identification method: Voice or CW (Morse Code).
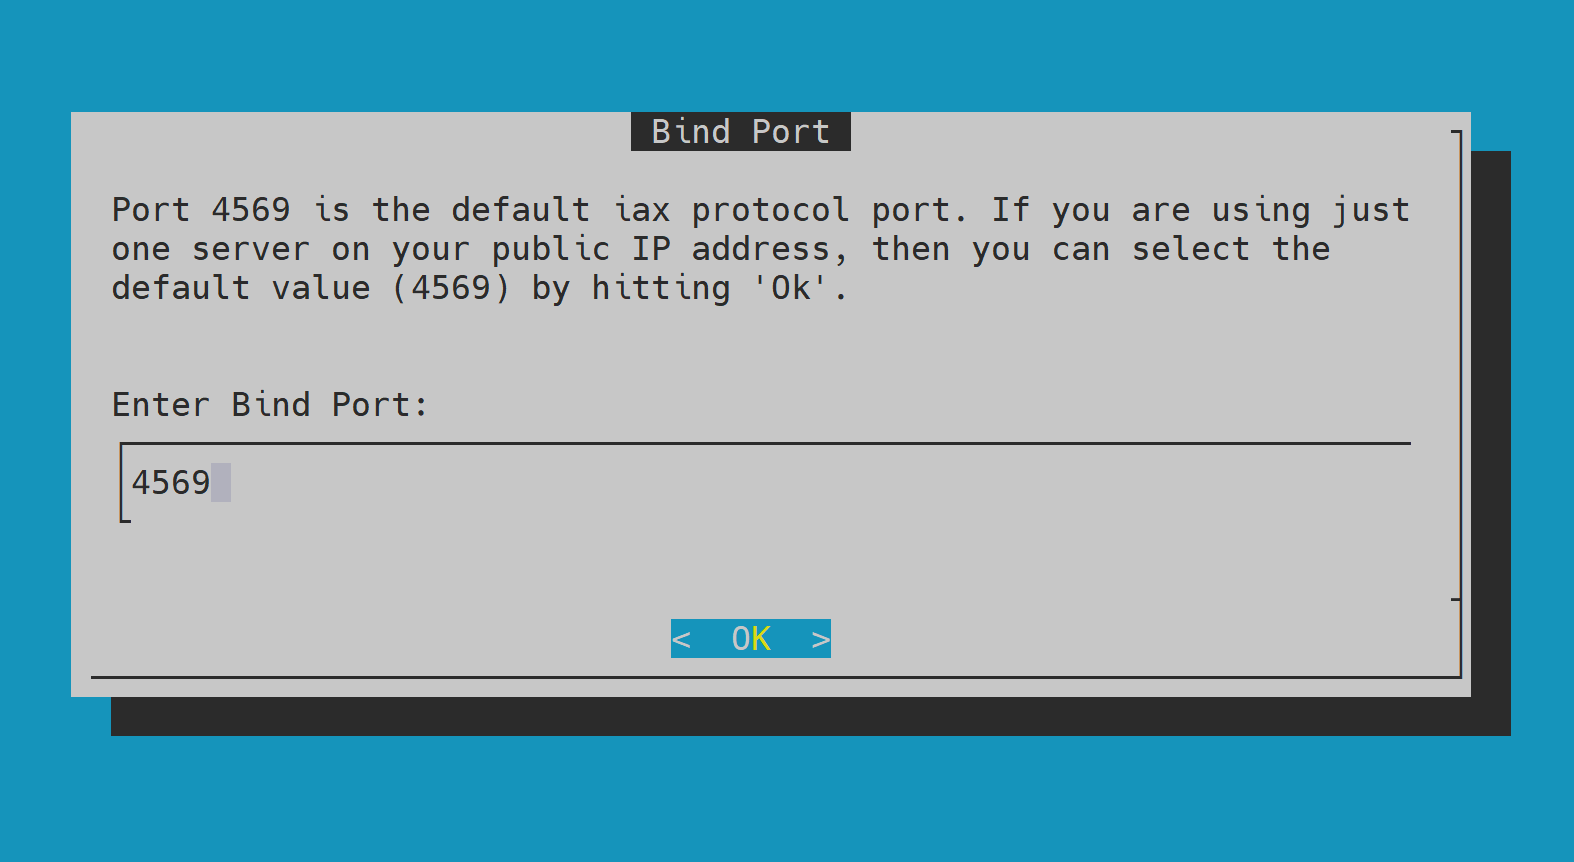
Step 16 - Bind Port
Select your bind port. If you are unsure, select "OK" to keep the default.
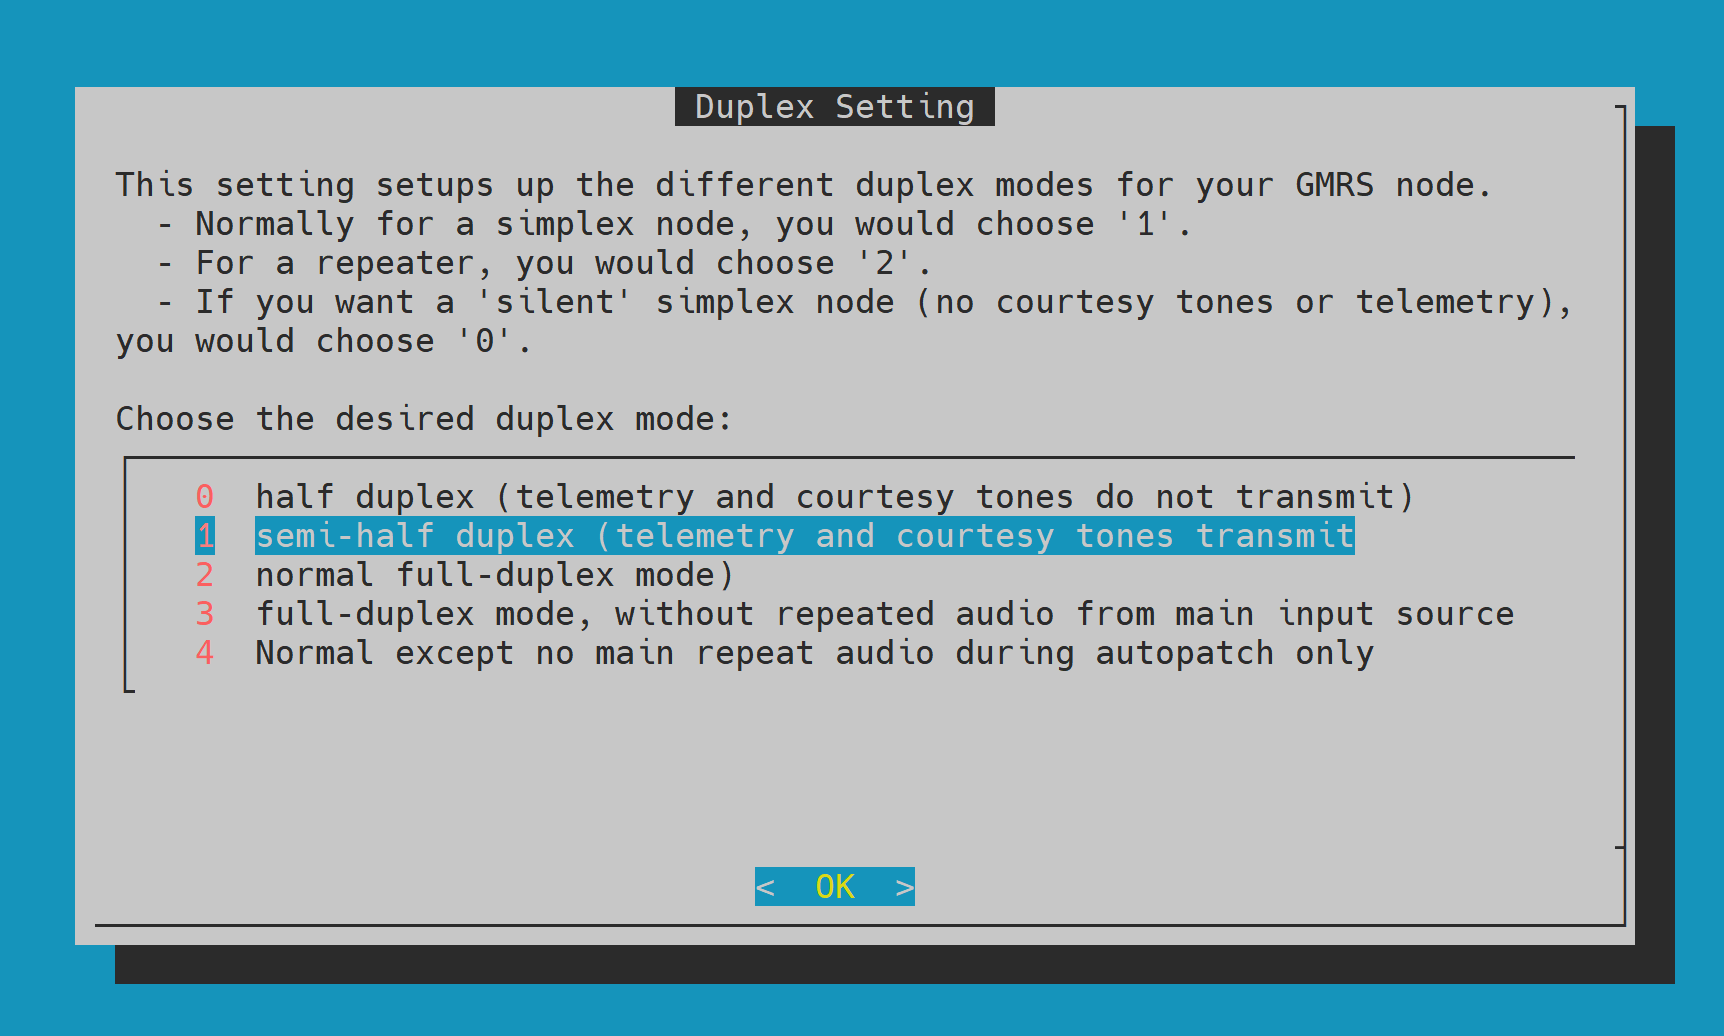
Step 17 - Duplex Setting
Select "1" and select "OK".
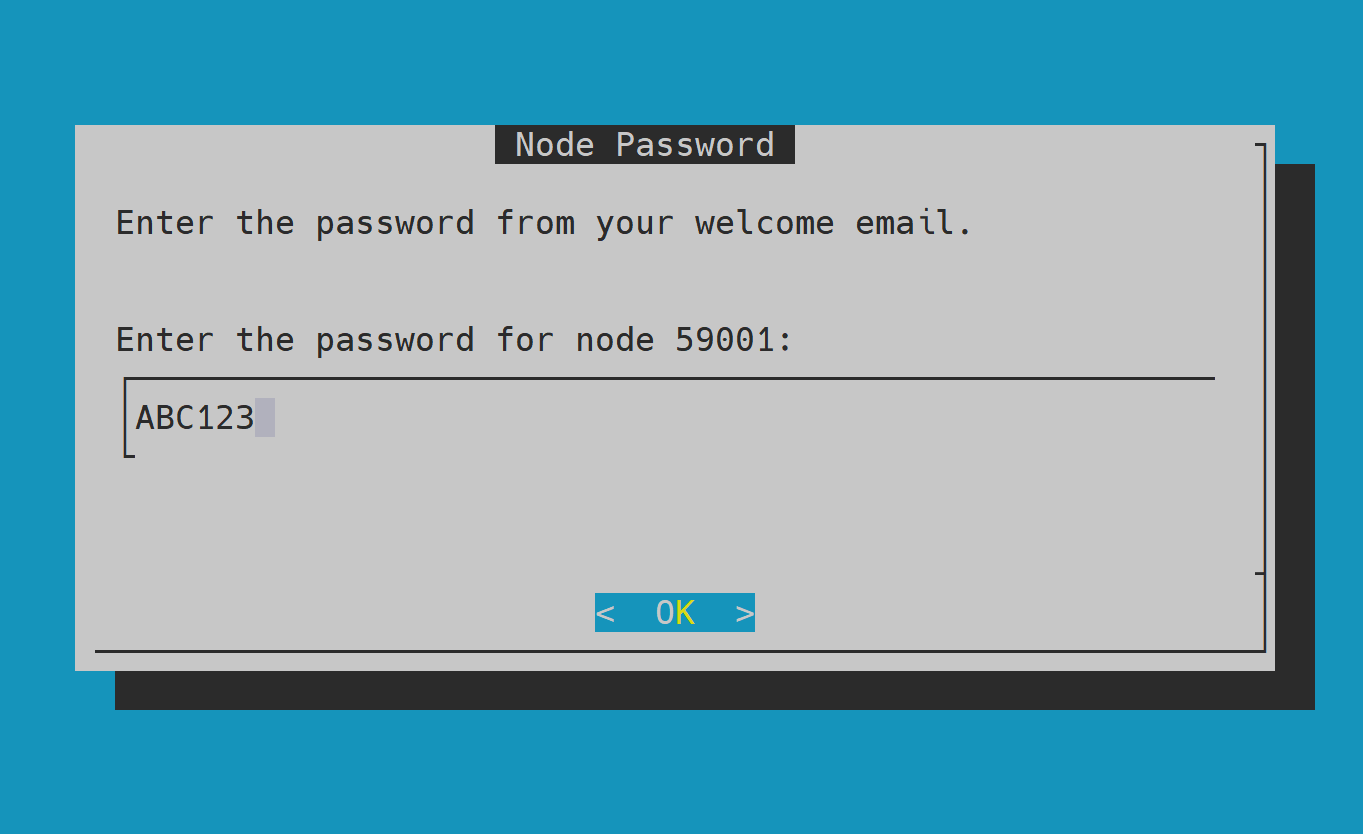
Step 18 - Node Password
Enter the node password provided in your welcome email, then select "OK".
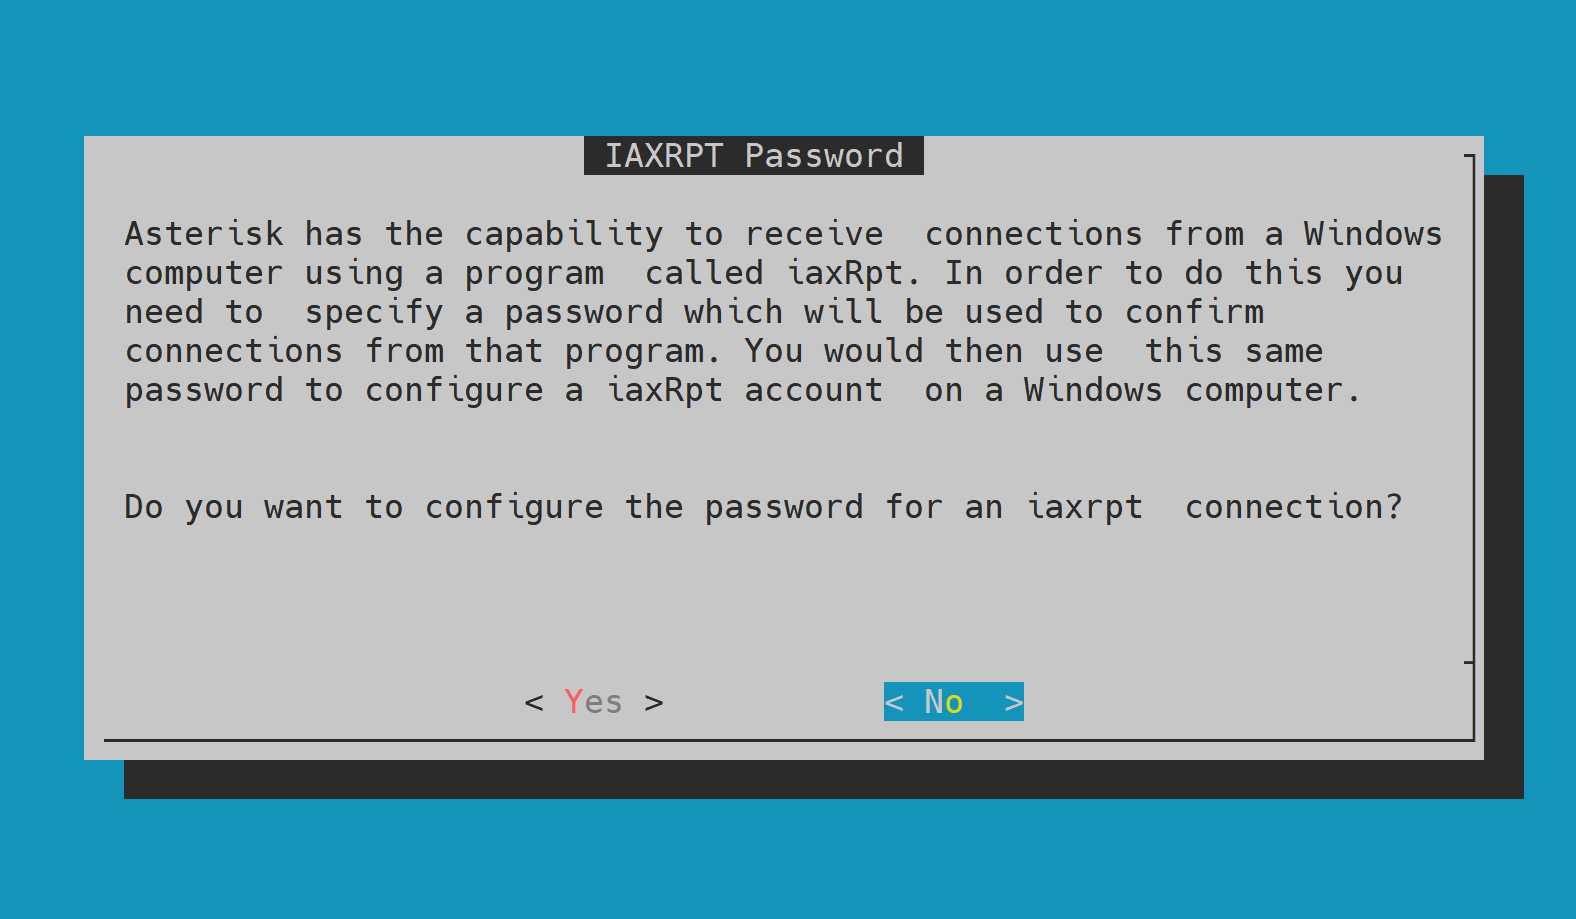
Step 19 - IAXRpt Password
If you are not using IAXRpt or are unsure, select "NO".
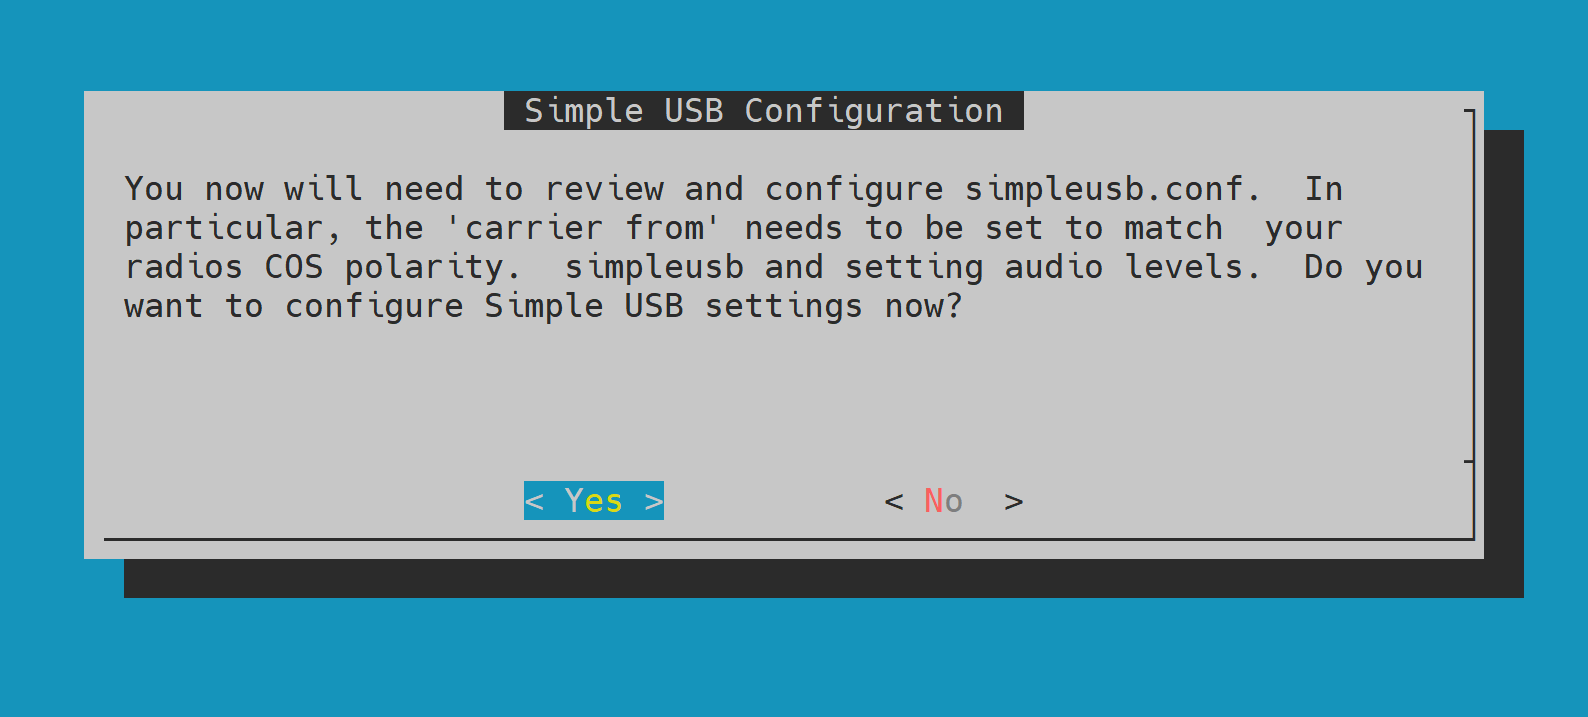
Step 20 - SimpleUSB Setup
Select "Yes" to begin configuring your radio dongle.
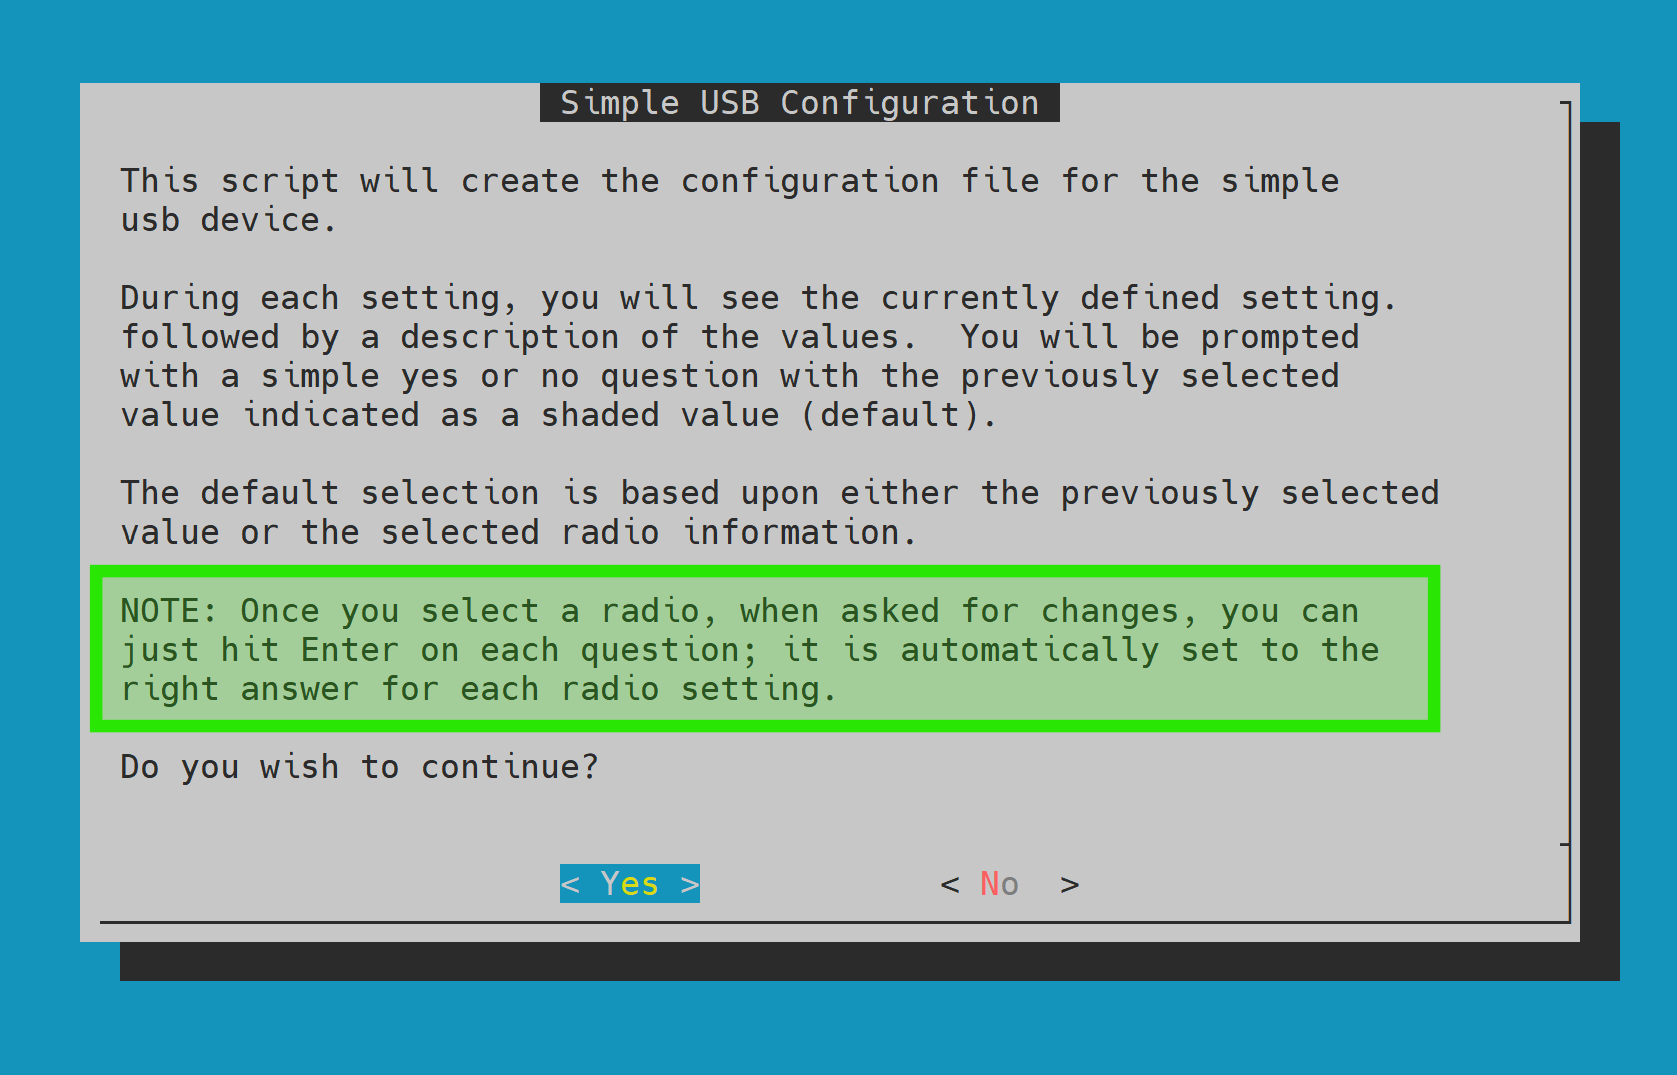
Step 21 - Confirmation Prompt
Take your time during this step to avoid mistakes. Select "Yes" to proceed.
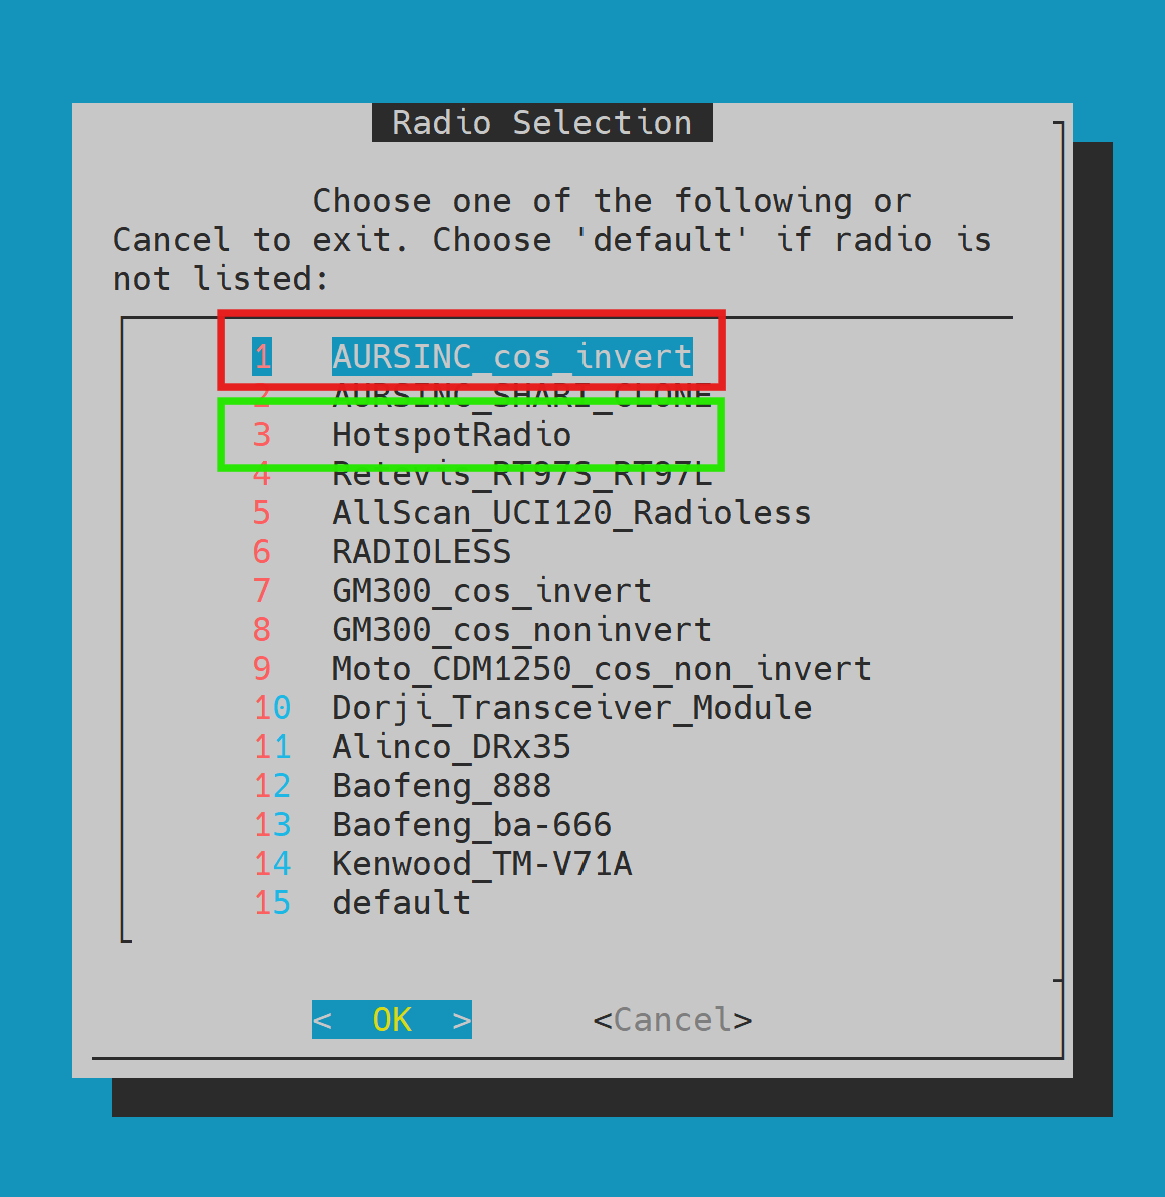
Step 22 - Select Radio Dongle
Choose your specific radio dongle, then select "OK". Press Enter through the default prompts until you reach "RX Audio Delay".
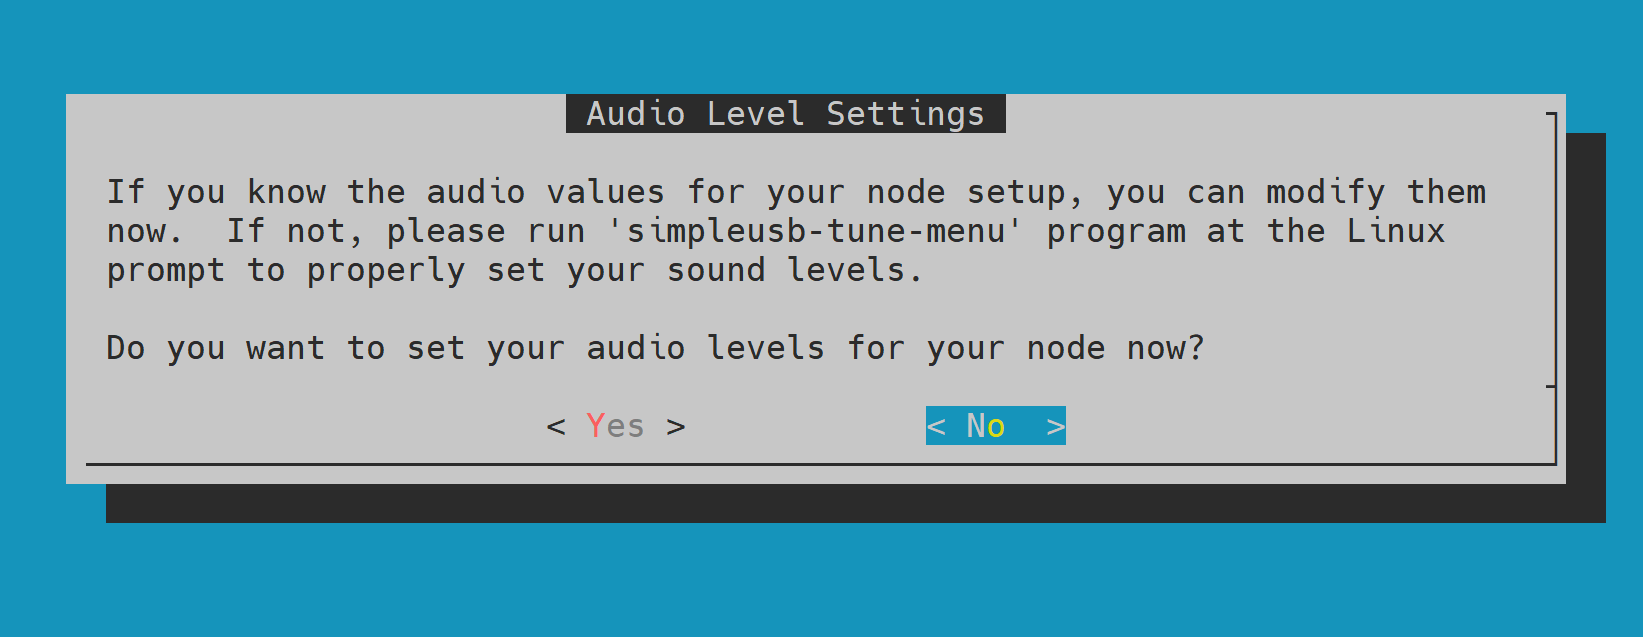
Step 23 - Audio Level Settings
Select "No". Audio level adjustment will be configured in a later step.
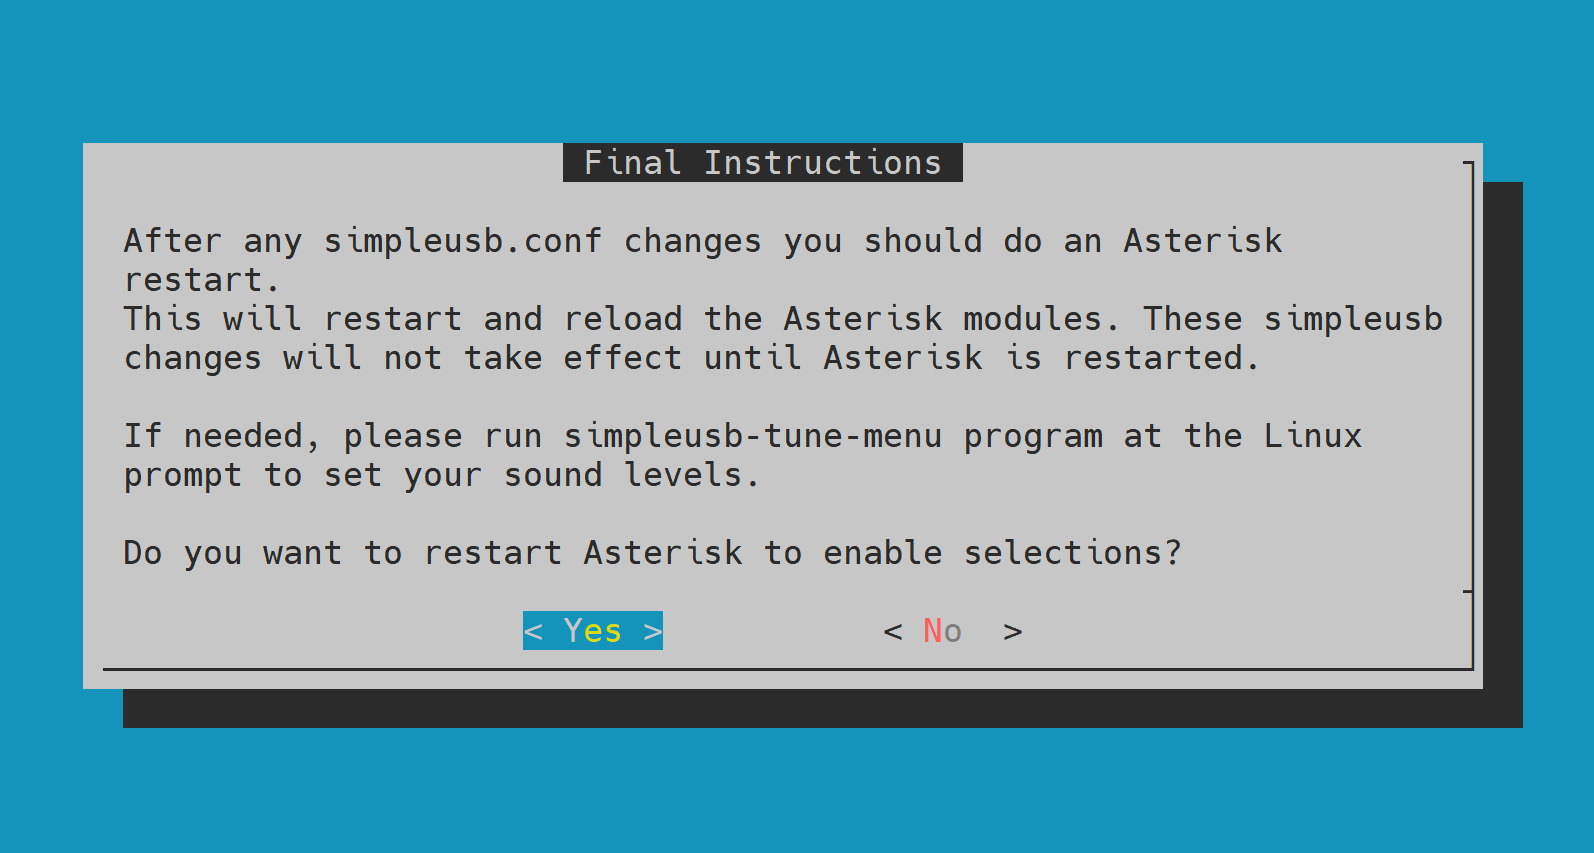
Step 24 - Restart Asterisk
Select "Yes" to restart the Asterisk service.
Step 25 - Access Time Zone Menu
Eastern Time users can skip this step. Otherwise, select "6", then select "Run Selected Item".
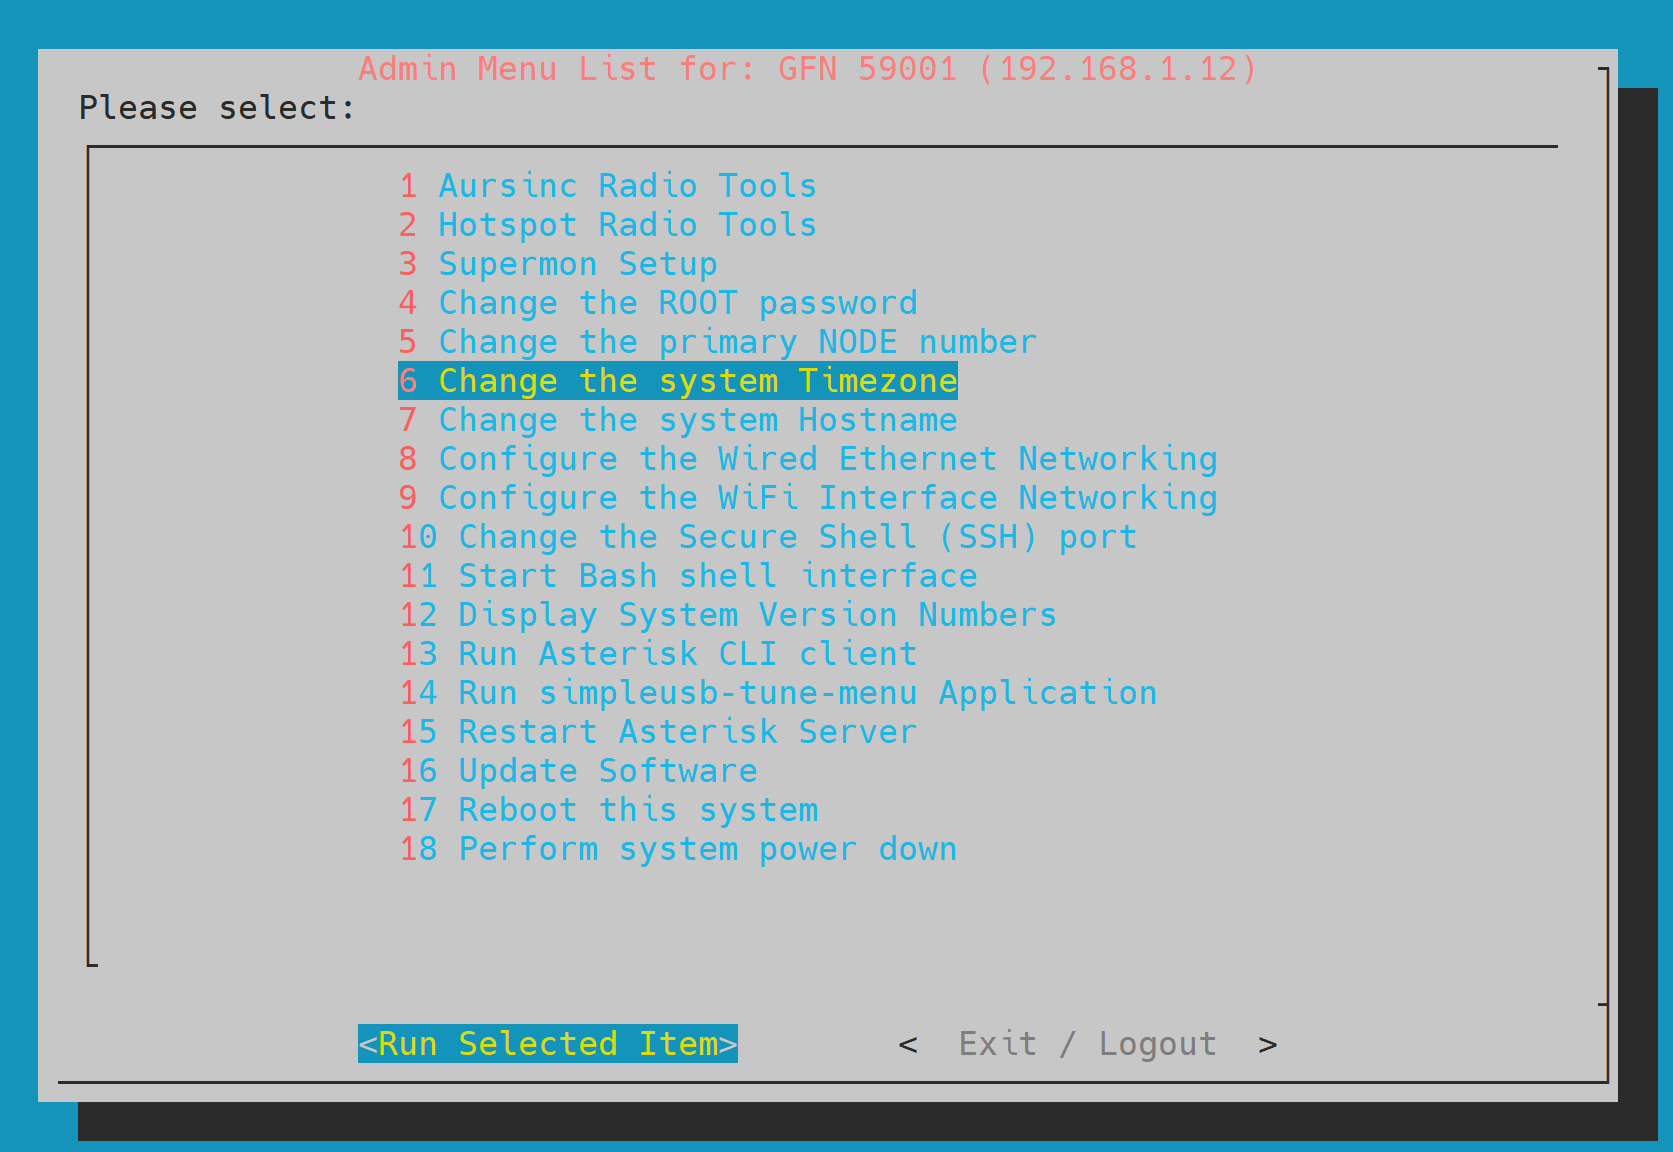
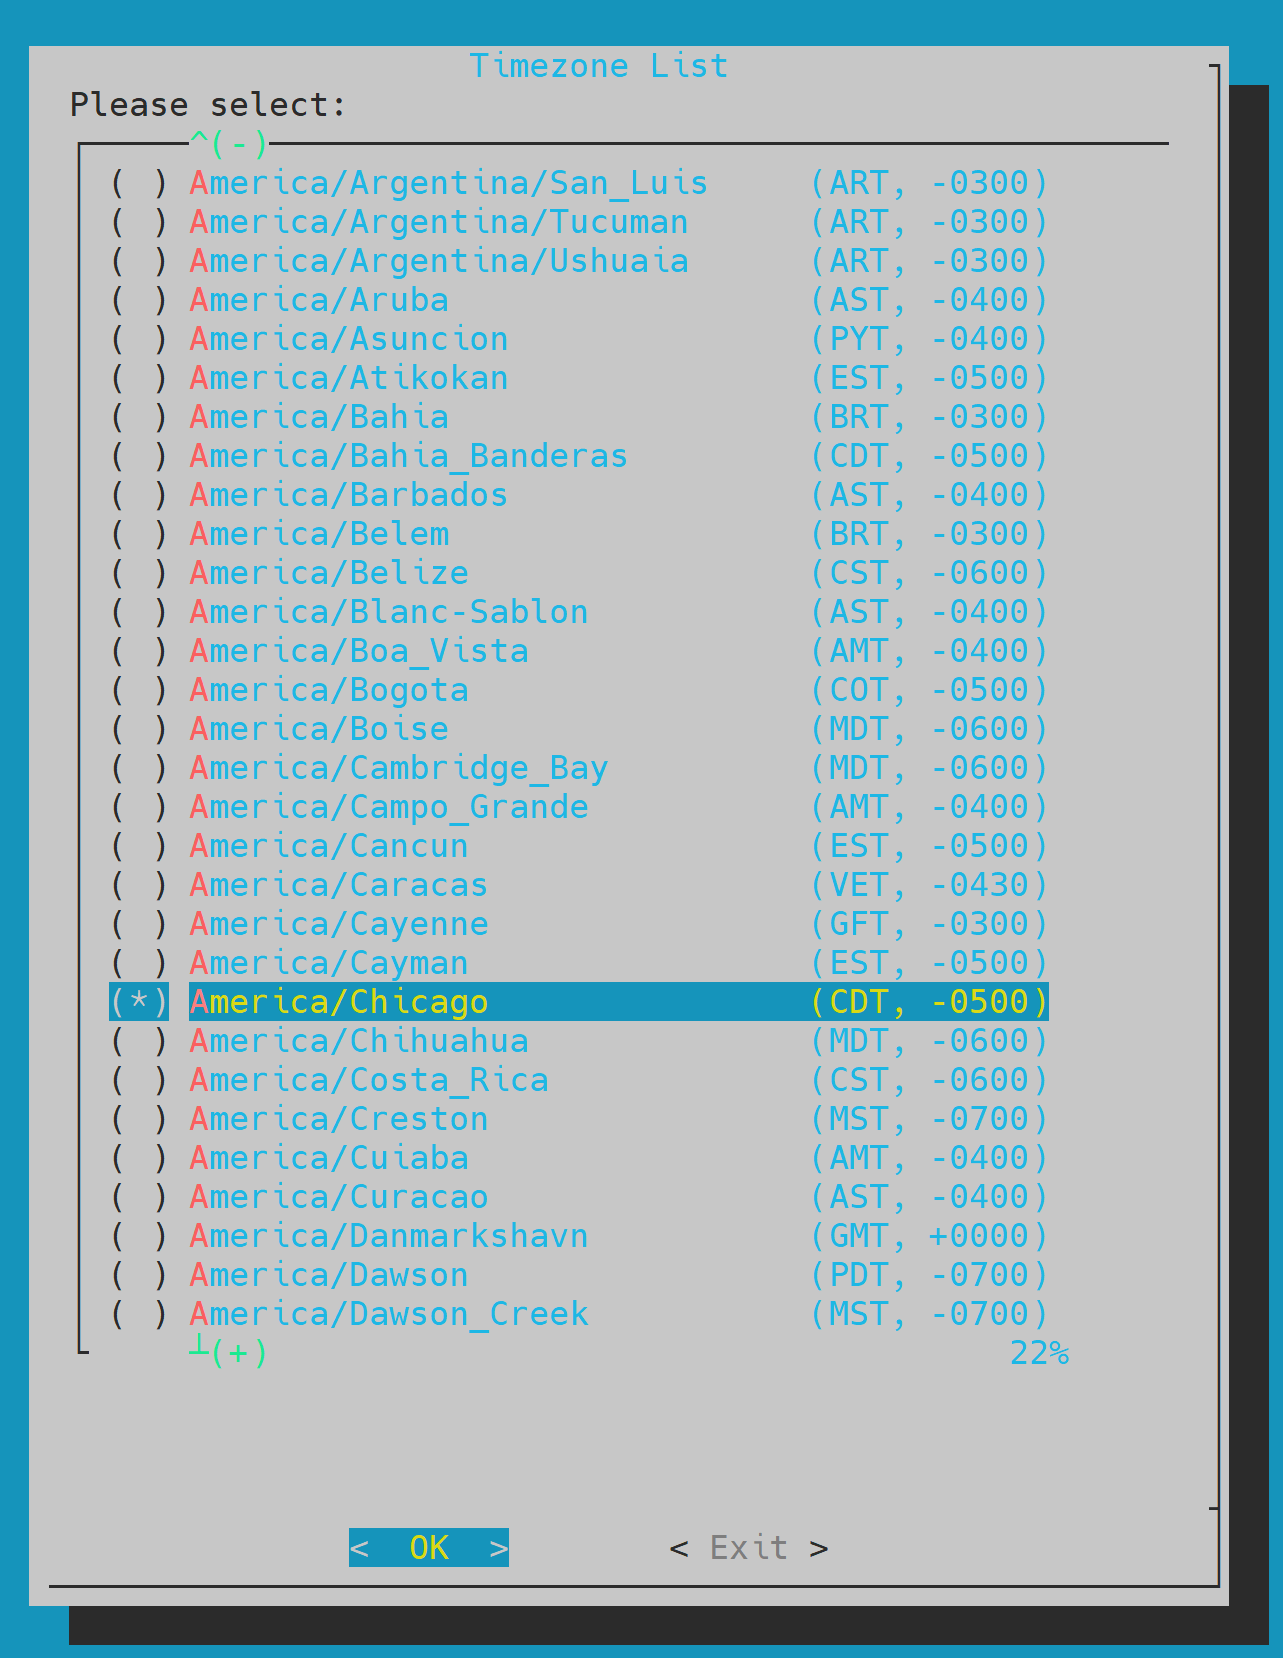
Step 26 - Select Time Zone
Scroll to your local time zone, press the spacebar to select it, then select "OK".
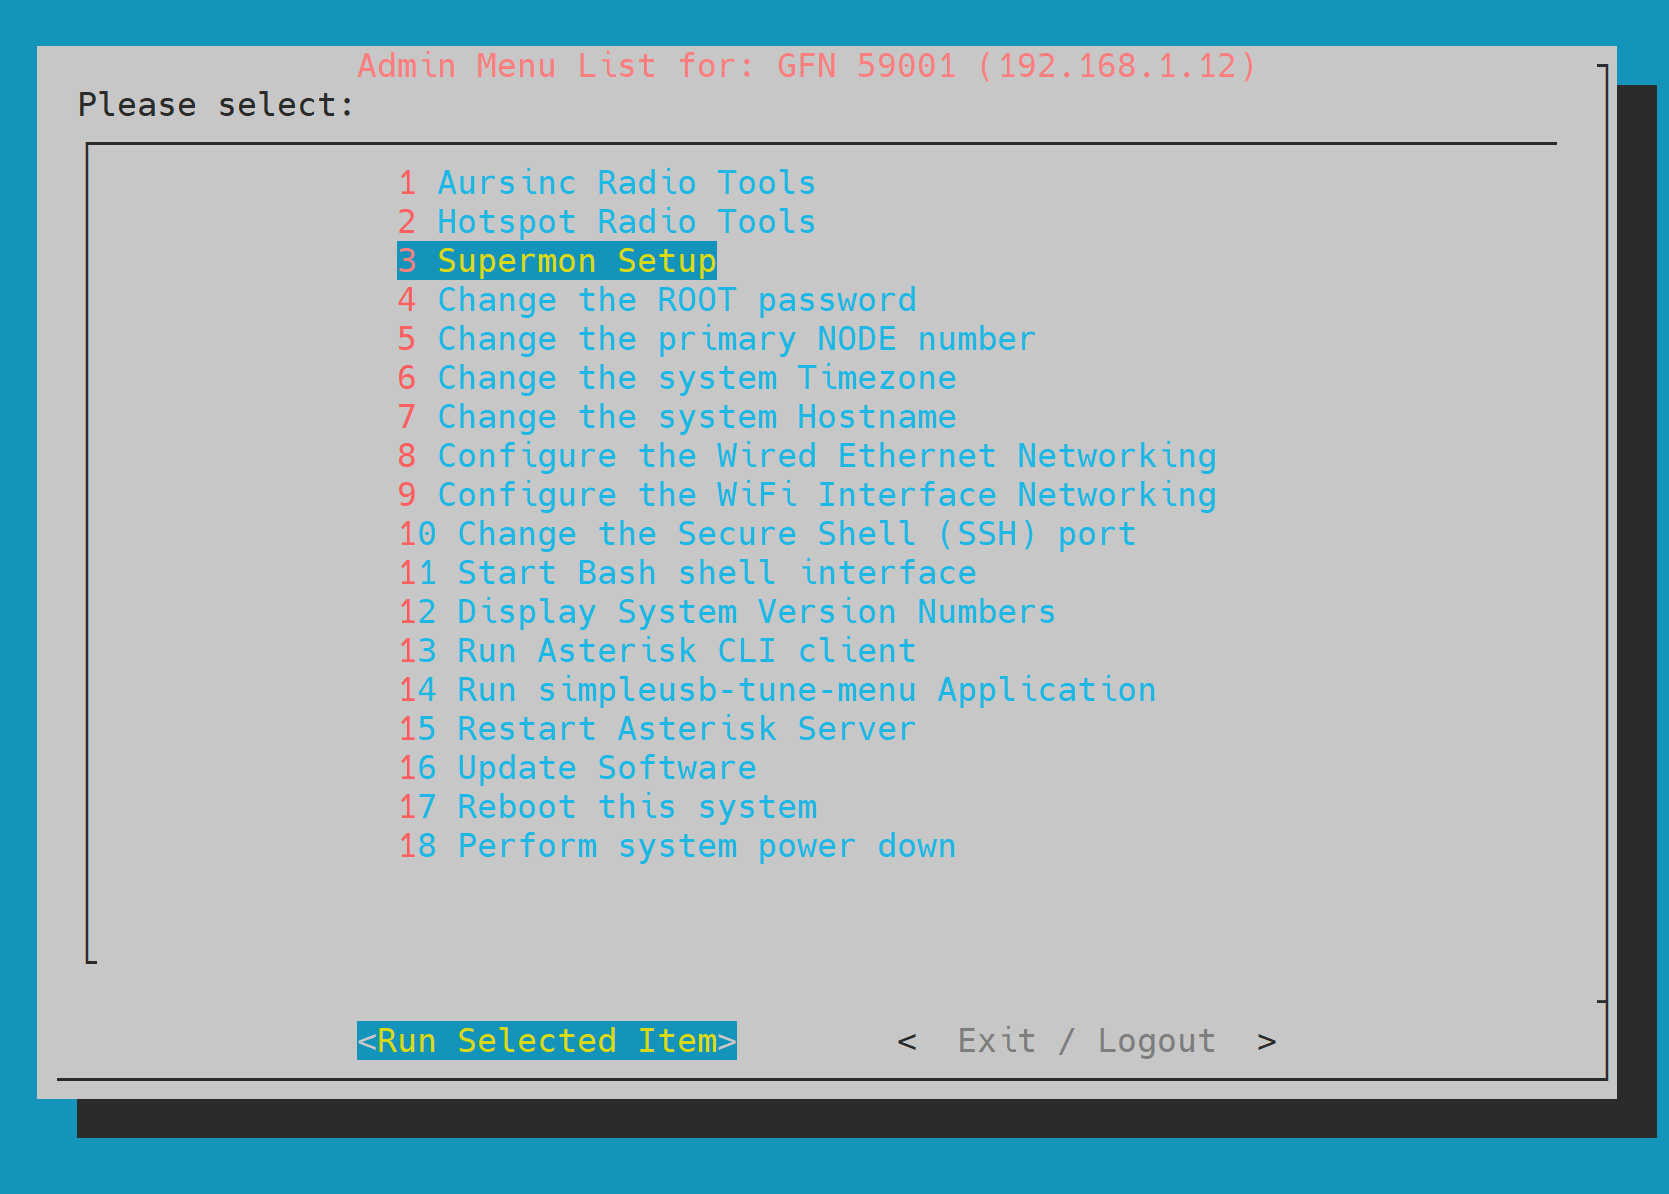
Step 27 - Access Supermon Setup
Select "3" ("Supermon Setup") then select "Run Selected Item".
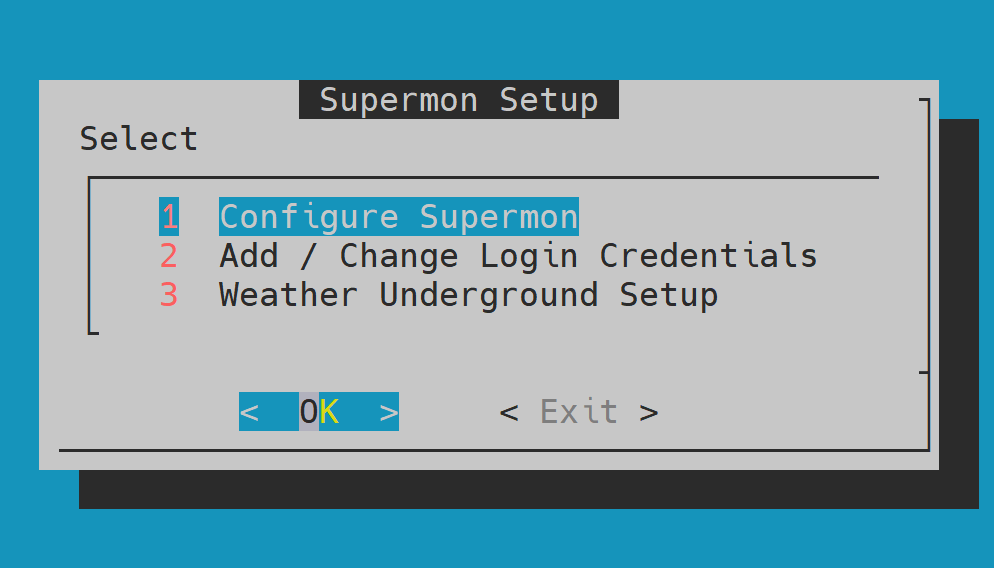
Step 28 - Configure Supermon
Select "1", select "OK", and confirm your choice on the following screen.
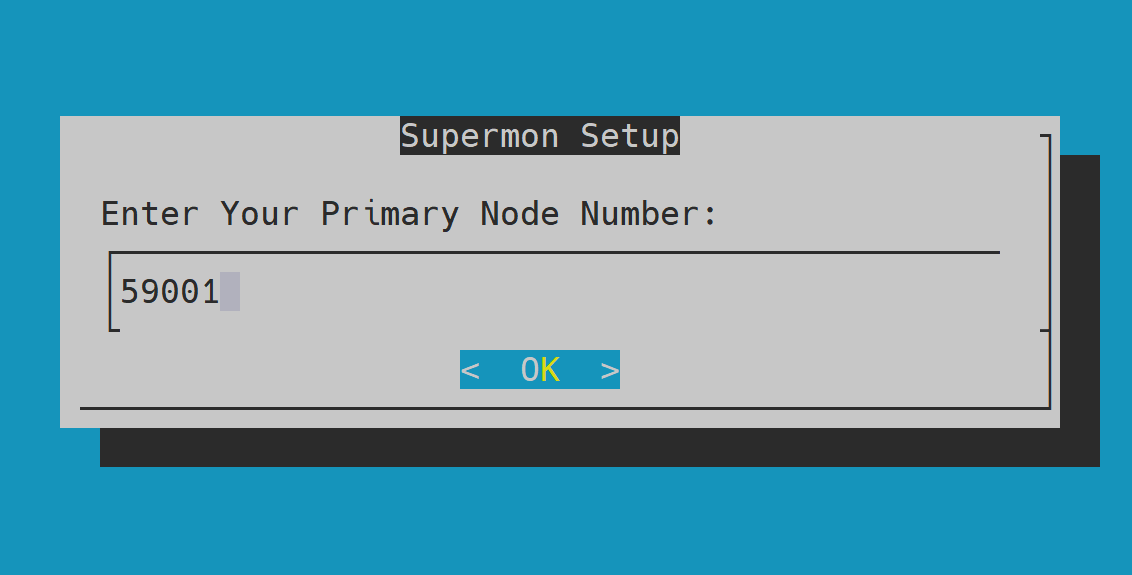
Step 29 - Verify Node Number
Your node number will be preloaded. Select "OK".
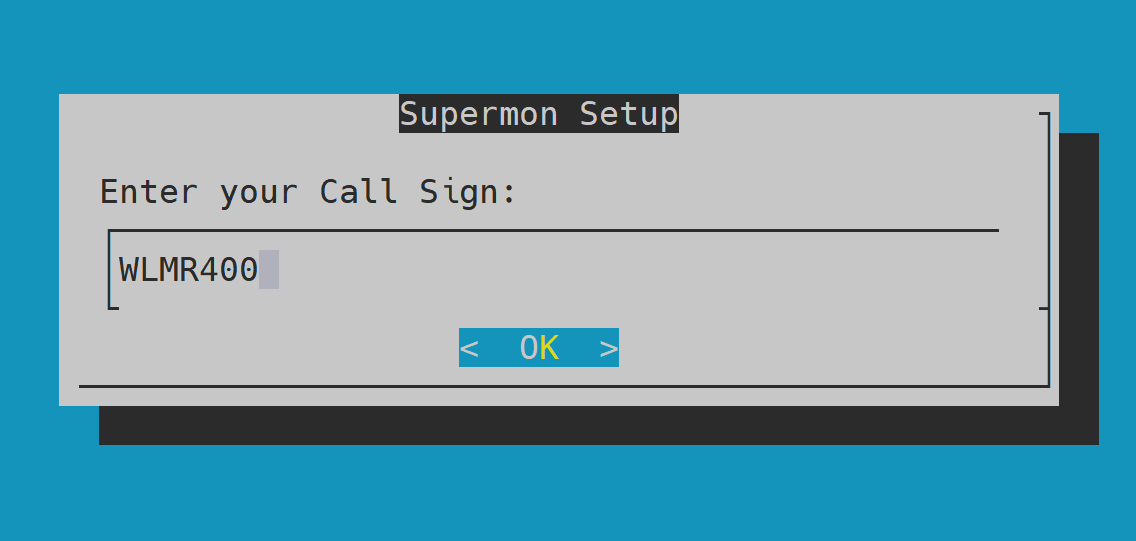
Step 30 - Verify Call Sign
Your call sign will be preloaded. Select "OK".
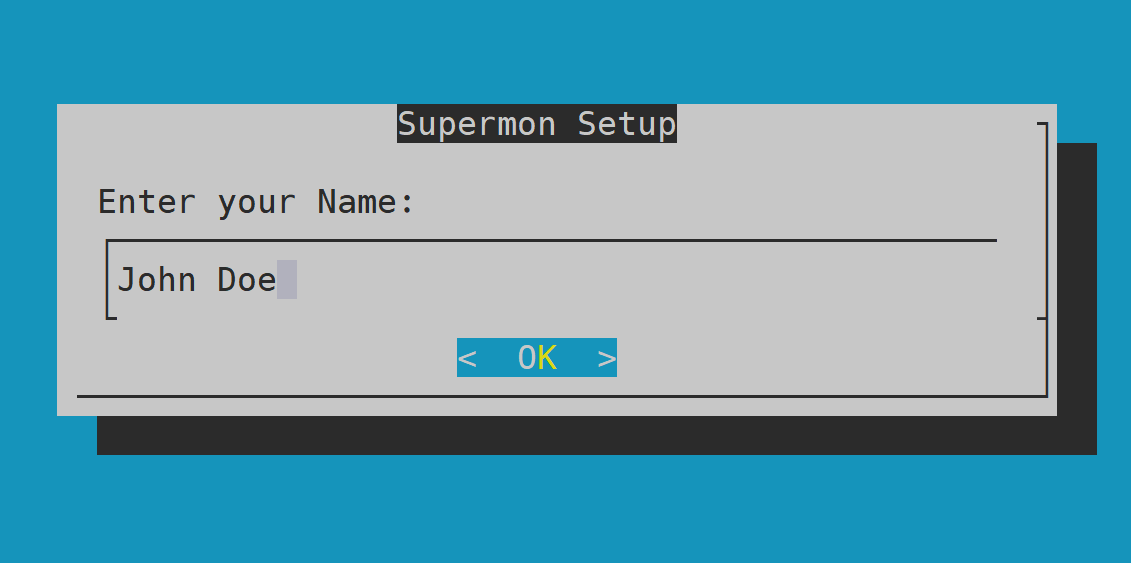
Step 31 - Enter Name
Type your name, then select "OK".
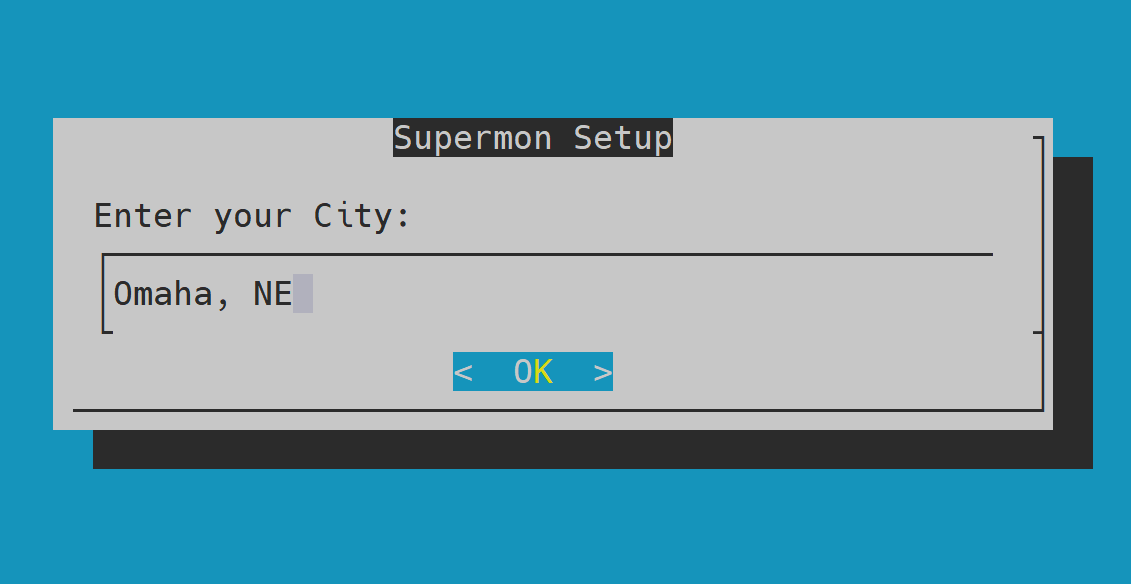
Step 32 - Enter Location
Enter your City and State, then select "OK".
Step 33 - Enter Zip Code
Enter your local Zip Code, then select "OK".
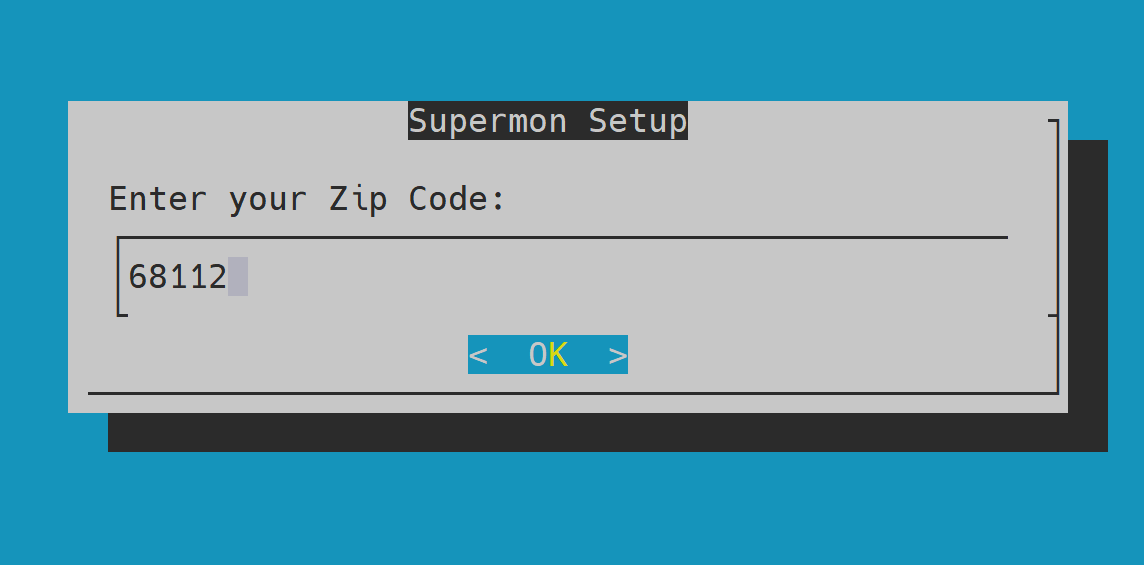
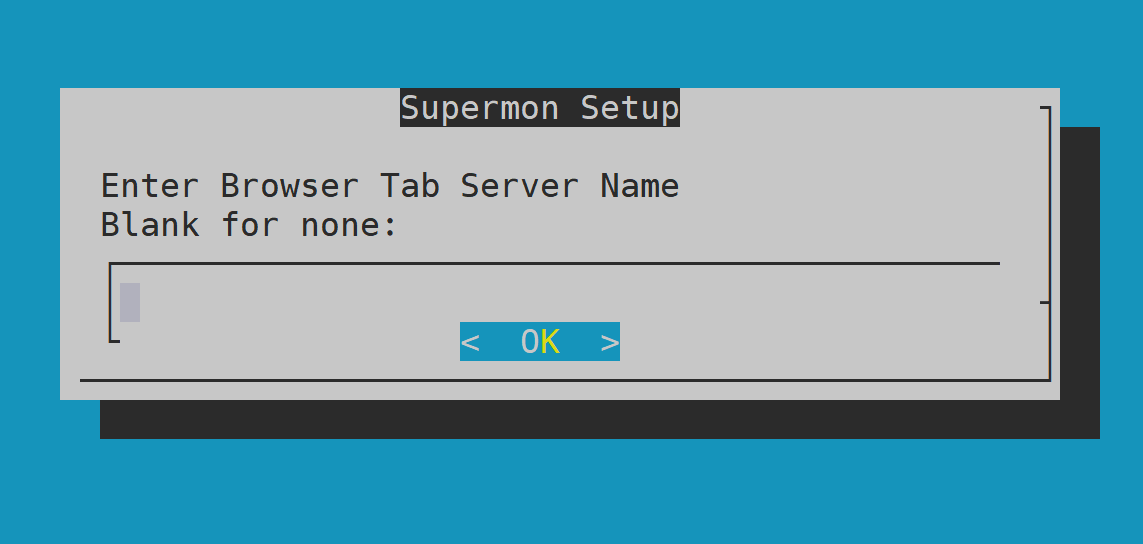
Step 34 - Browser Tab Name
Enter a label for your browser tab, or leave it default.
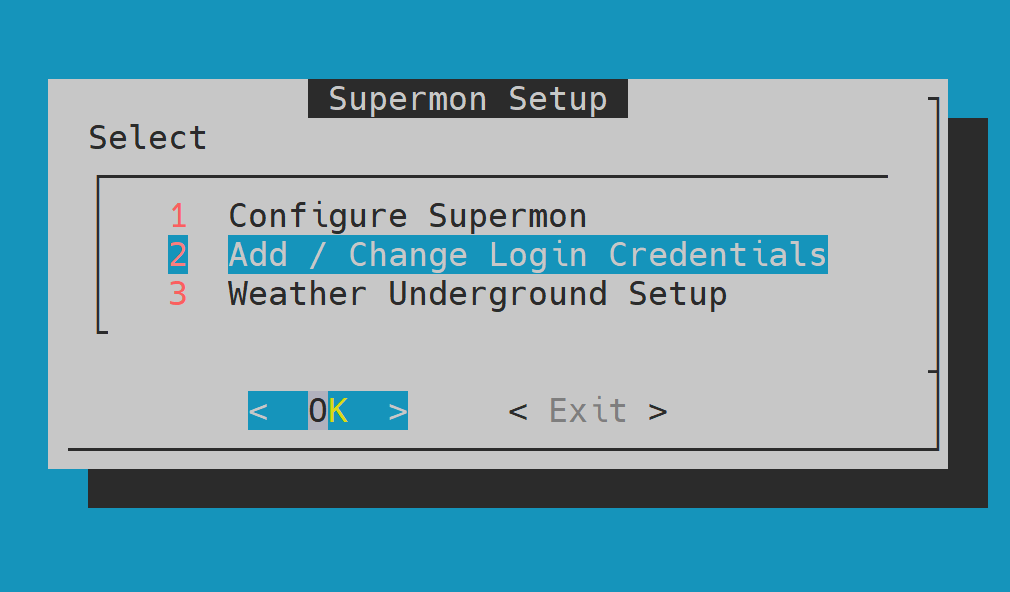
Step 35 - Add Supermon Login
Select "2" then select "OK".
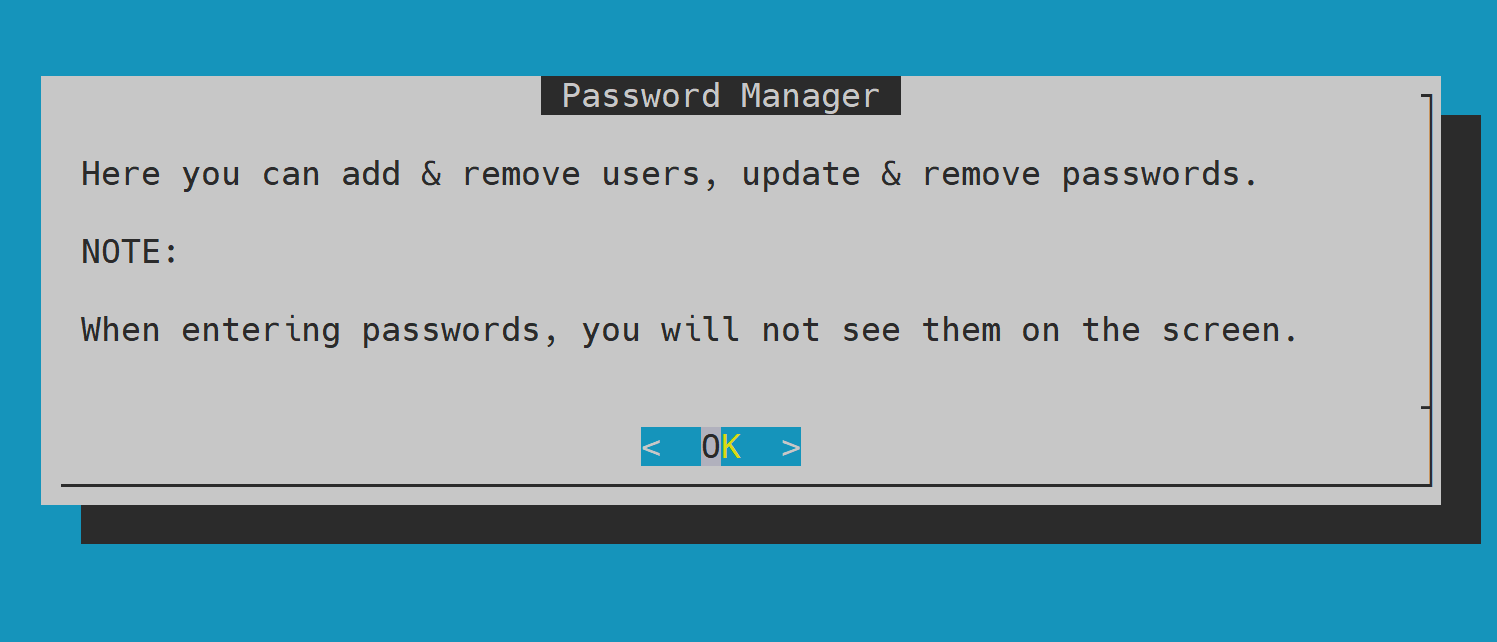
Step 36 - Information Prompt
Select "OK" to dismiss the note.
Step 37 - Add User Account
Select "1" then select "OK".
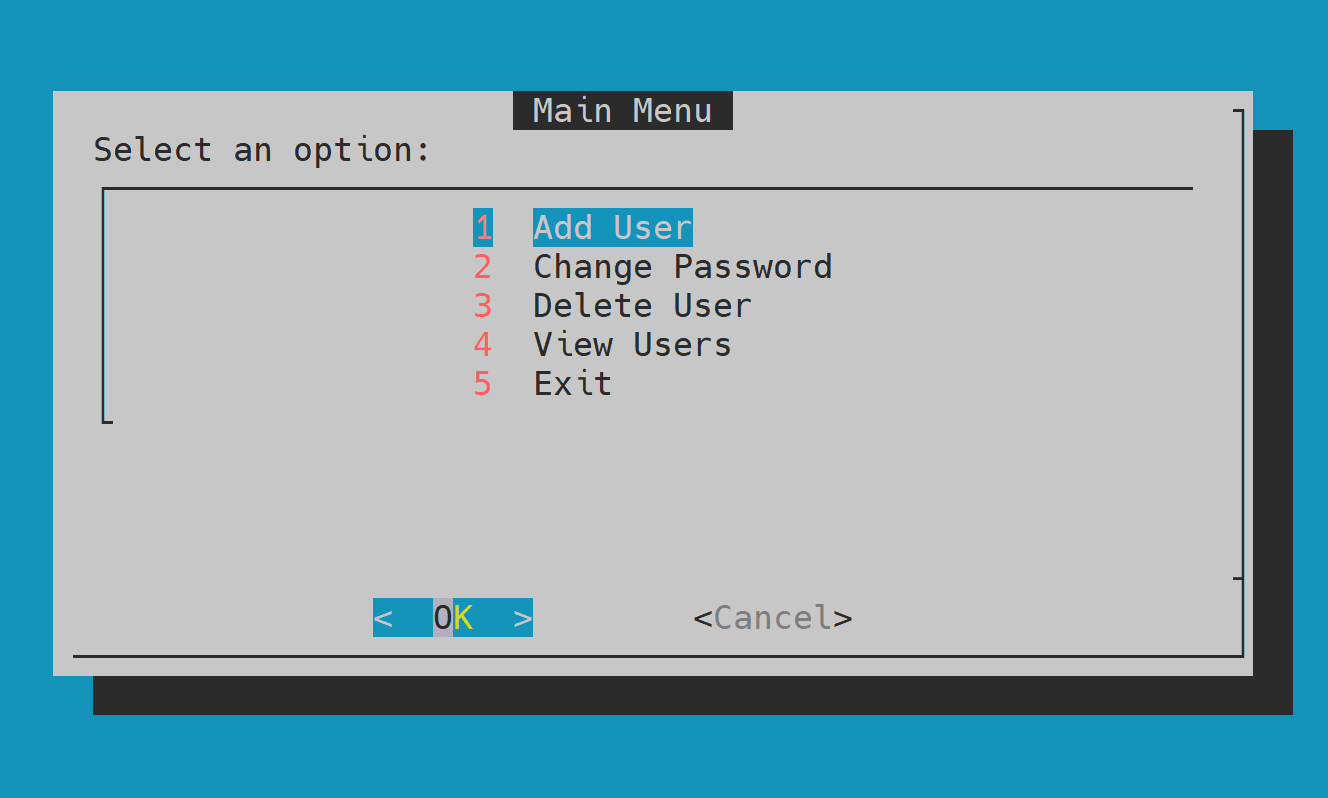
Step 38 - Enter Username
Enter a new username, then select "OK".
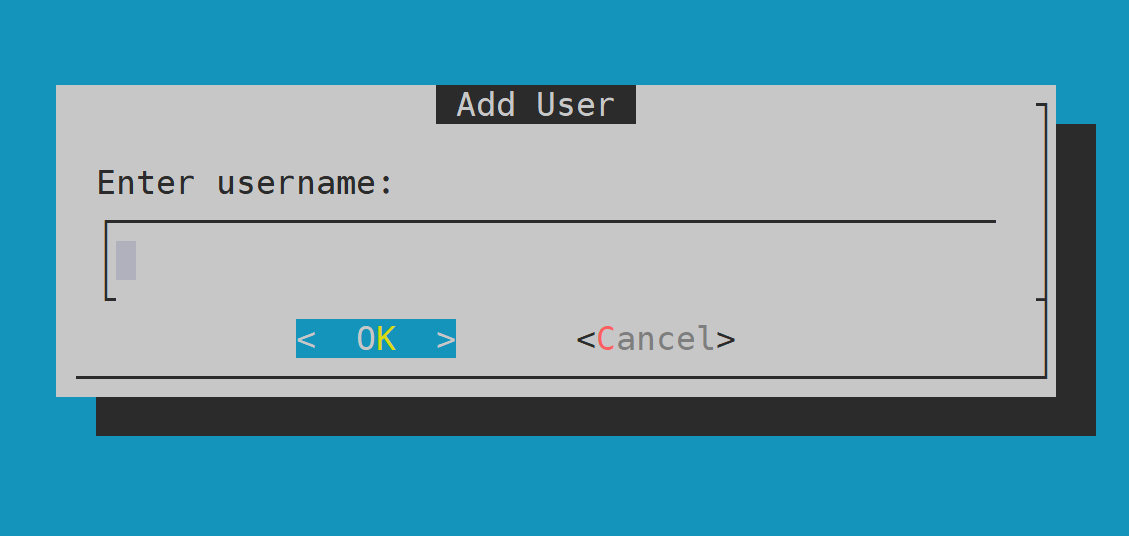
Step 39 - Enter Password
Type a secure password, then select "OK".
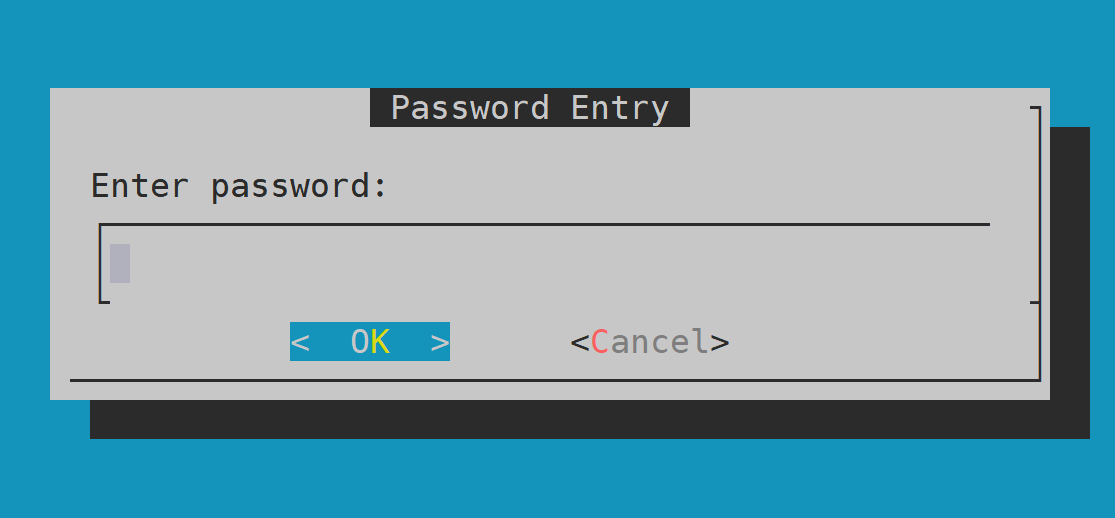
Step 40 - Confirm Password
Re-enter your password to confirm, then select "OK".
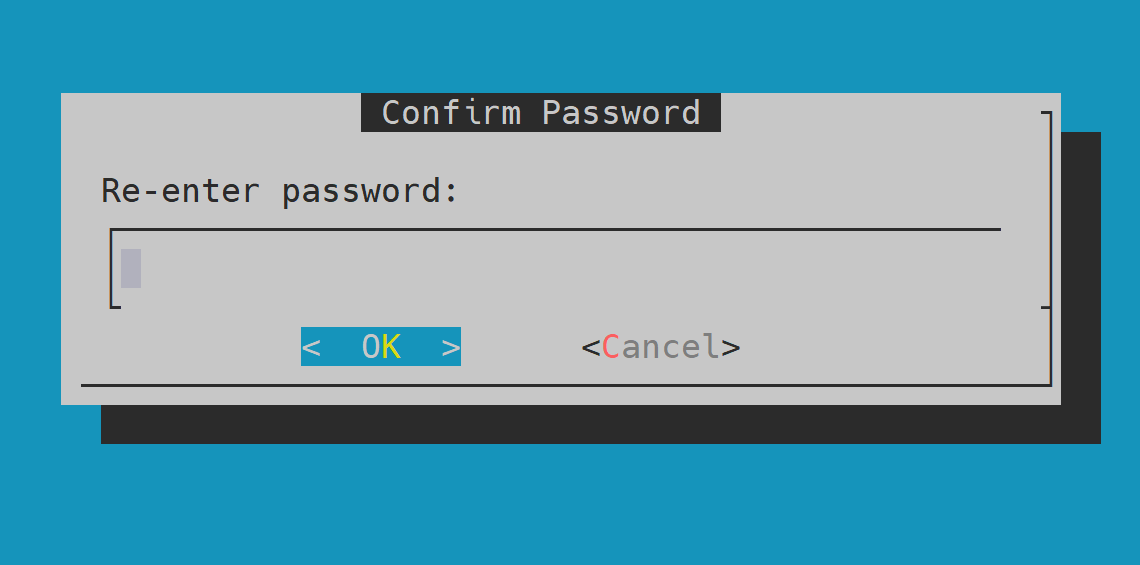
Step 41 - Complete User Creation
Select "OK" to finish adding the user.
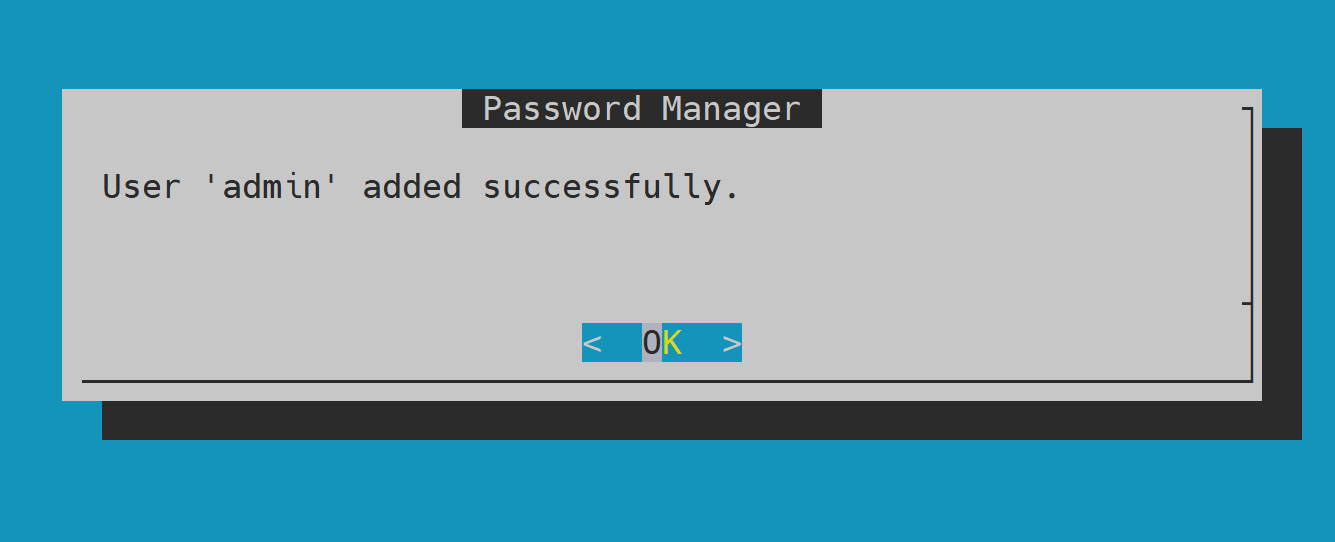
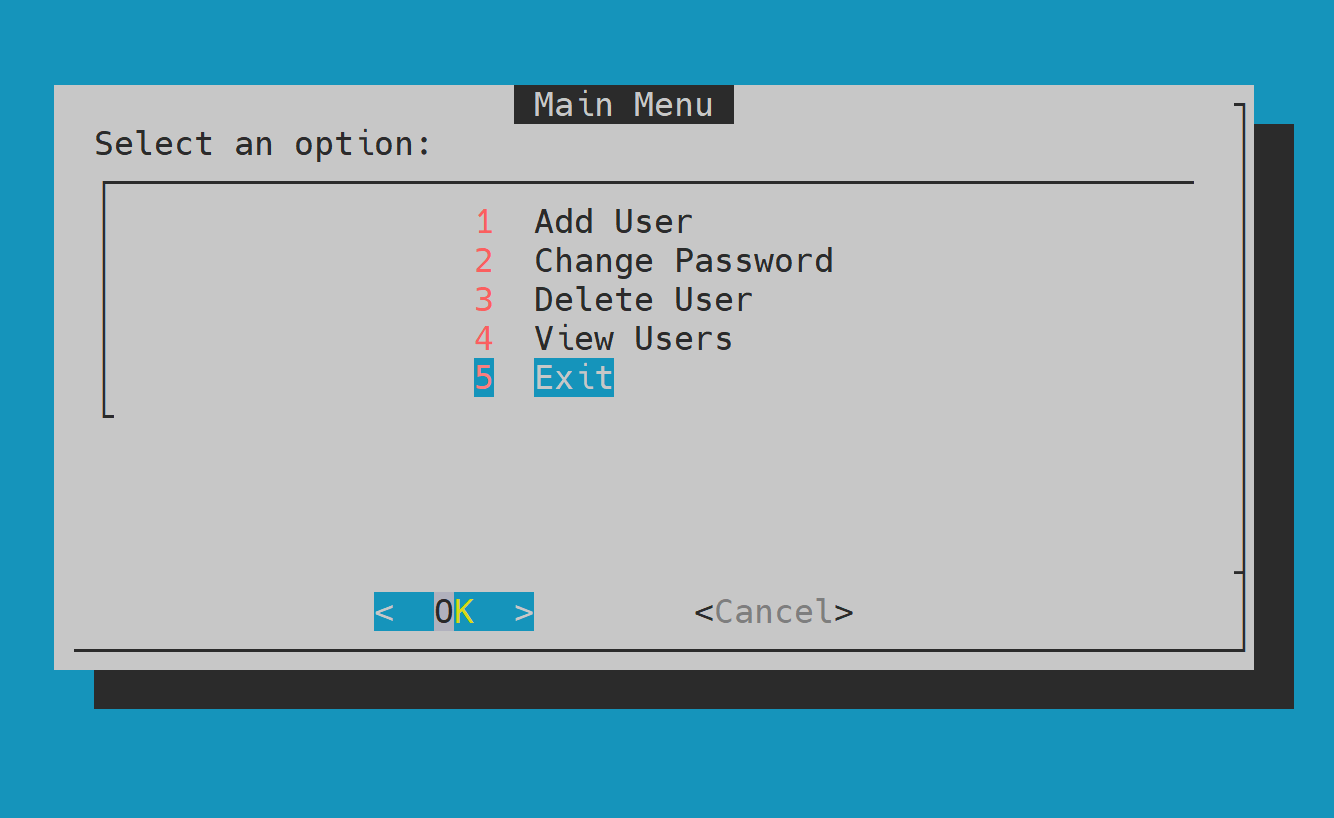
Step 42 - Exit User Menu
Select "5" then select "OK".
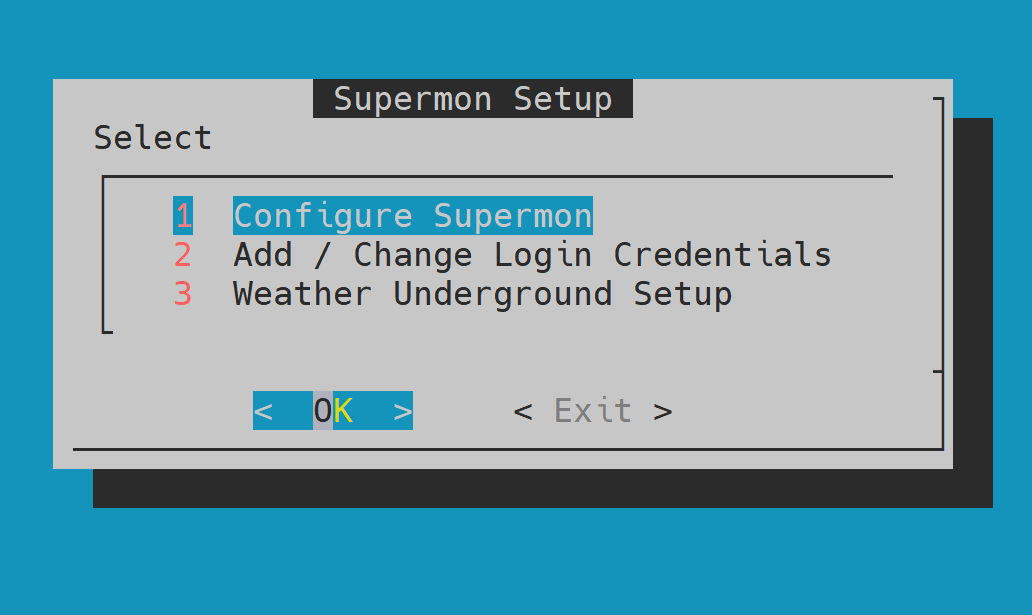
Step 43 - Exit Supermon Setup
Select "Exit". Please note the Weather Underground setup documentation is included in your zip file.
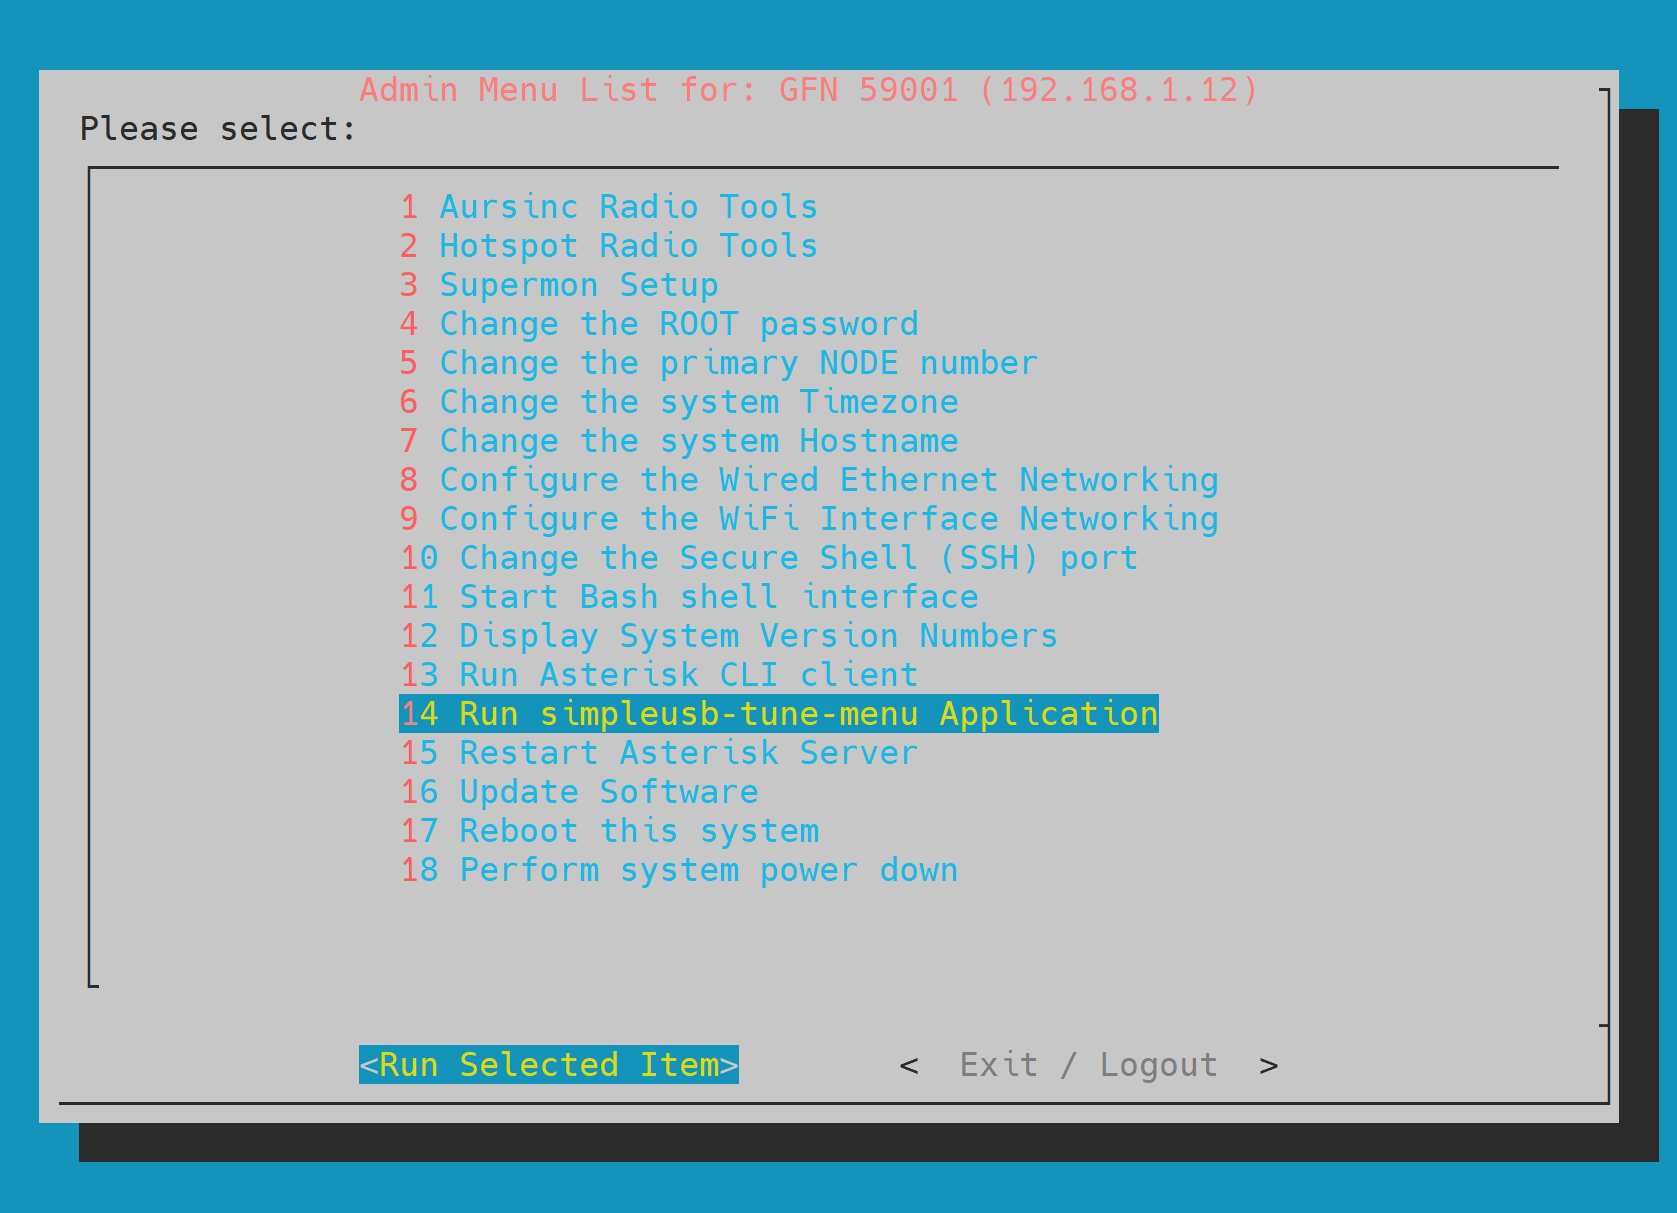
Step 44 - SimpleUSB Tune Configuration
Select "14" ("SimpleUsb Tune") then select "OK".
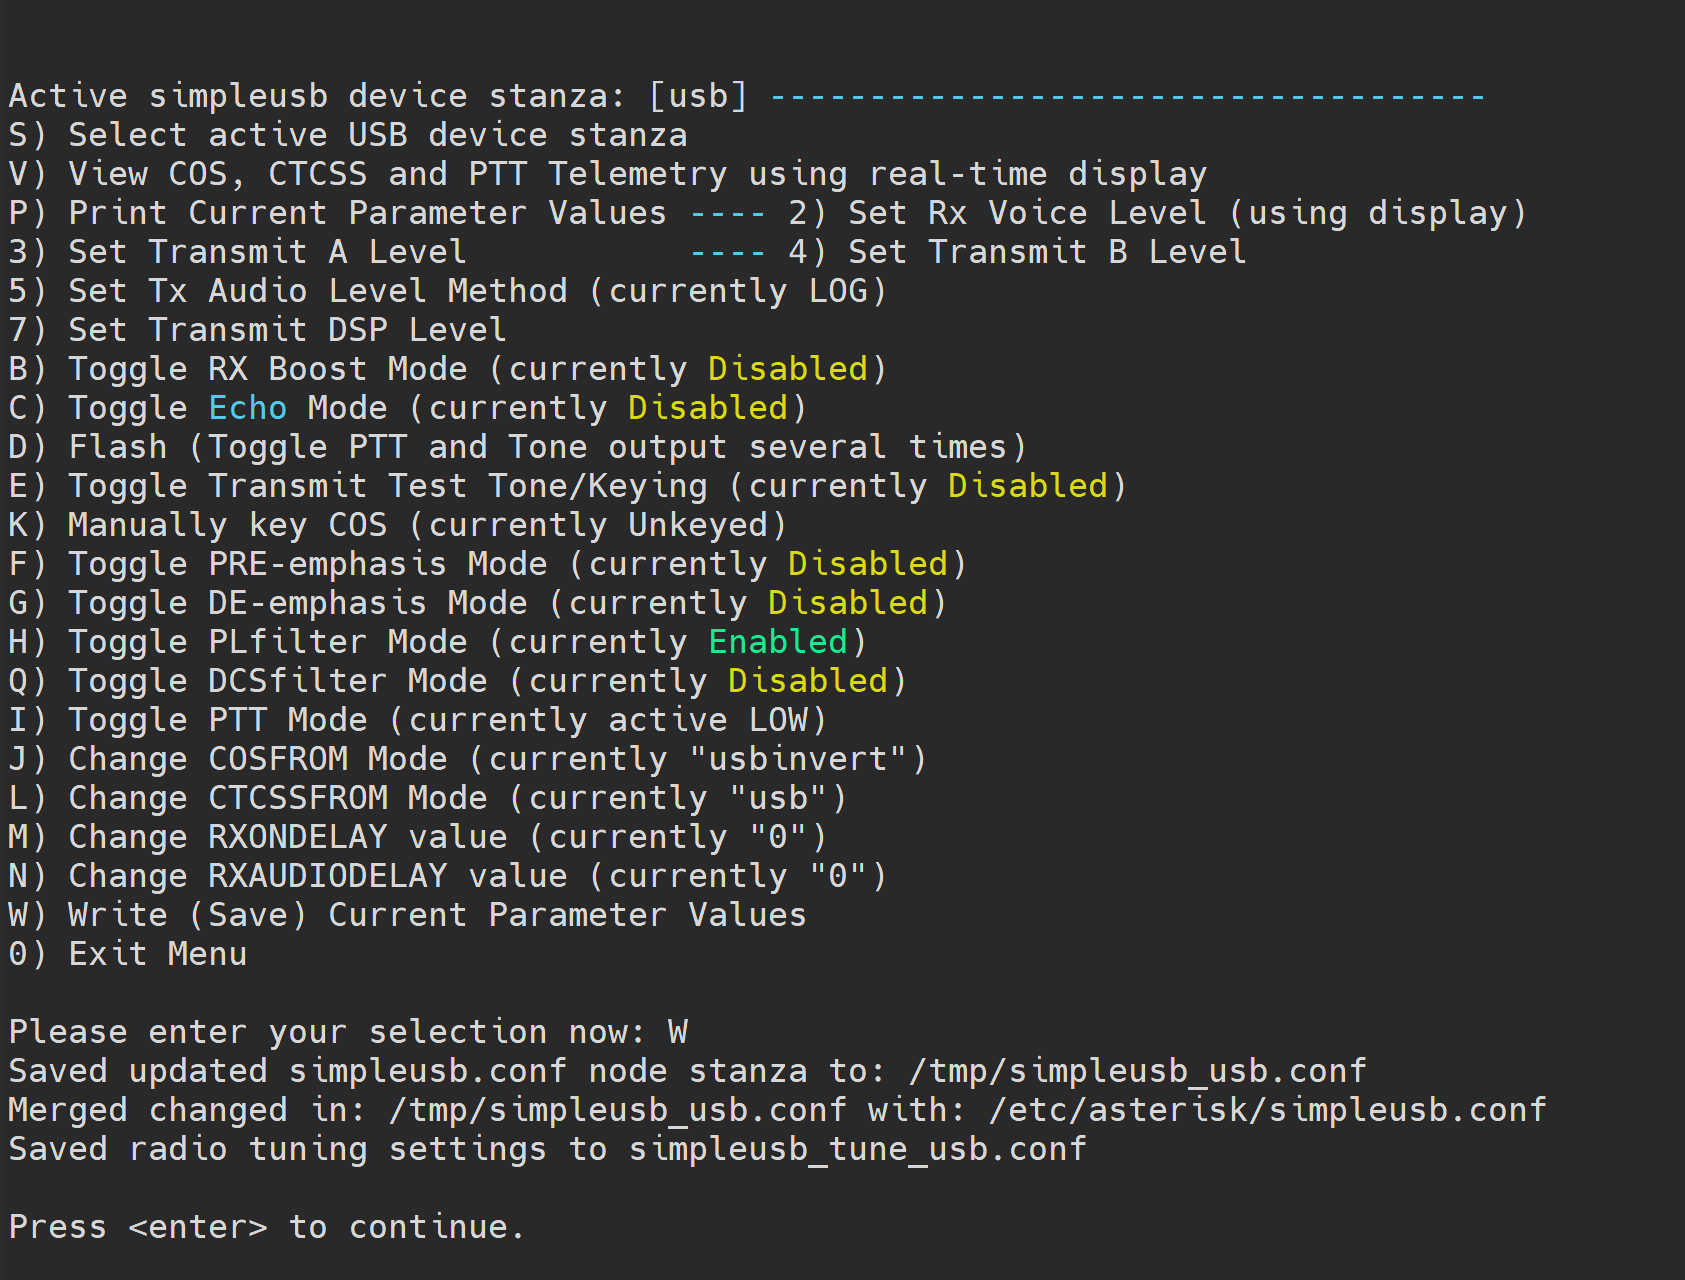
Step 45 - Write Configuration Files
Type "w" and press Enter to write changes. Then type "0" and press Enter to exit.
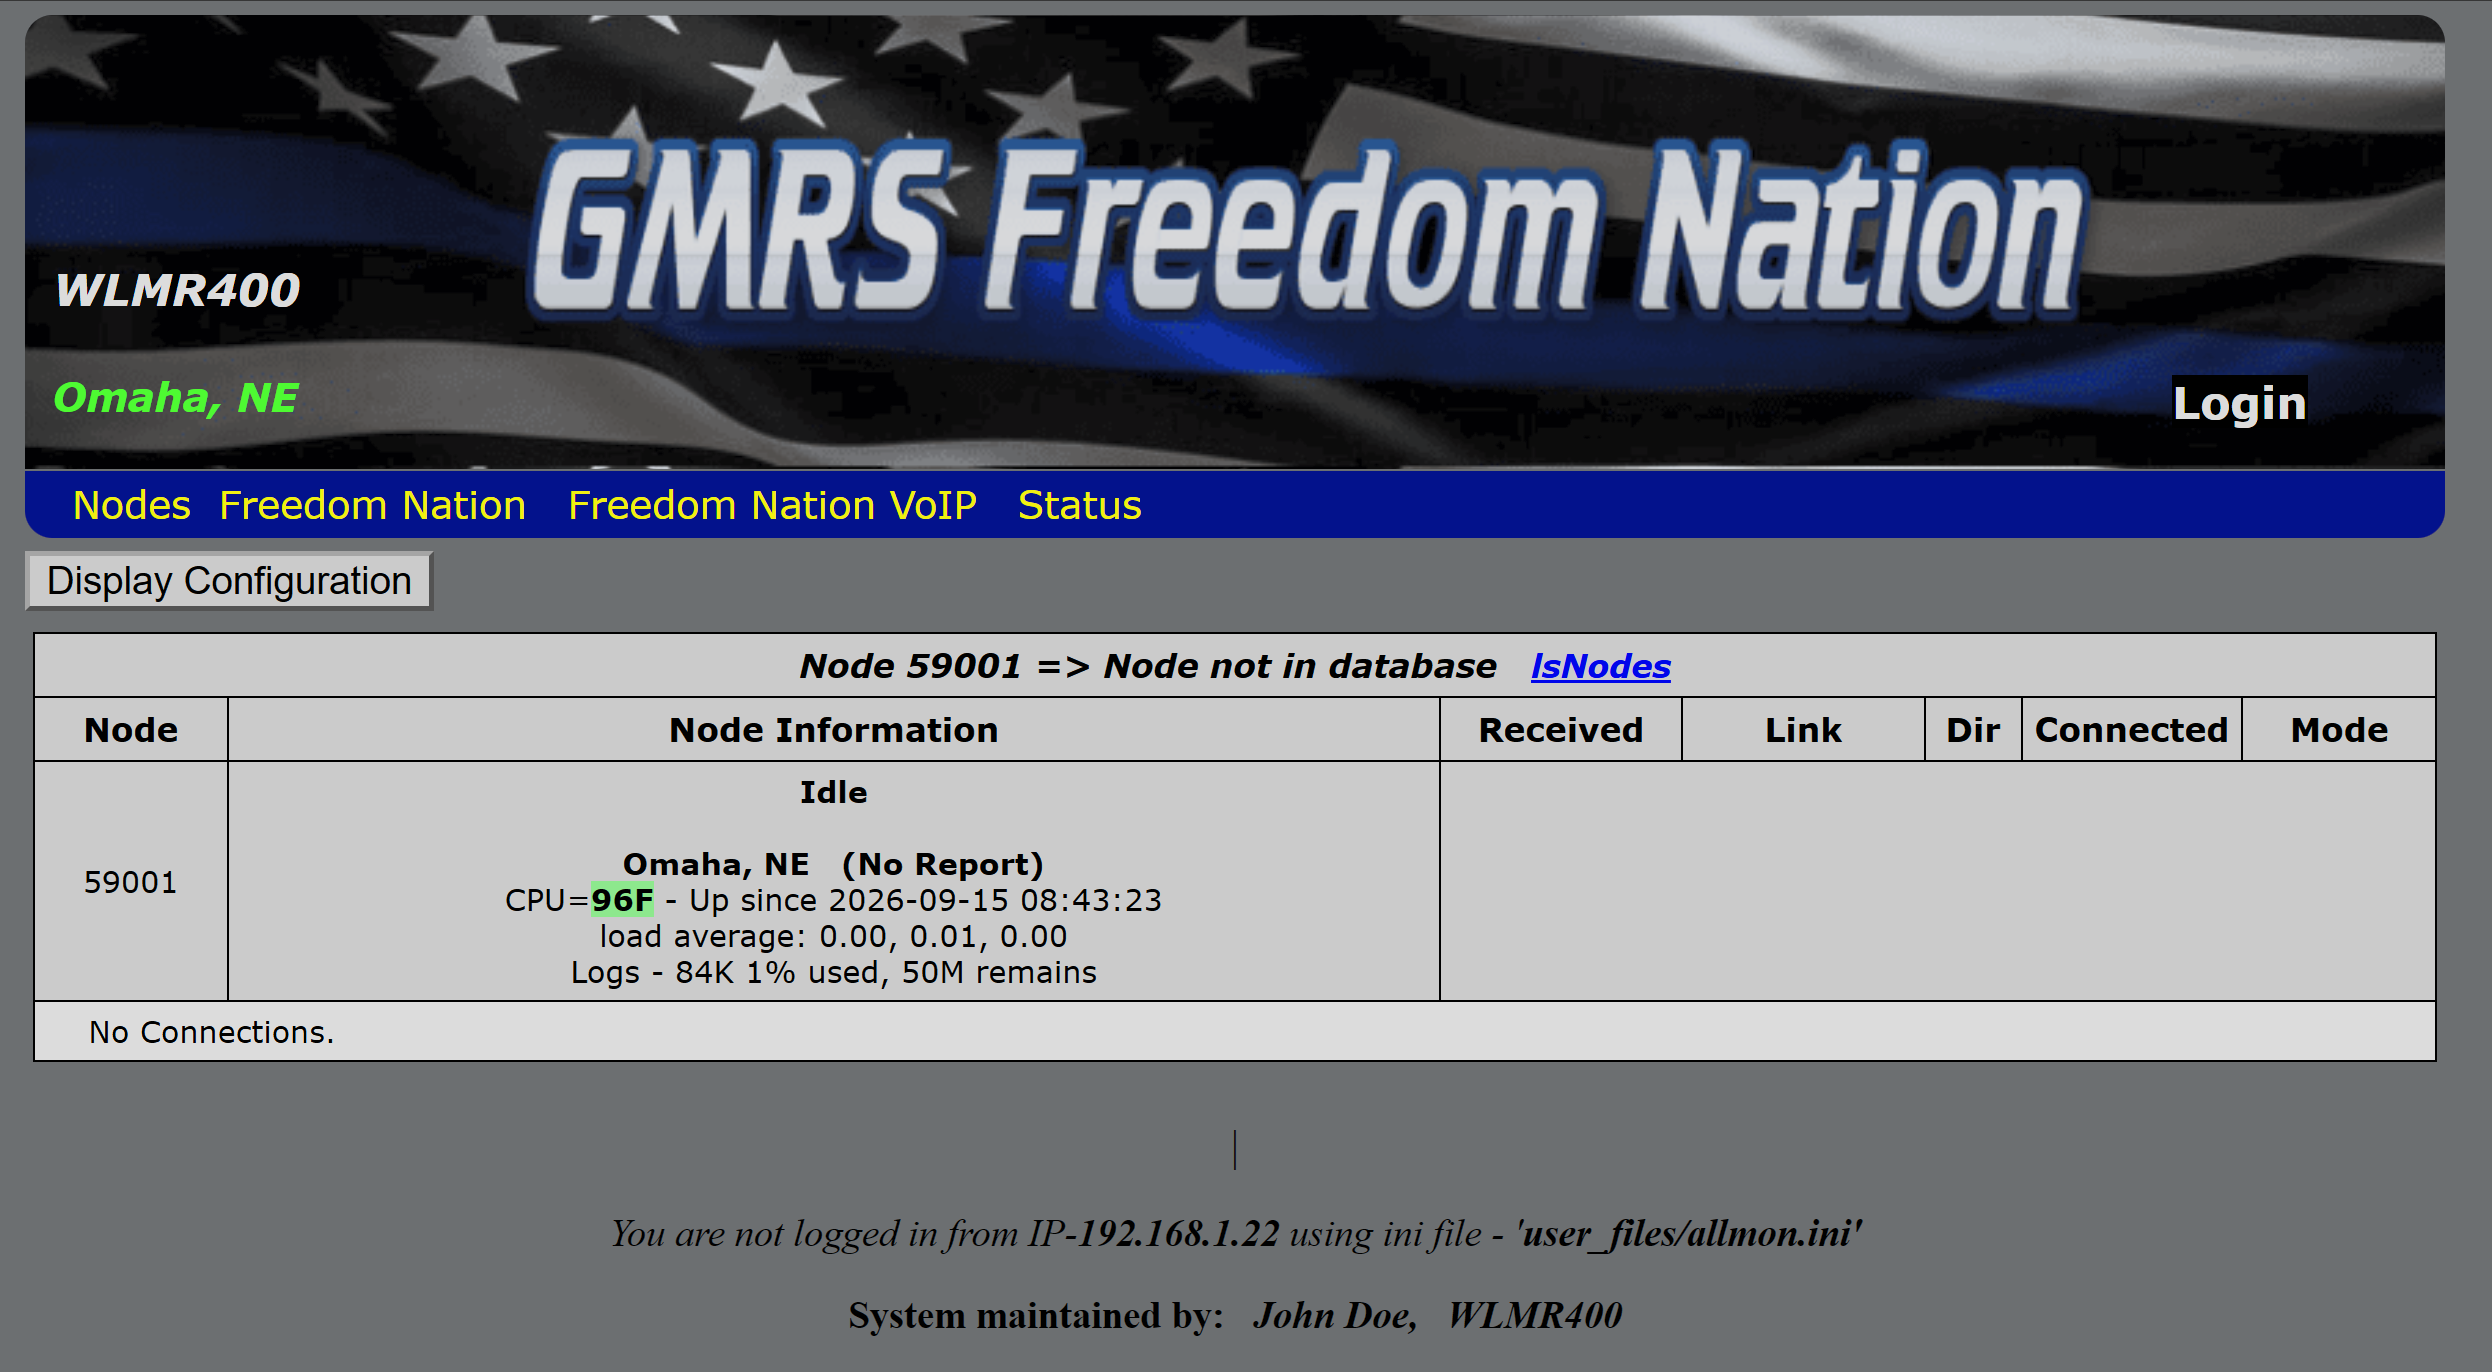
Step 46 - Access Supermon Dashboard
Open a browser and navigate to http://YOUR-IP/supermon2 & log in.
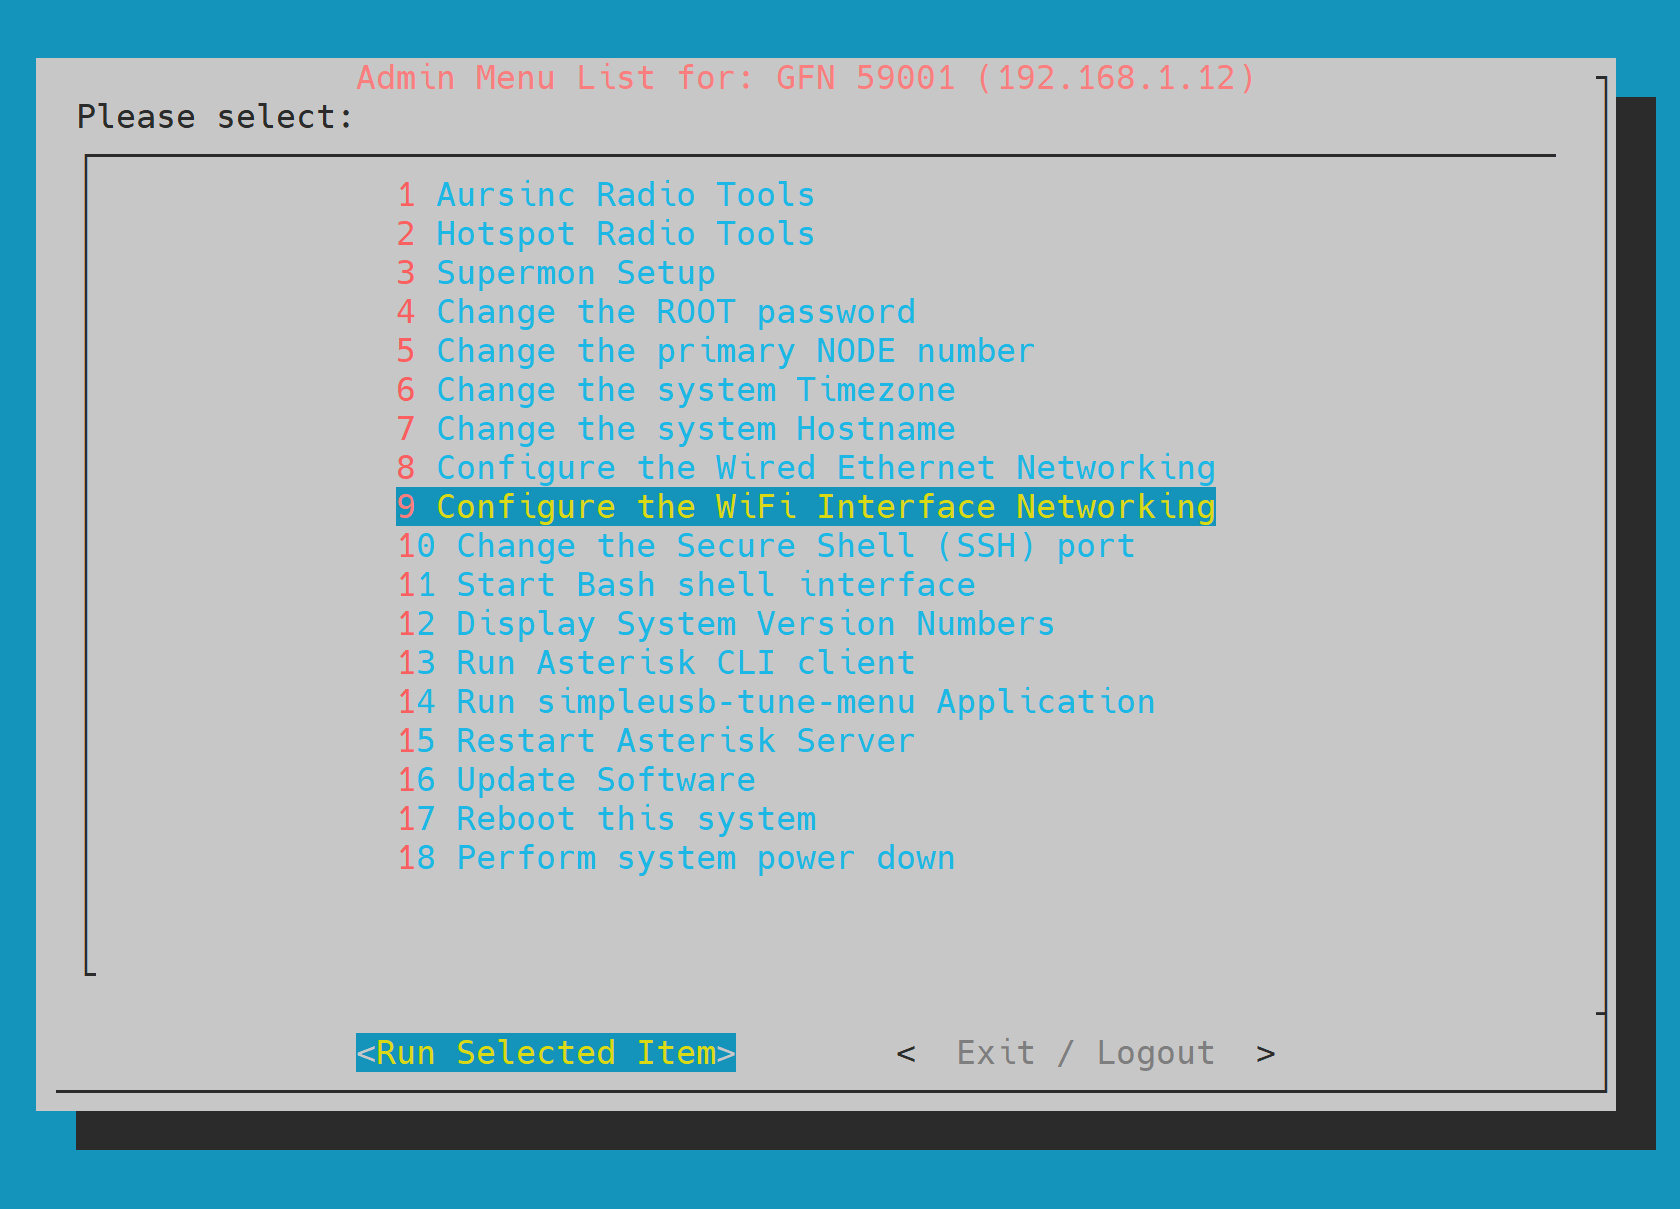
Step 47 - Wi-Fi Setup (Optional)
If staying on Ethernet, skip this section. Otherwise, select "9" then select "Run Selected Item".
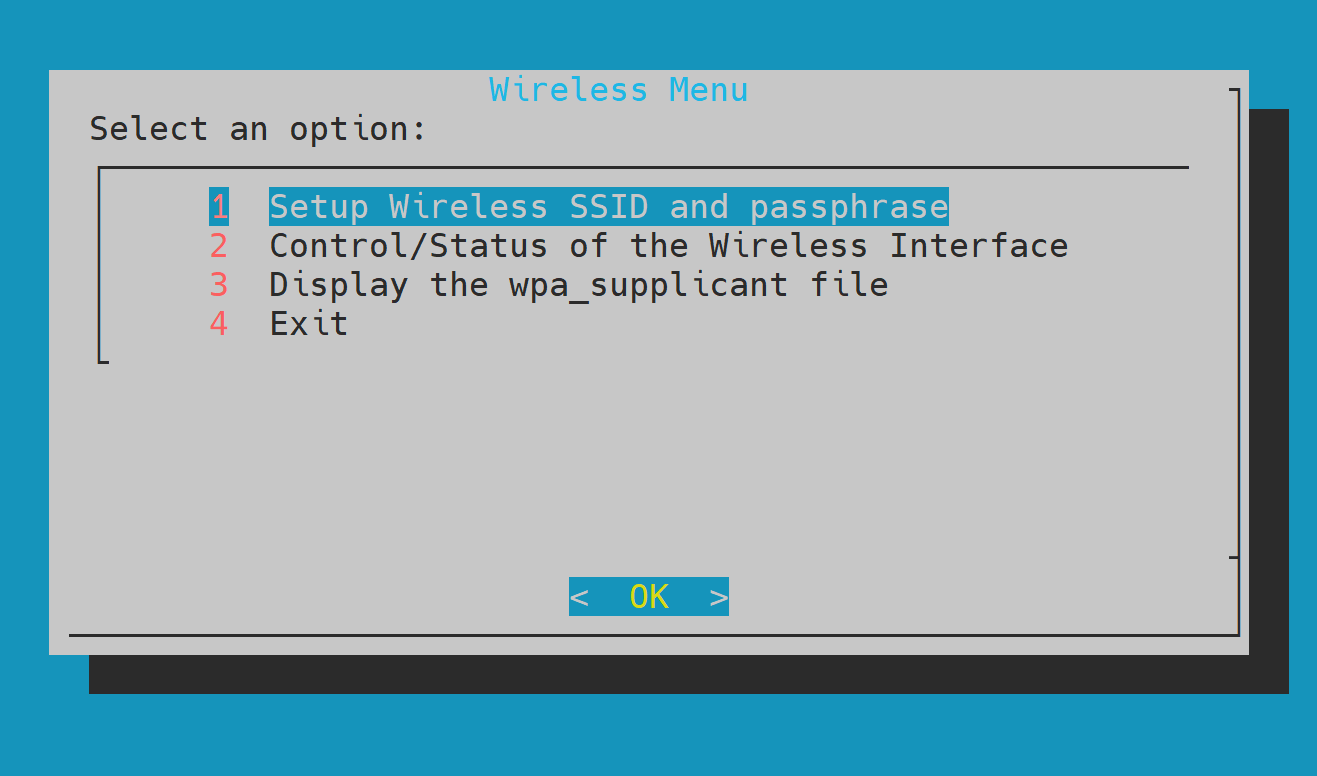
Step 48 - Wireless Menu
Select "1" then select "OK".
Step 49 - Information Prompt
Select "OK" to proceed.
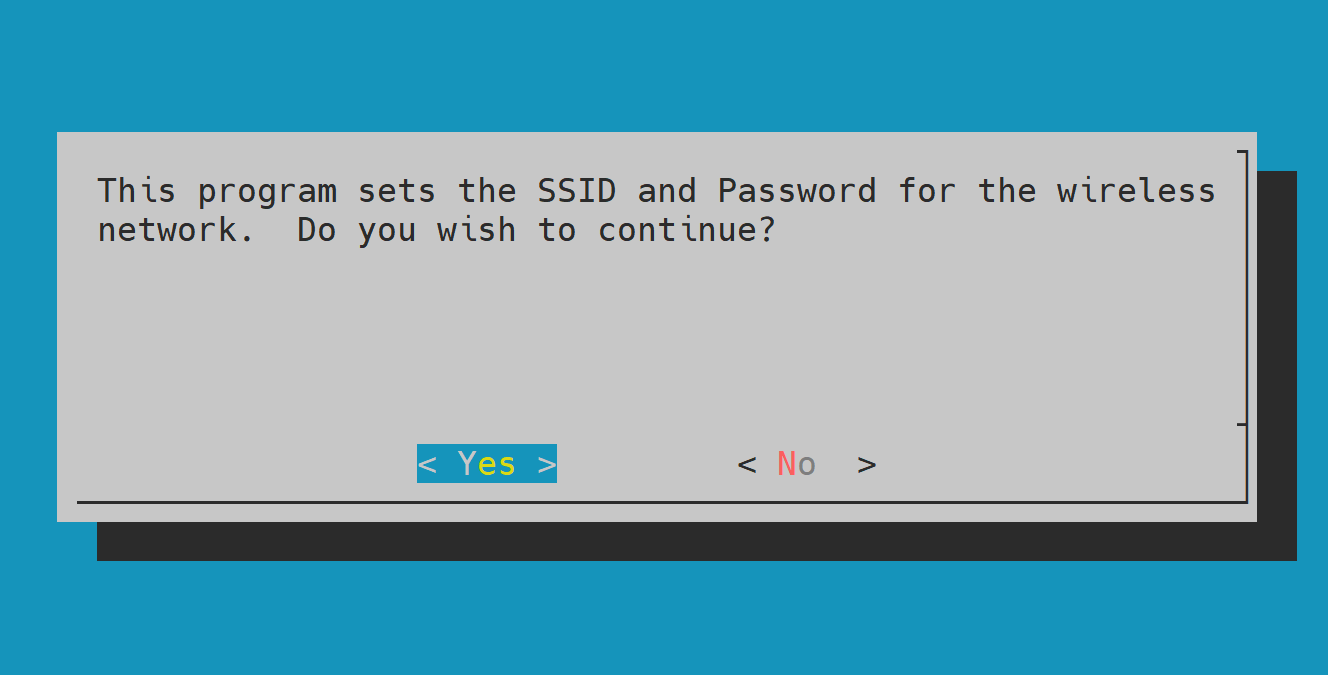
Step 50 - Wi-Fi Entry Method
Choose manual network entry by selecting "Yes".
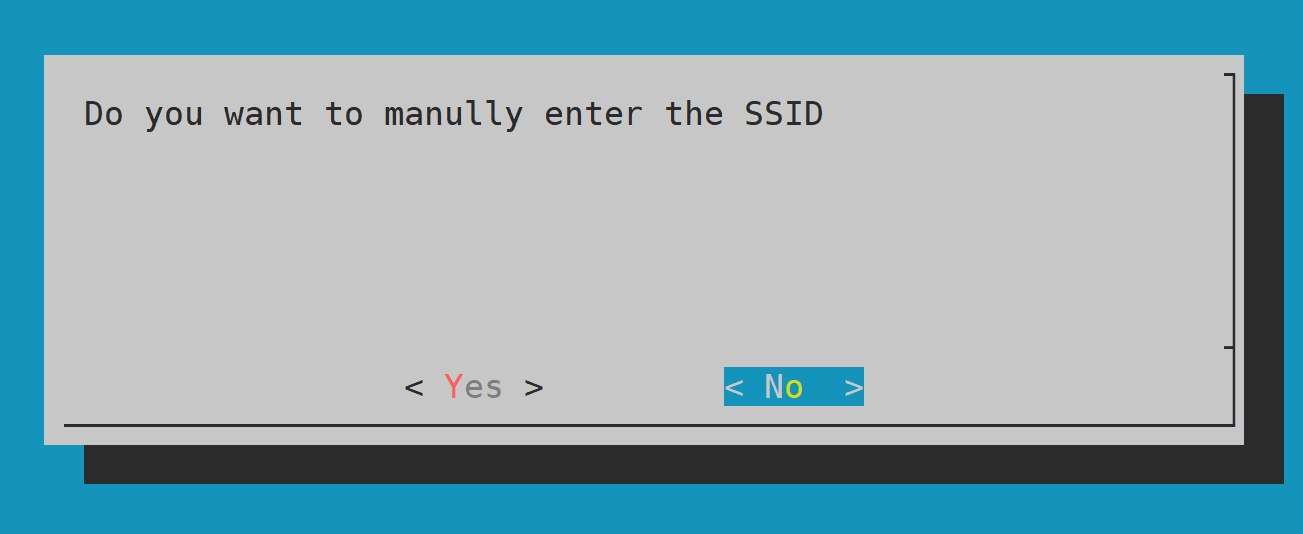
Step 51 - Enter Wi-Fi SSID
Type your Wi-Fi network name (SSID), then click "OK".
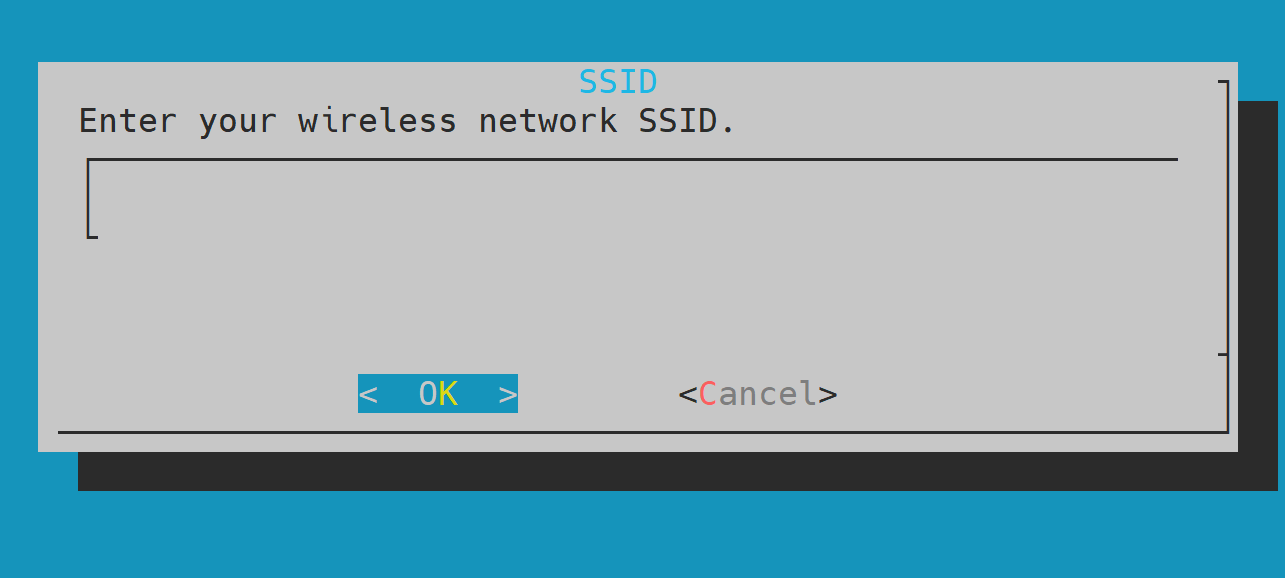
Step 52 - Enter Wi-Fi Password
Type your Wi-Fi password, then select "OK".
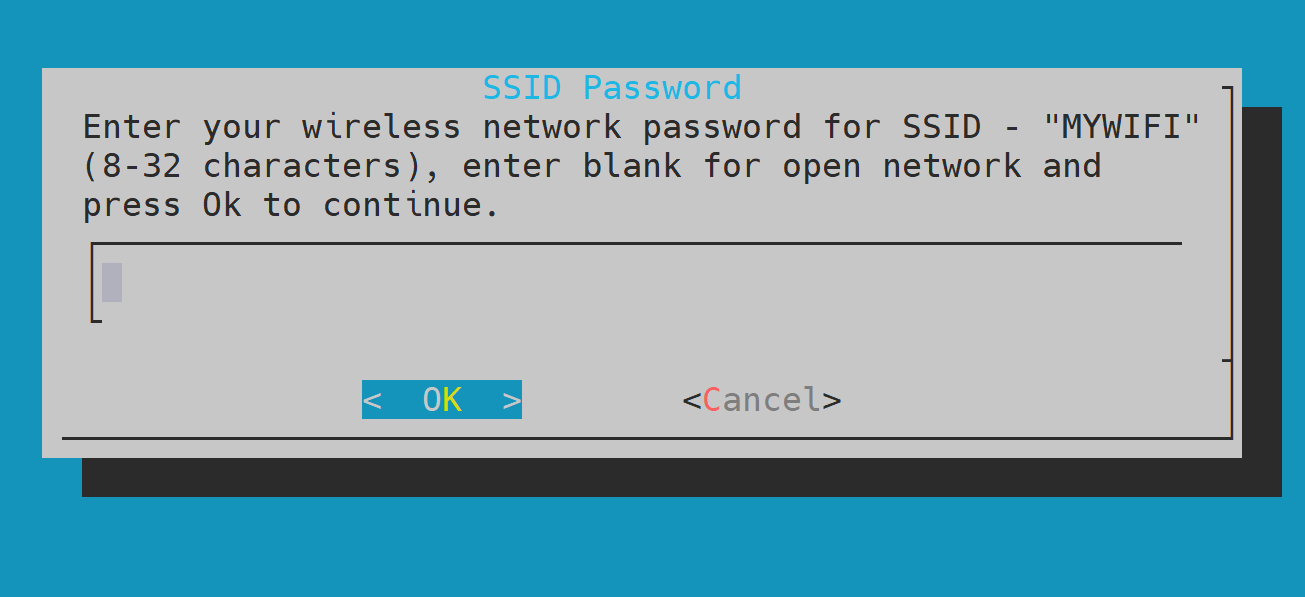
Step 53 - Confirm Settings
Verify your network information and select "Yes".
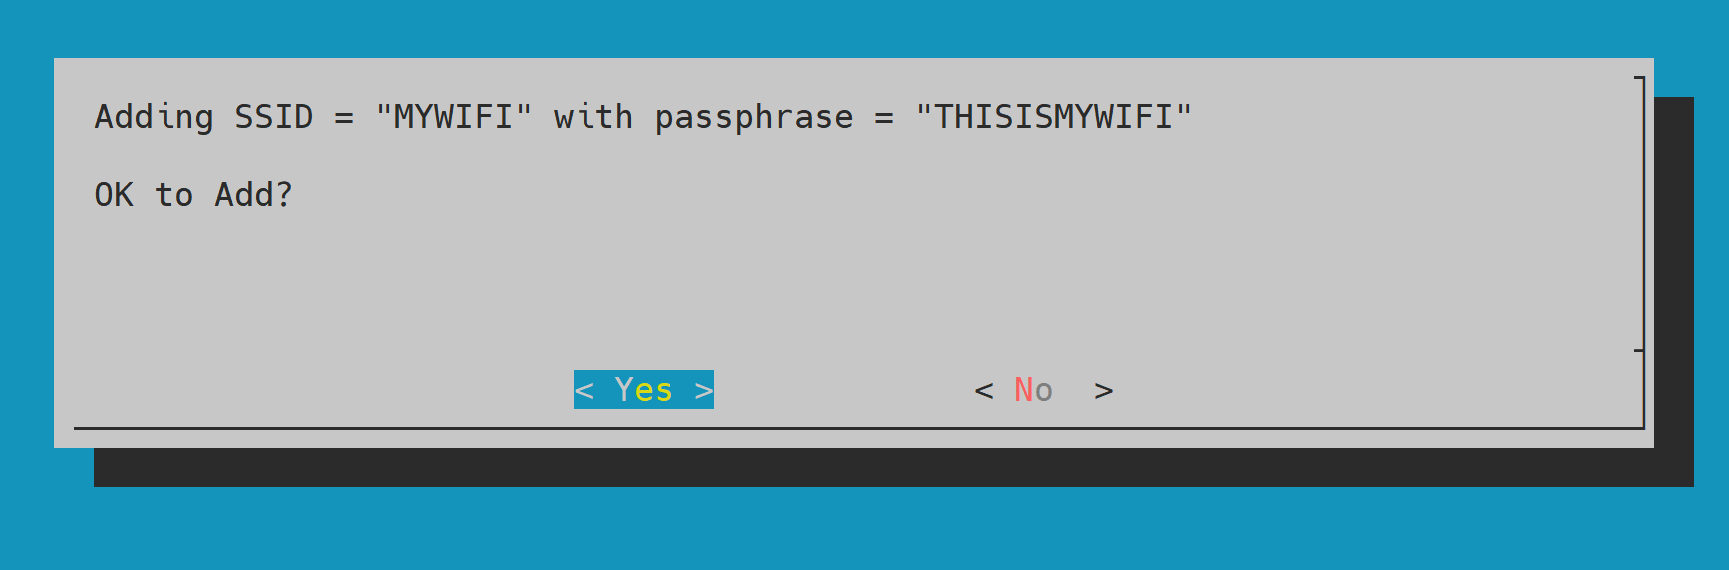
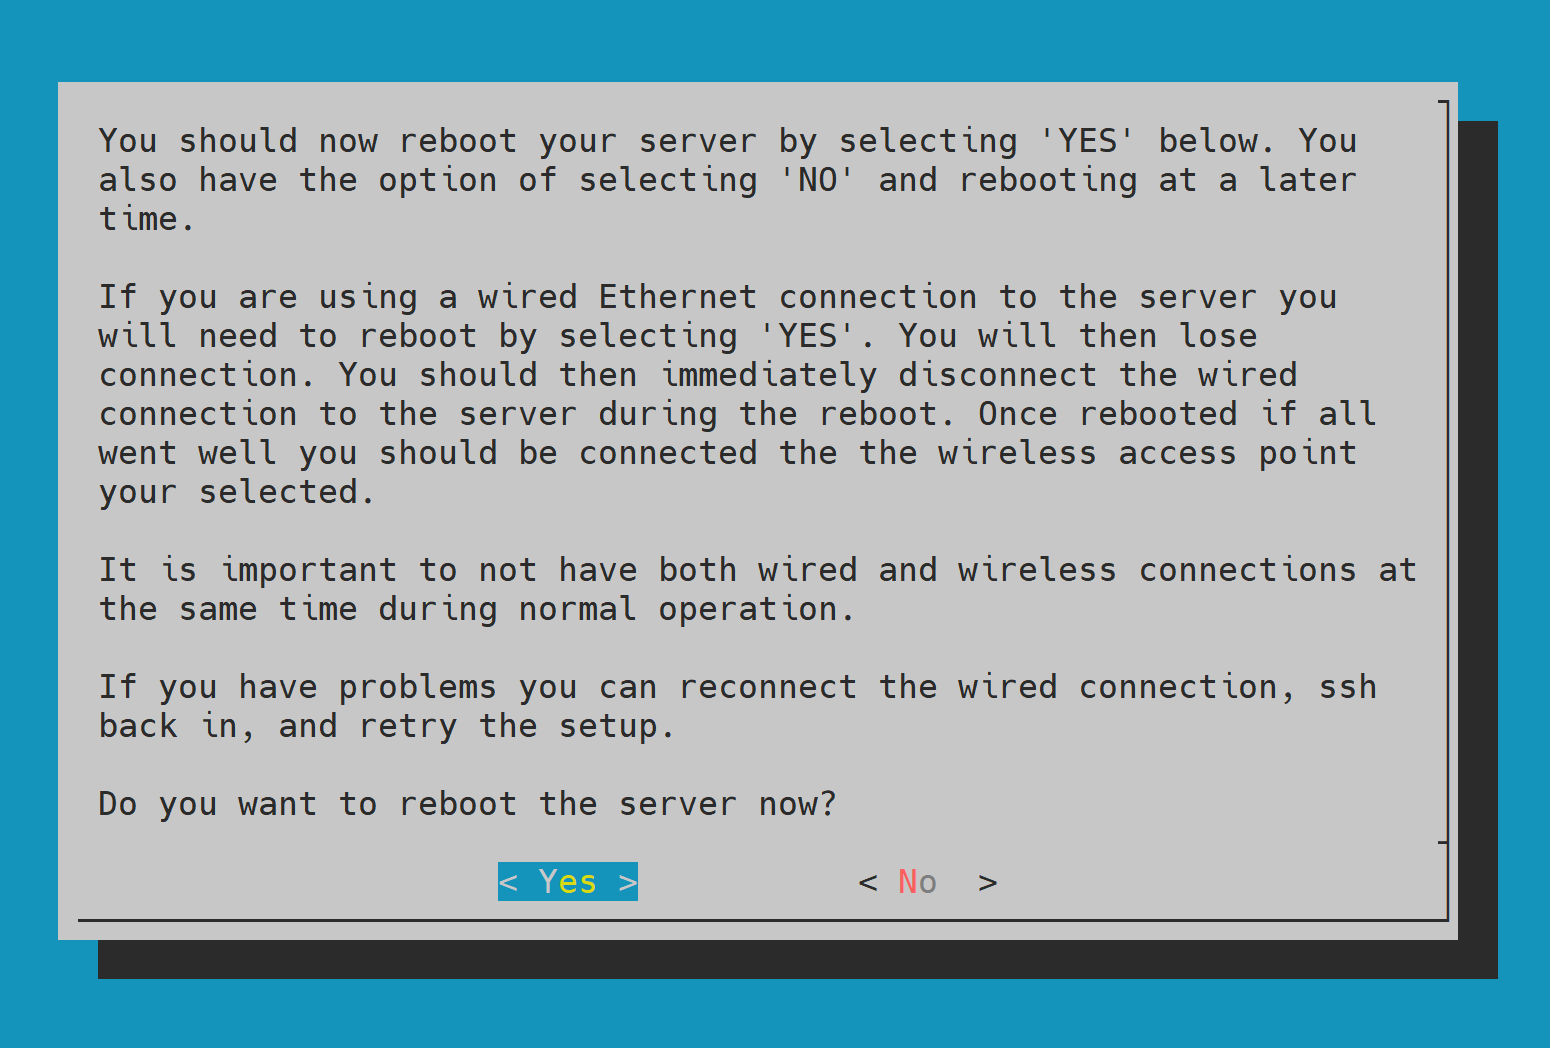
Step 54 - Reboot System
Select "Yes" to reboot the node and complete Wi-Fi setup.
Program the Radio Dongle
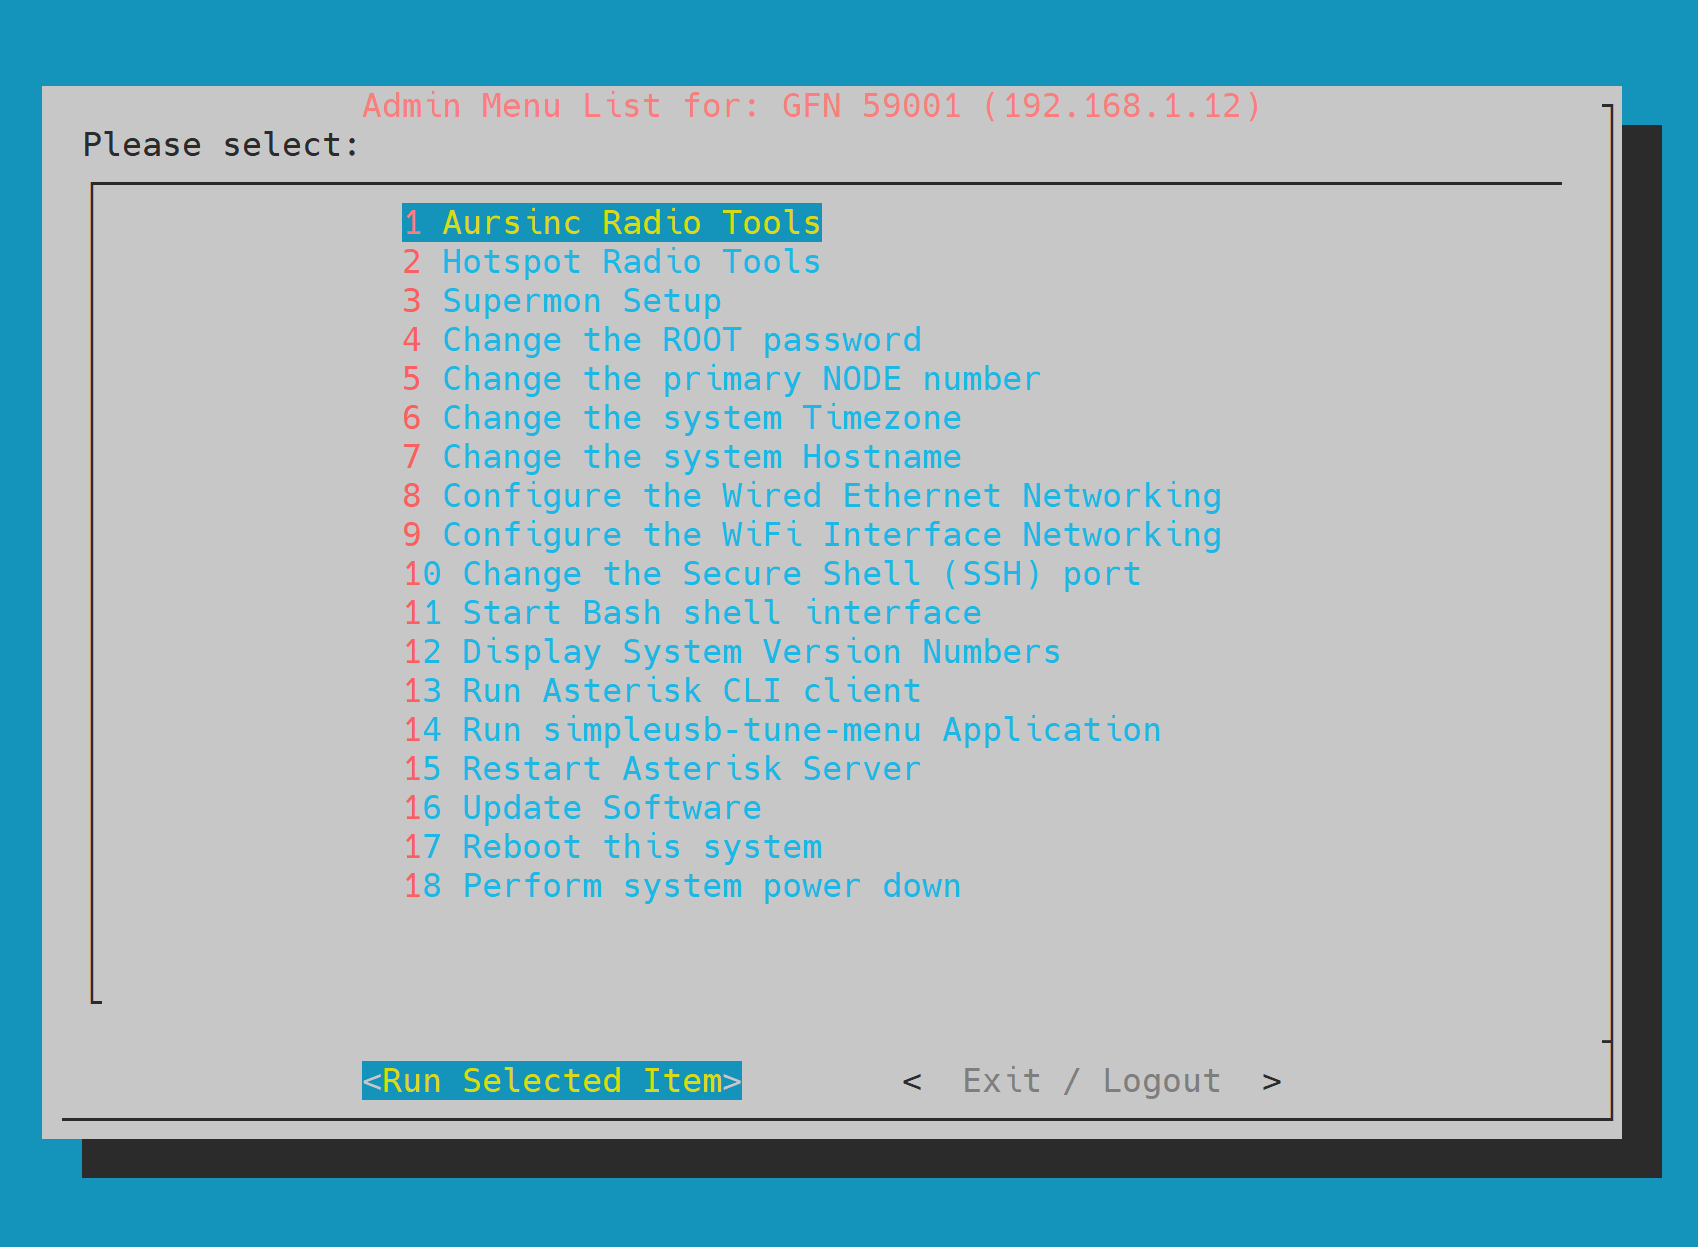
Step 1 - Access Radio Tools
Select "1" "Aursinc Radio Tools" then select "Run Selected Item" (the process is nearly identical for HSR Dongles).
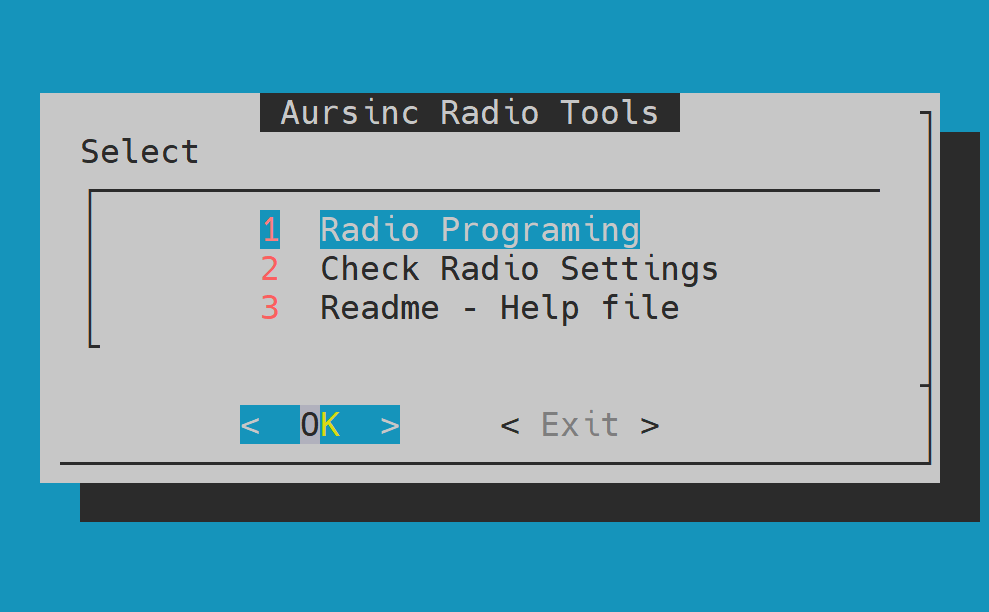
Step 2 - Radio Programming
Select "1" then select "OK".
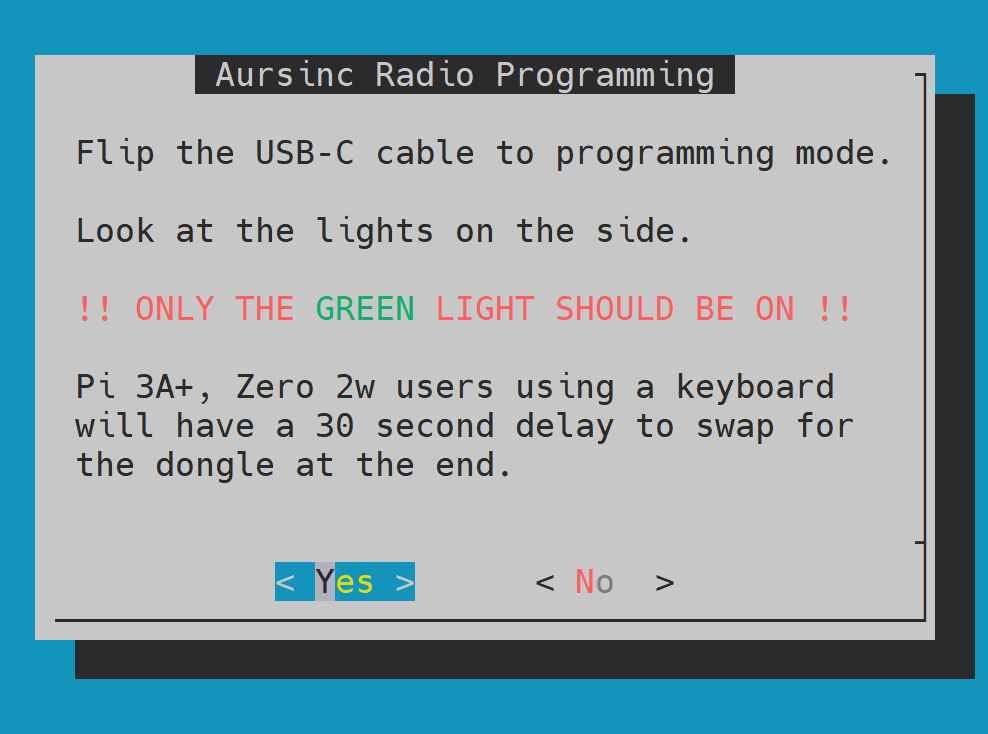
Step 3 - Enable Programming Mode
Follow the prompt to place the dongle in programming mode, then select "Yes".
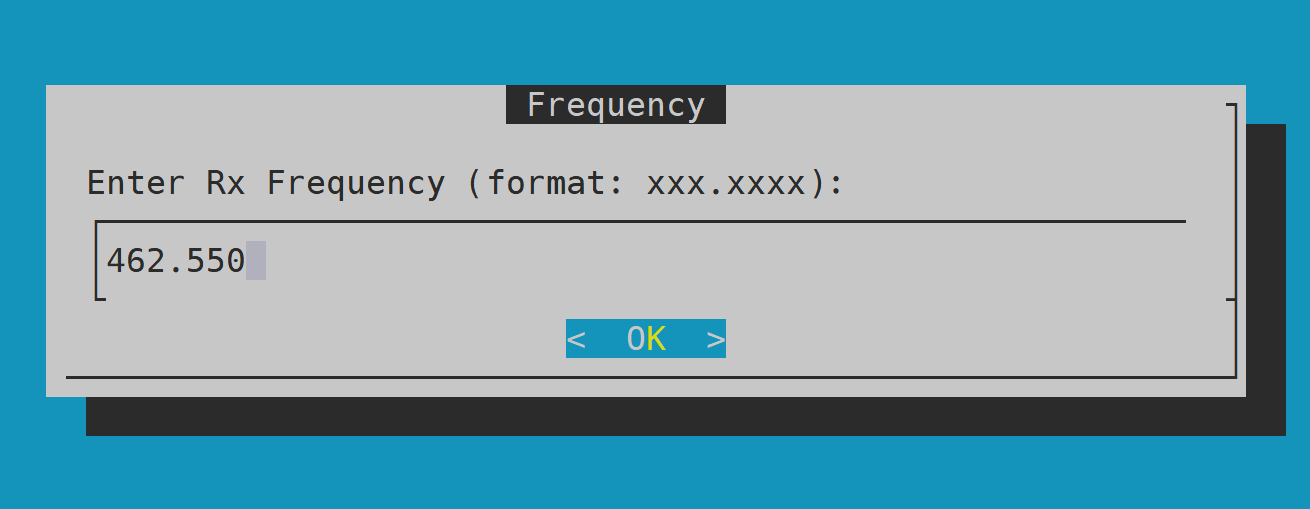
Step 4 - Set Frequency
Enter your desired operating frequency, then select "OK".
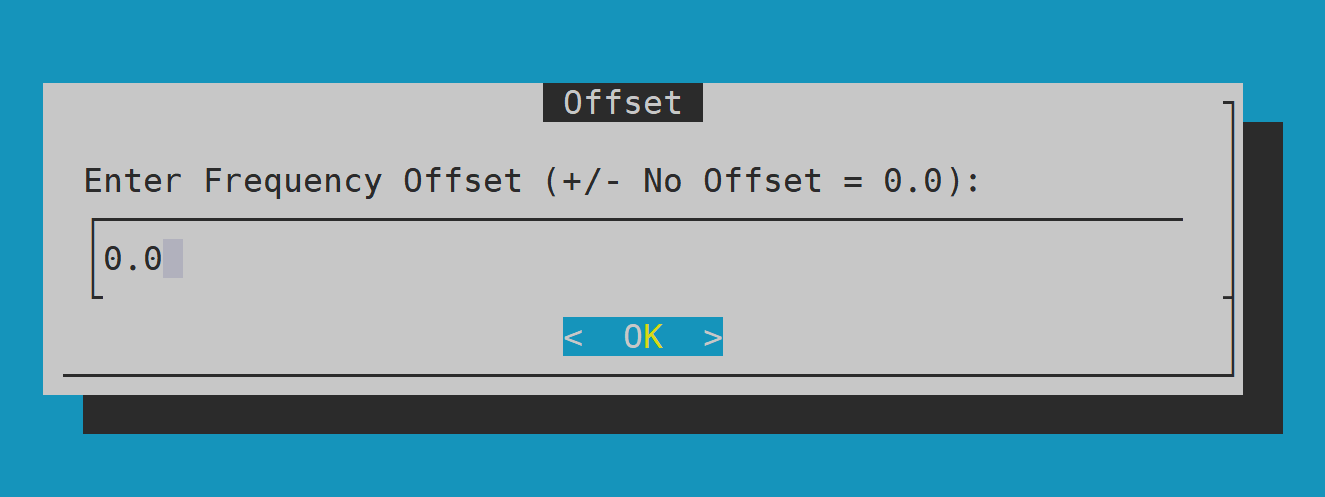
Step 5 - Set Offset
For Simplex operation, leave the offset value at 0.0 and select "OK".
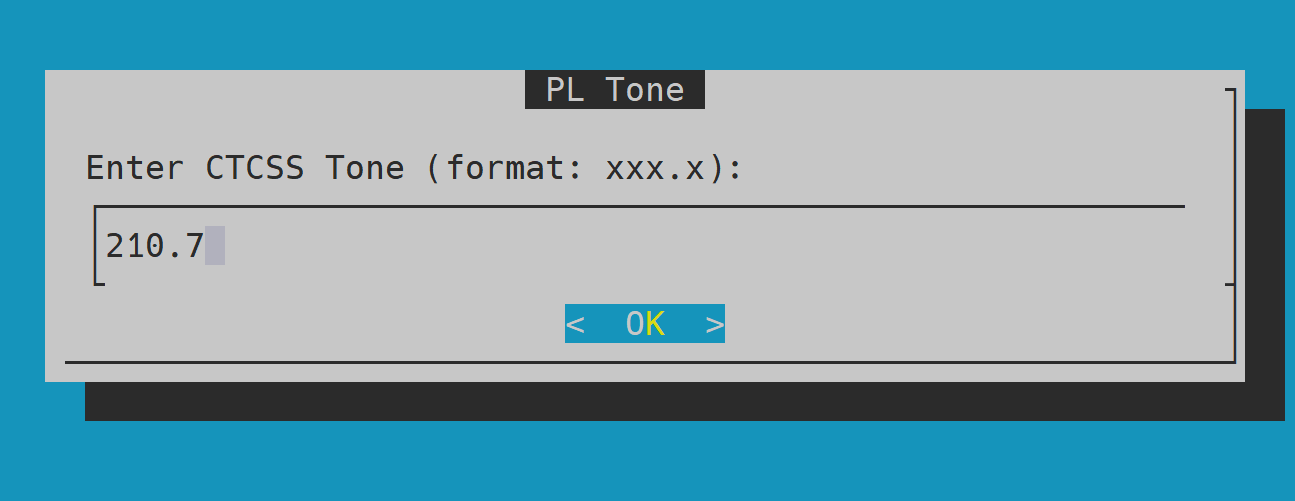
Step 6 - CTCSS Tone
Enter your target CTCSS tone and select "OK" (Tip: Avoid setting tones of 88.5 or below).
Step 7 - Squelch Level
Set your squelch level (default is 4), then select "OK".
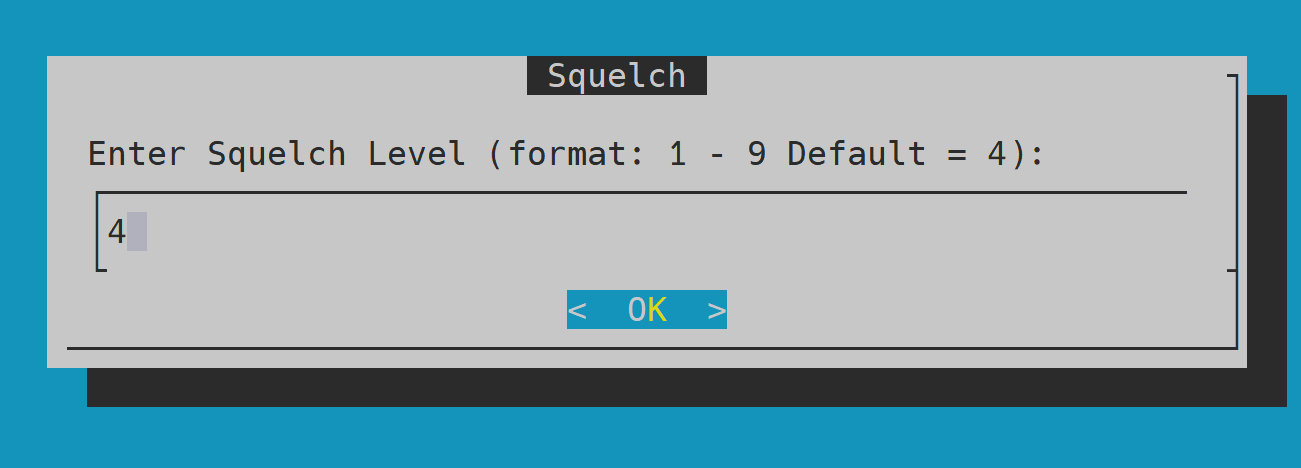
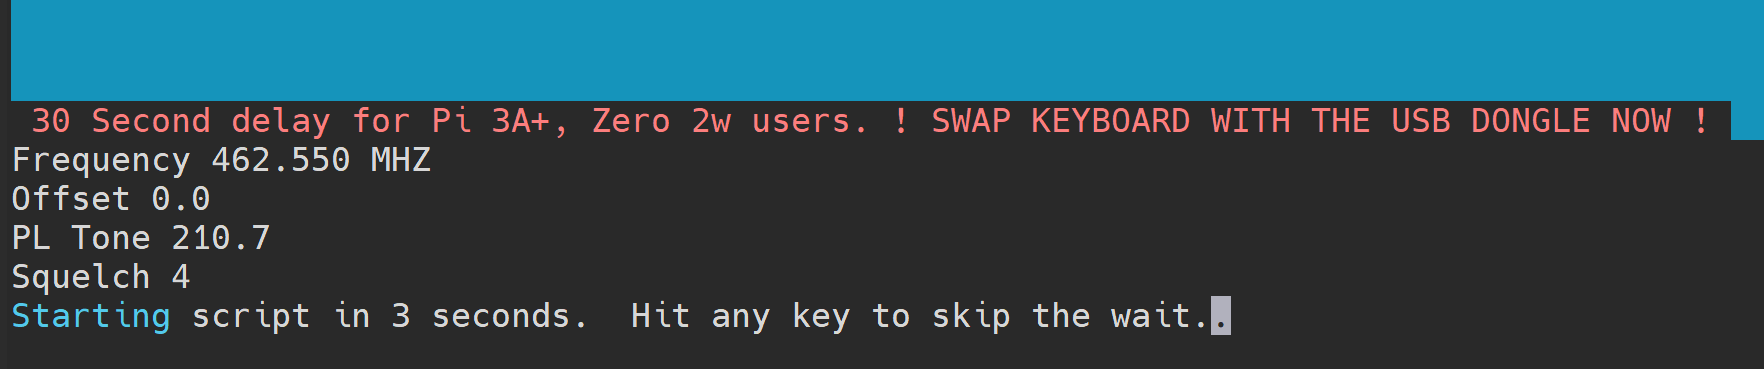
Step 8 - Complete Programming
Press Enter to bypass the timer. Once returned to the main screen, flip the USB-C cable connector and key your radio to confirm a confirmation tone ("BONK").
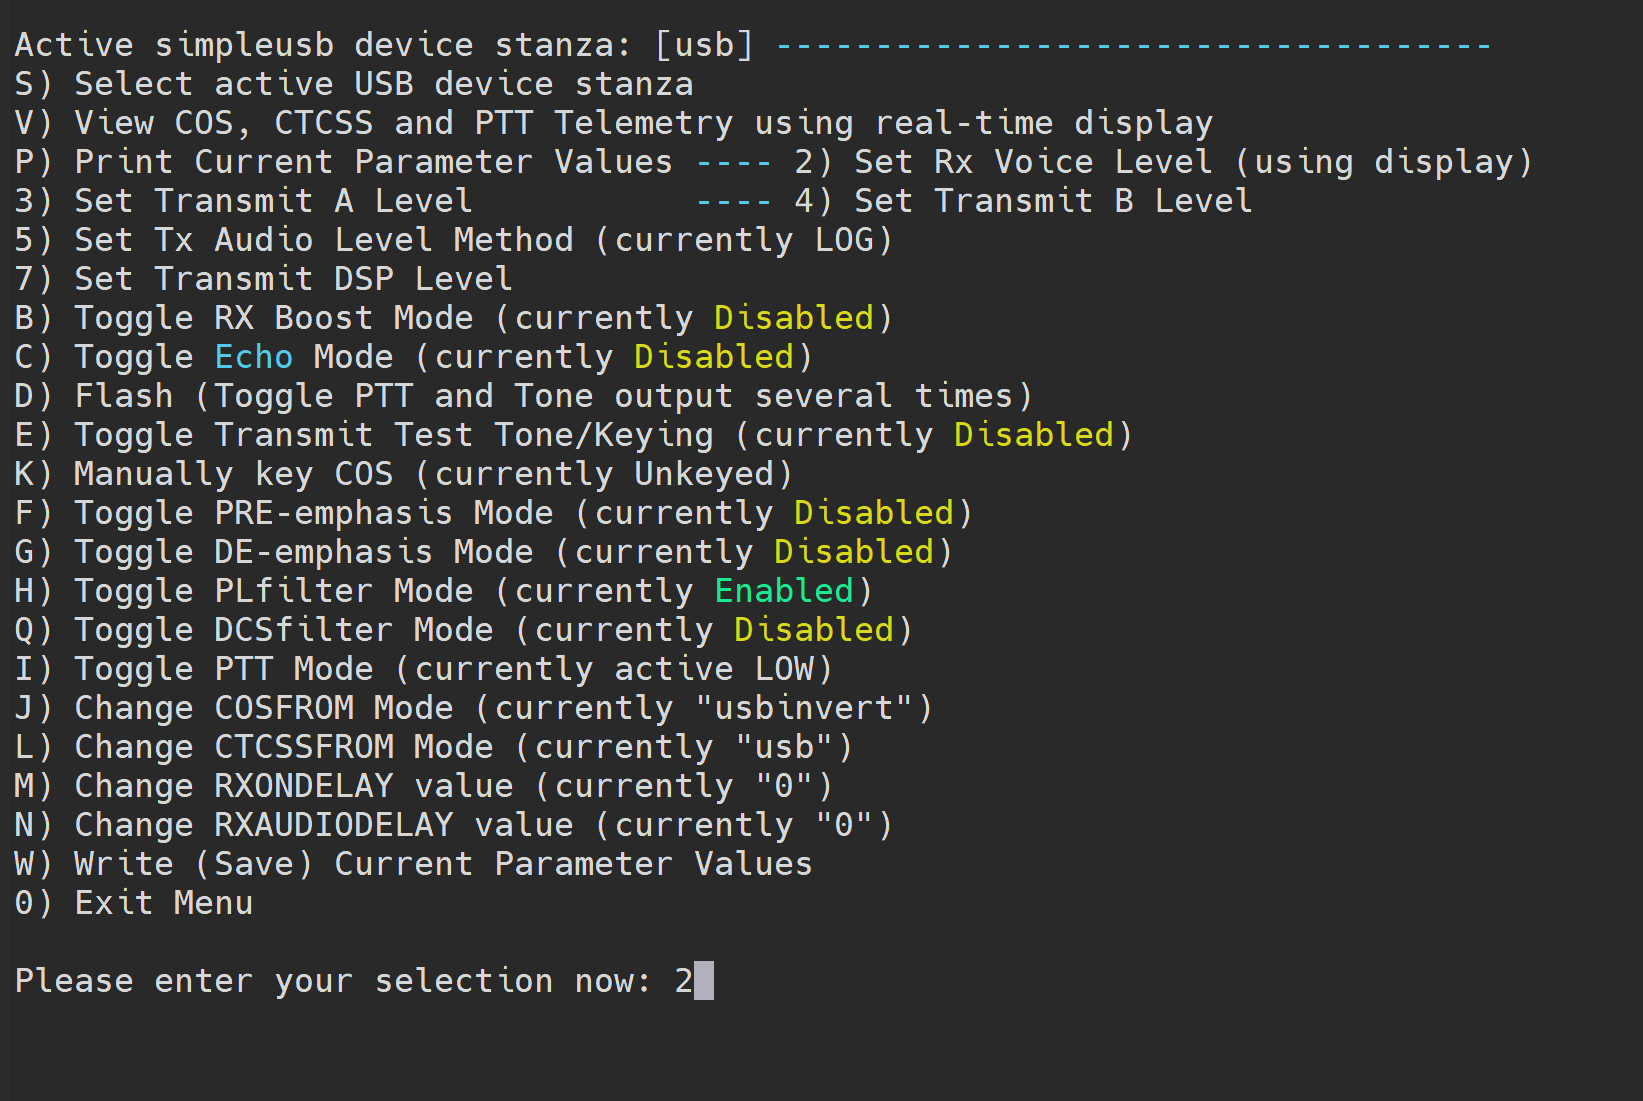
Step 9 - Set Audio Level
Open the SimpleUSB Tune menu, enter "2", and press Enter.
Step 10 - Check On-Screen Meter
Key your radio and speak into the microphone. Aim for standard deviation near 5 kHz without excessive peaking.
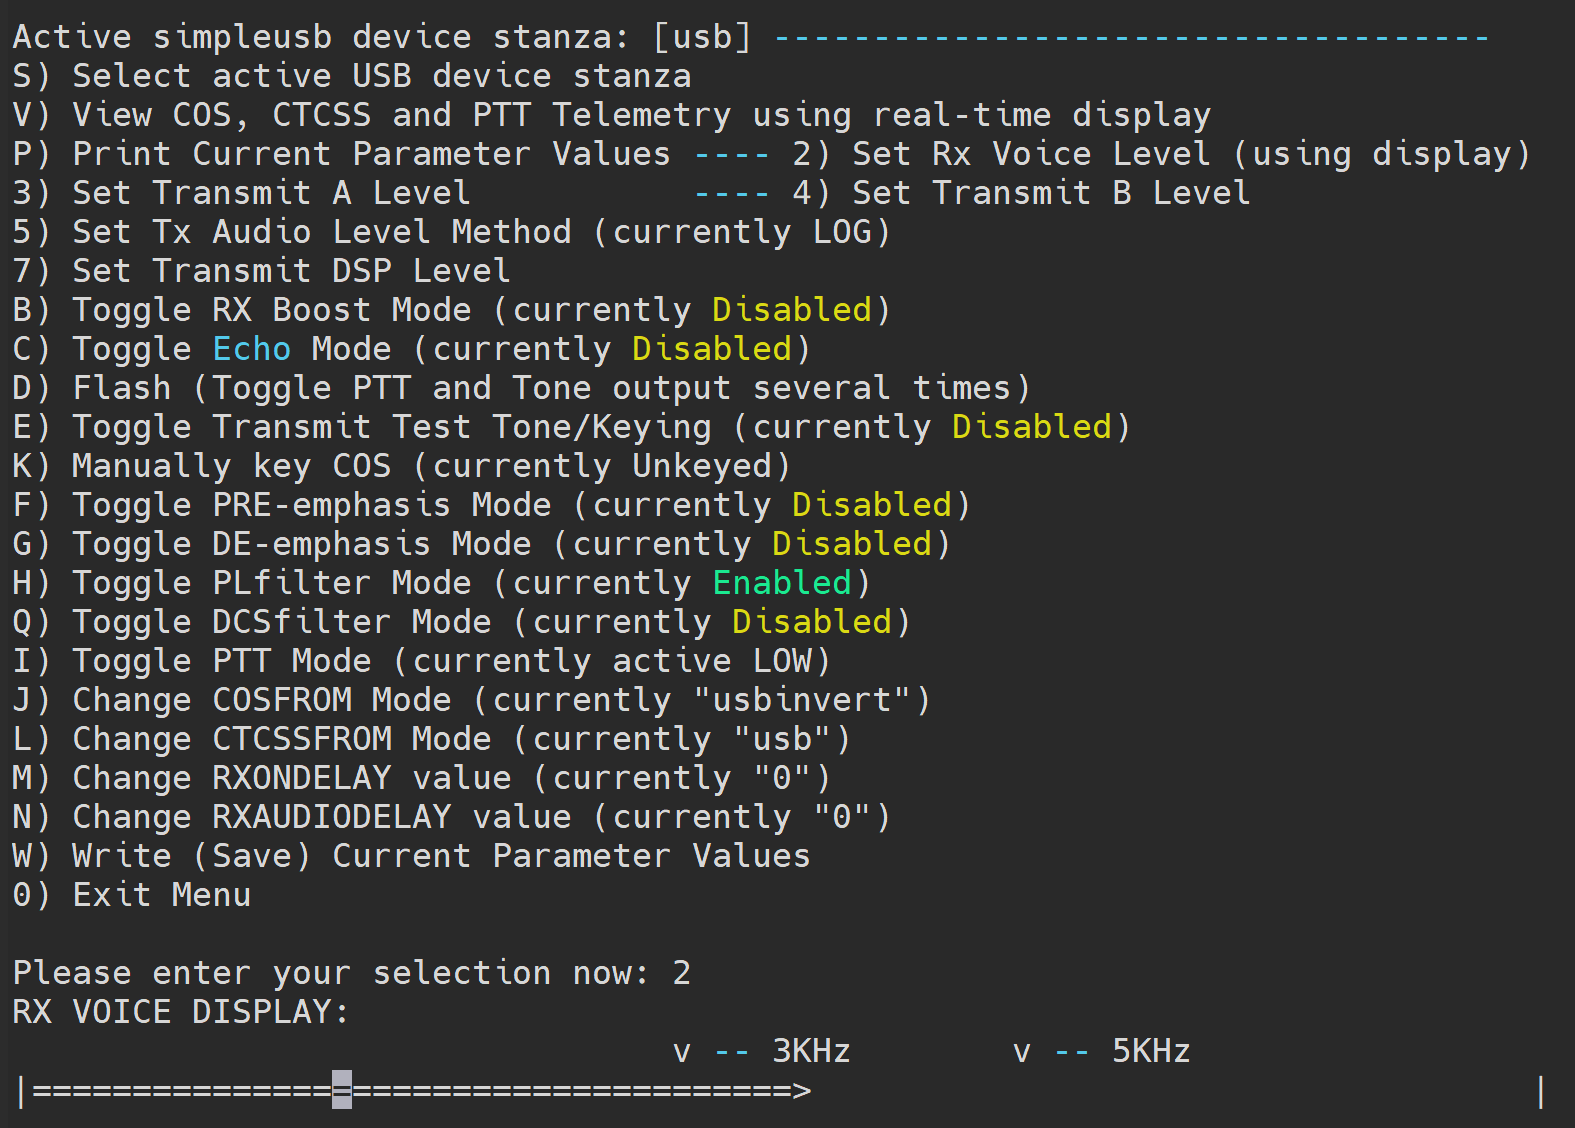
Step 11 - Adjust Gain Settings
Press Enter to input a new gain value. Raise the value if audio is low, or lower the value if high.
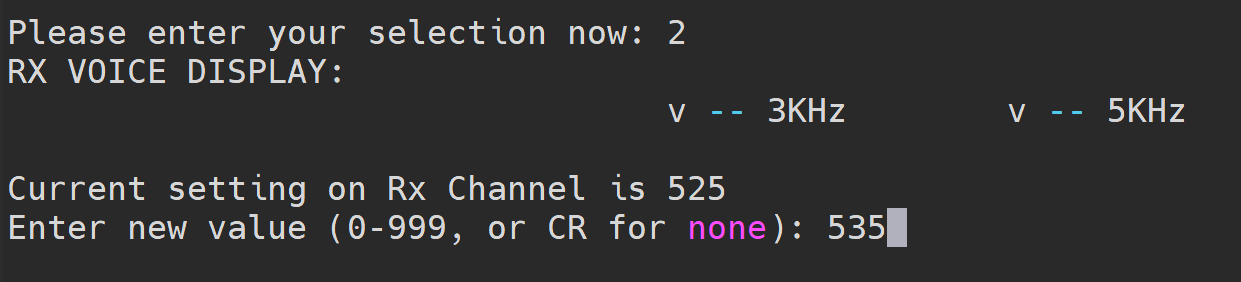
Step 12 - Save Levels
Press Enter once levels are set, then press Enter again on the value prompt to return to the main menu.
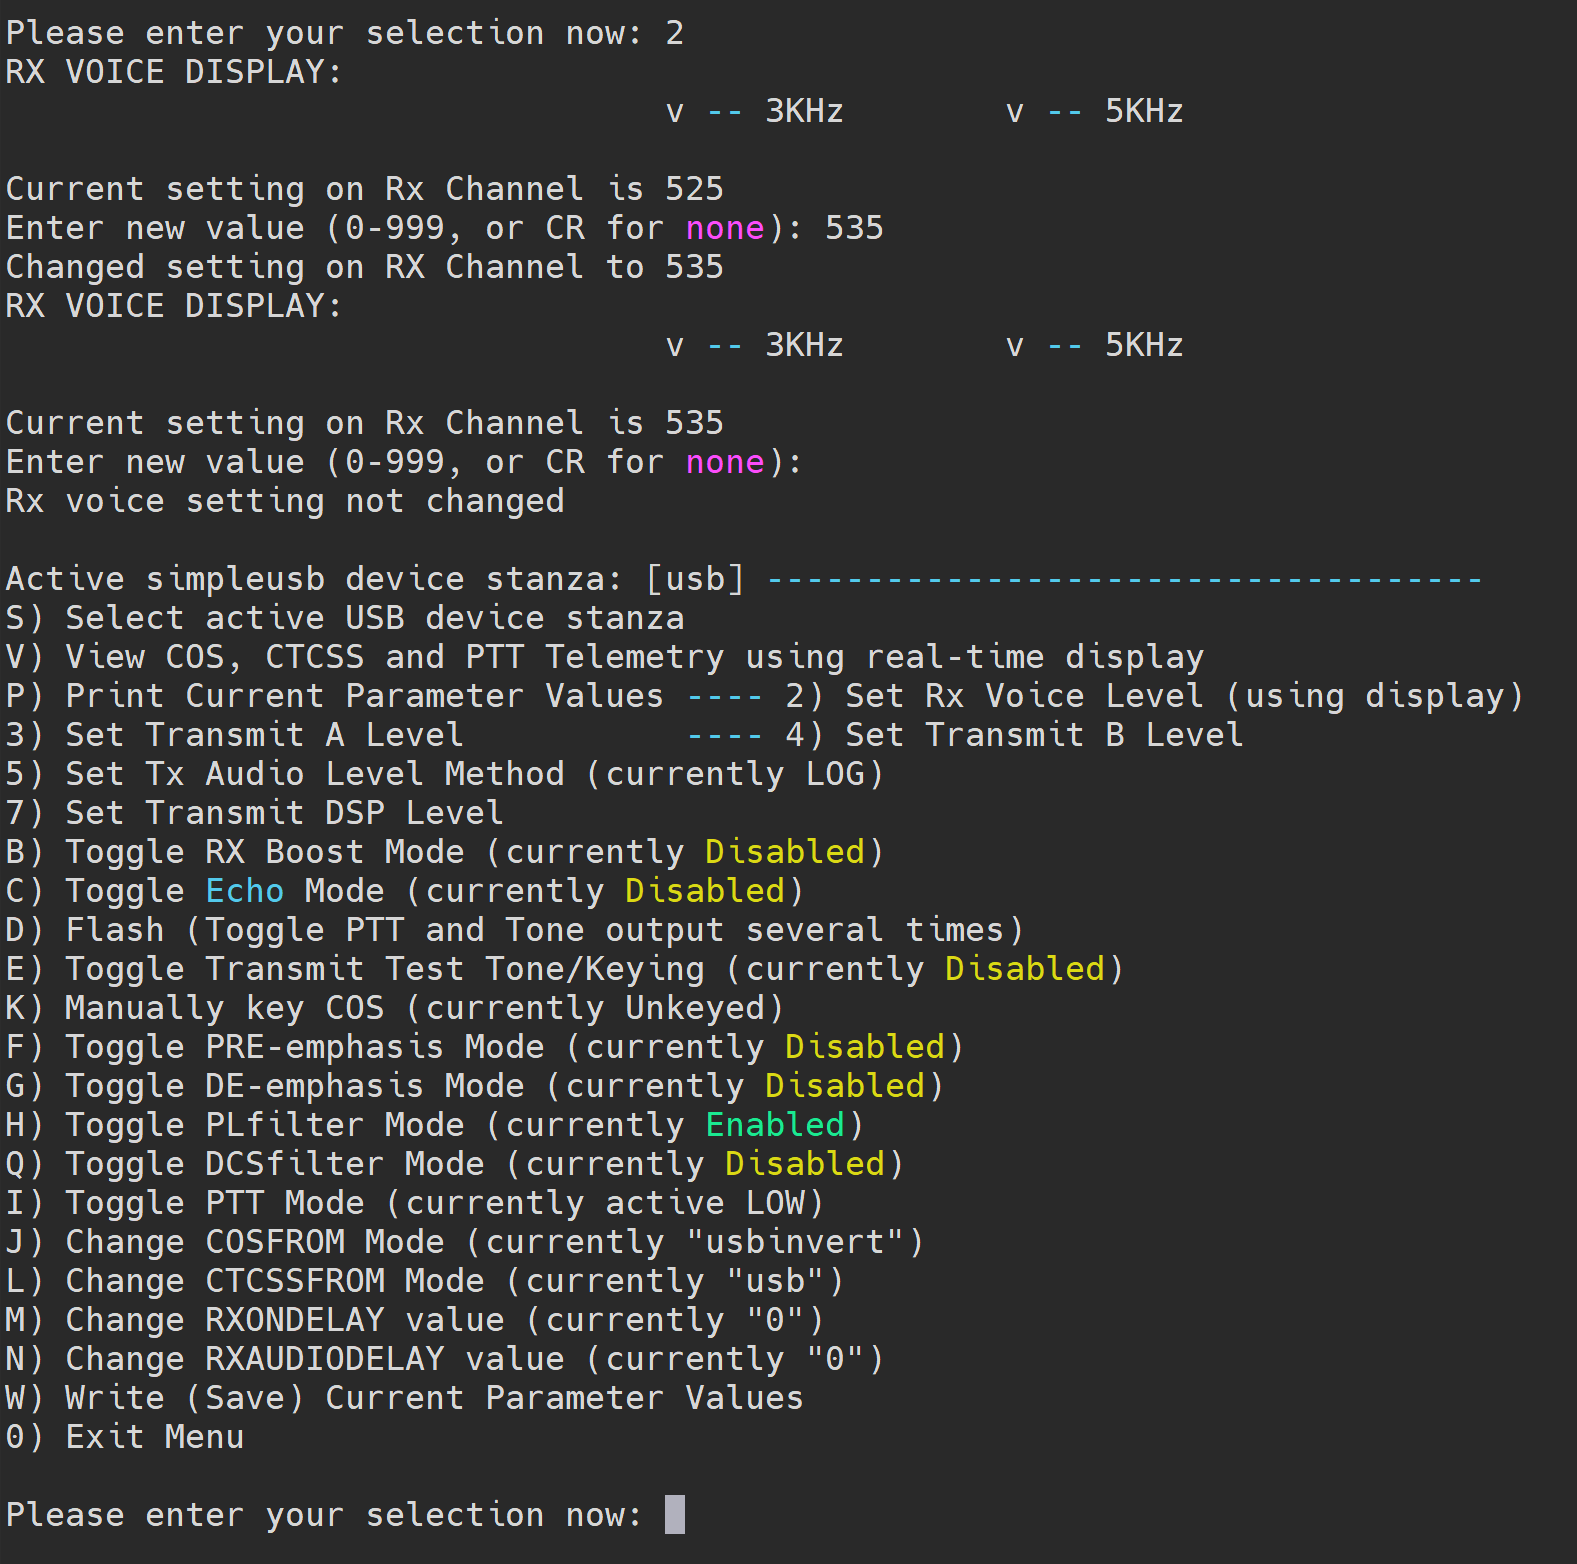
Step 13 - Save and Exit
Type "w" and press Enter to save changes, then type "0" and press Enter to exit.
Step 14 - Network Audio Check
Connect to the network and request an audio level check from an admin.